If your key outputs 2-3 identical characters with one press, these things should help.
Try raising your debounce delay
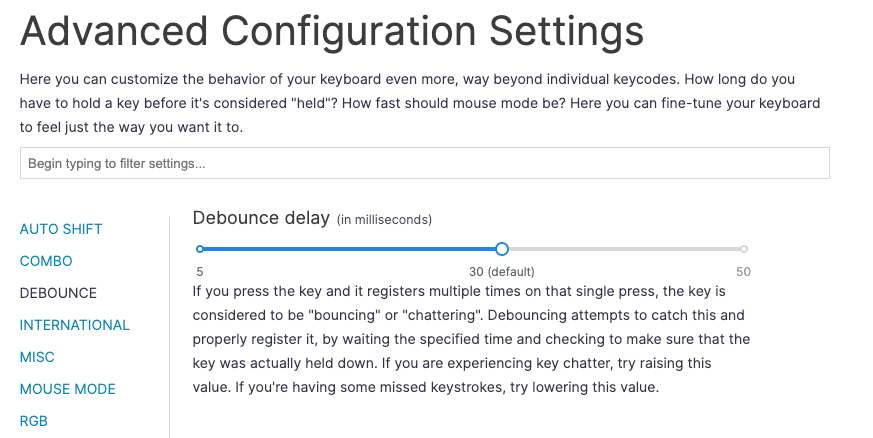
All keyboards in Oryx allow you to modify a setting called "Debounce delay". Debounce adds a very short delay in firmware before the press of a switch is actually registered.
Some amount of debounce is almost always necessary: mechanical switches, like many mechanisms, tend not to act identically across the millions of units out there. There will naturally be some variance, and some switches will "bounce" or "chatter" very slightly right out of the box. Adding a little bit of debounce normalizes these tiny variations among switches so you rarely end up with noticeable chatter right away.
However, over time, mechanical systems will wear down. Think of the brake pads of a bike or the hinges of a door. These systems require inspections and maintenance to make sure they continue to work well. Mechanical switches are no different, and are actually even more susceptible because they are so small and the margin for error is tiny.
So, should you do maintenance on a switch? Well, you can, but this can get pretty complicated for what is ultimately a very small and cheap part, so it's not something we usually recommend. Debounce, however, offers a unique way to mitigate aging switches easily and with minimal impact on the typing experience.
Try raising the value of your debounce delay setting by 20ms. For some boards, this will be all the way to the top, and for others, it will be high but not quite the maximum. The idea is not to stay at this value, but just to test your board with a dramatic increase. If raising your debounce fixes your issue, then you can adjust it down and test again until you find a smaller value where the issue is still fixed.
To be clear, there is no disadvantage to staying at a high debounce value if you don't mind it. The only reason you would not want to do this is if it starts to bother you. Even high debounce values are very short overall, but they may start to be perceptible to some people. If you notice the debounce value after typing for an hour or so, try lowering it a little bit at a time. Many chattering switch issues are fixed by raising debounce by roughly 8-10ms, but every case is different.
Replace the switch
Warning: Check your ErgoDox EZ batch. If you have an ErgoDox EZ that was made before 2018, it will not have hotswap sockets, so this procedure will be more complicated (see "Replacing a soldered switch"). You can confirm whether your board has hotswap sockets by checking the sticker on the back and making sure it is from "Batch 5" or later.
If what you tried hasn't worked so far, it's a good idea to try replacing the switch. The best way to do this is to take a different switch from elsewhere on your board that you know works, and then swap that switch for the one that's not working.
Does the same spot still not work or does the problem follow the switch?
If the problem remains in the same spot, you probably have an issue with the switch's socket instead.
Replacing a soldered switch
Note: This is for ErgoDox EZ keyboards bought before 2018 only. All newer boards from us have hotswap sockets and do not need this procedure. Attempting this with a board with hotswap sockets will both not work and likely ruin the board.
Desoldering a switch
If you have an older ErgoDox EZ, you'll need to desolder and resolder switches. This is a bit more tedious than changing a hotswappable switch, but not difficult. Some slightly more specialized tools make this much easier: a solder sucker and/or solder wick.
I don't have an old ErgoDox EZ on hand, so I'll be using a different board with soldered switches. It was actually my very first soldering project. The soldering isn't perfect, but it works, so you too can dive into soldering with a keyboard PCB. :)
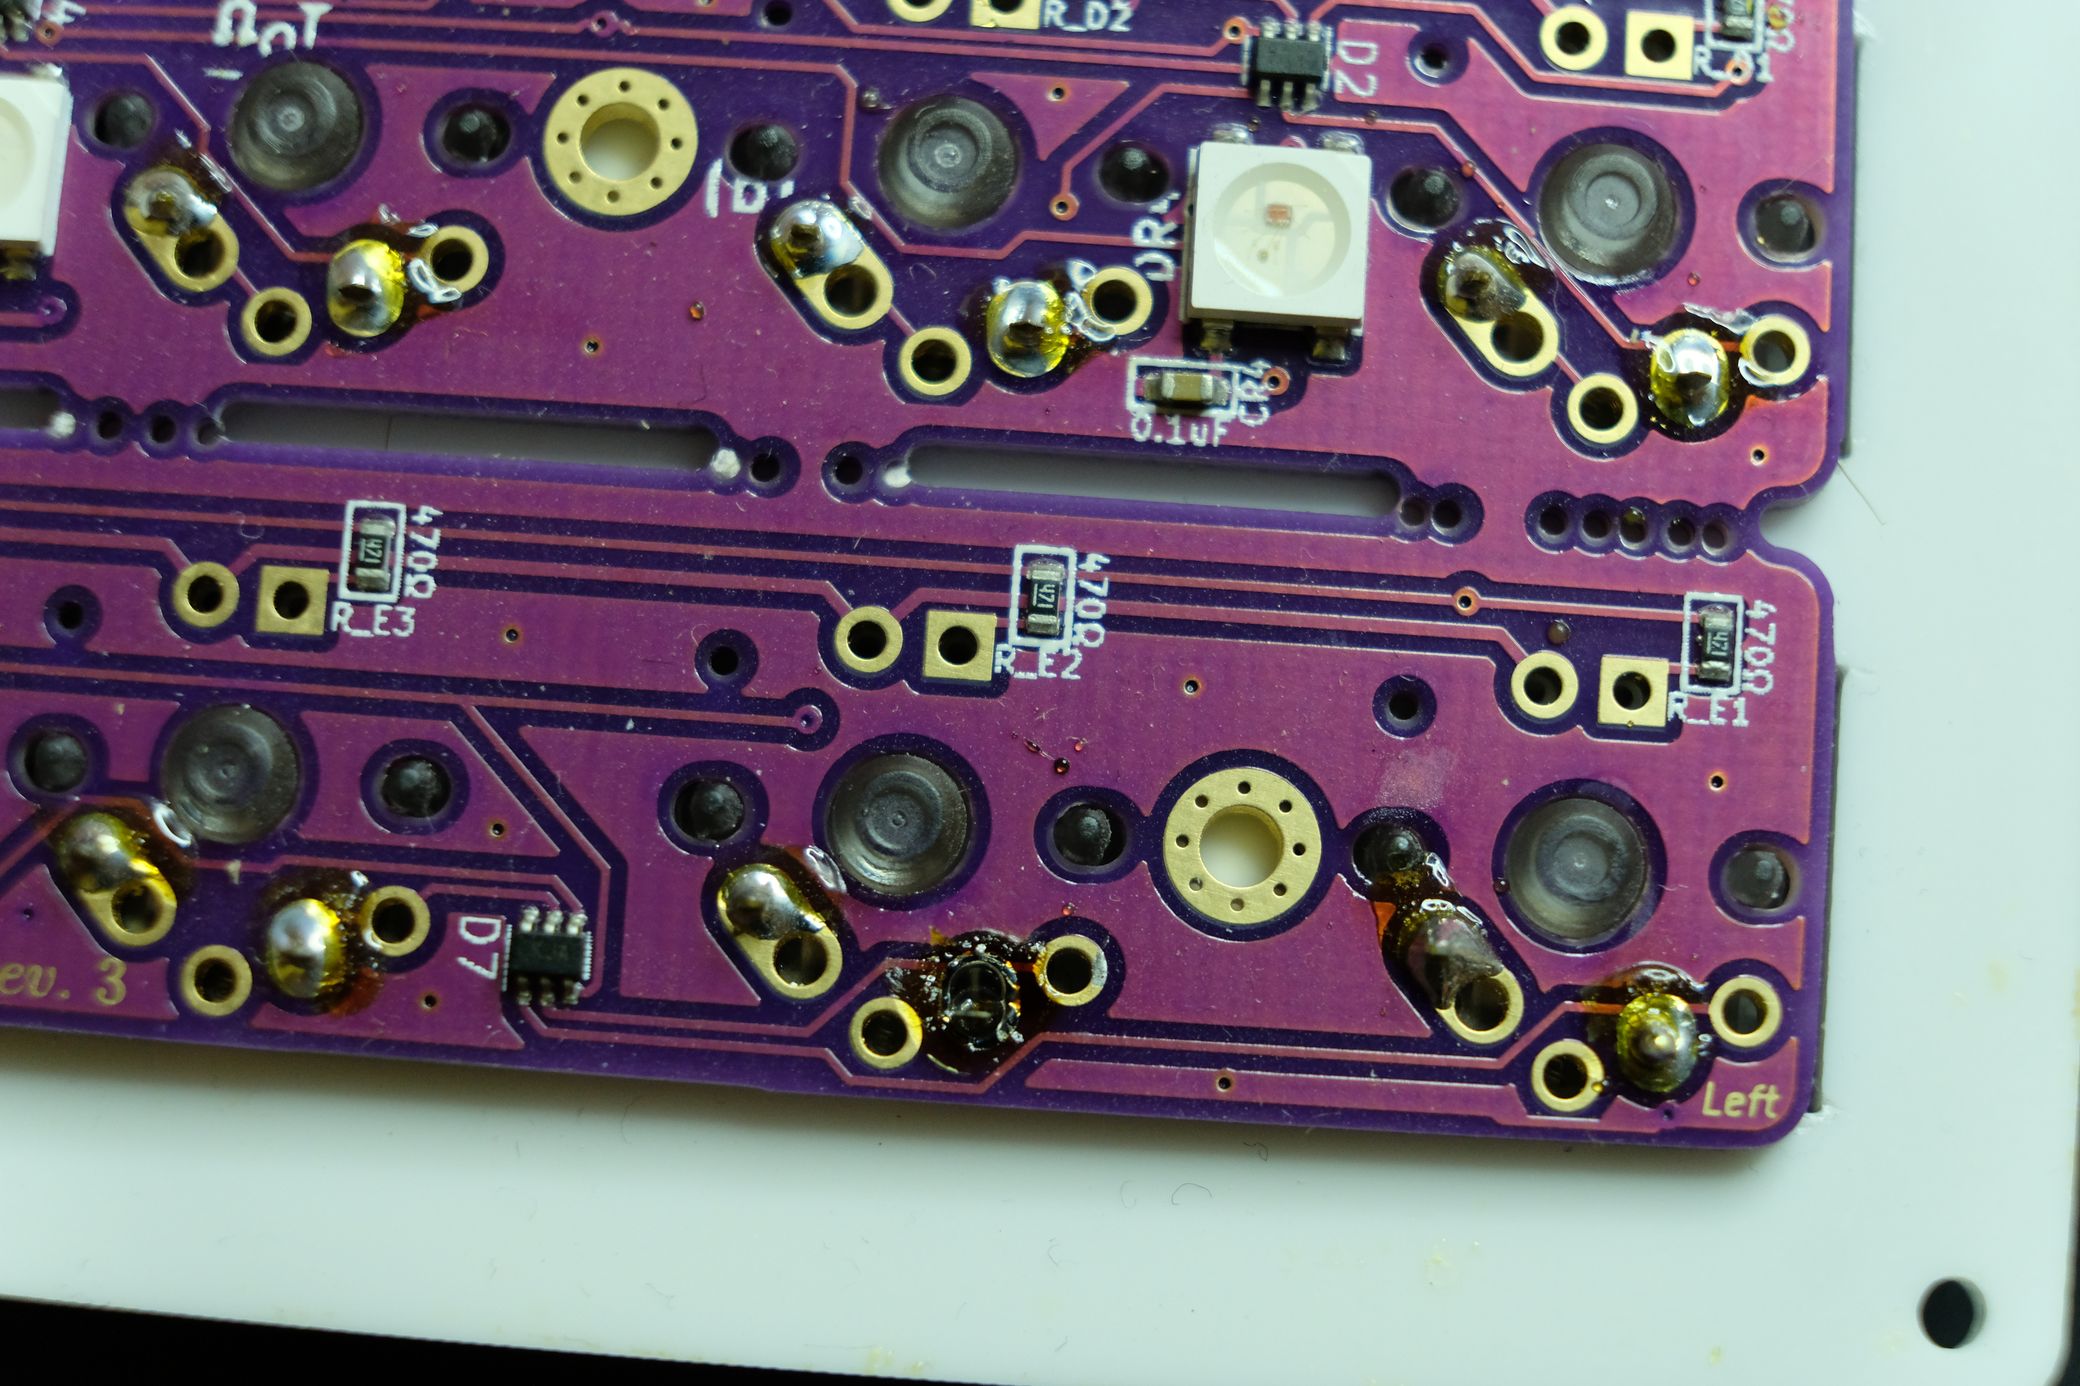
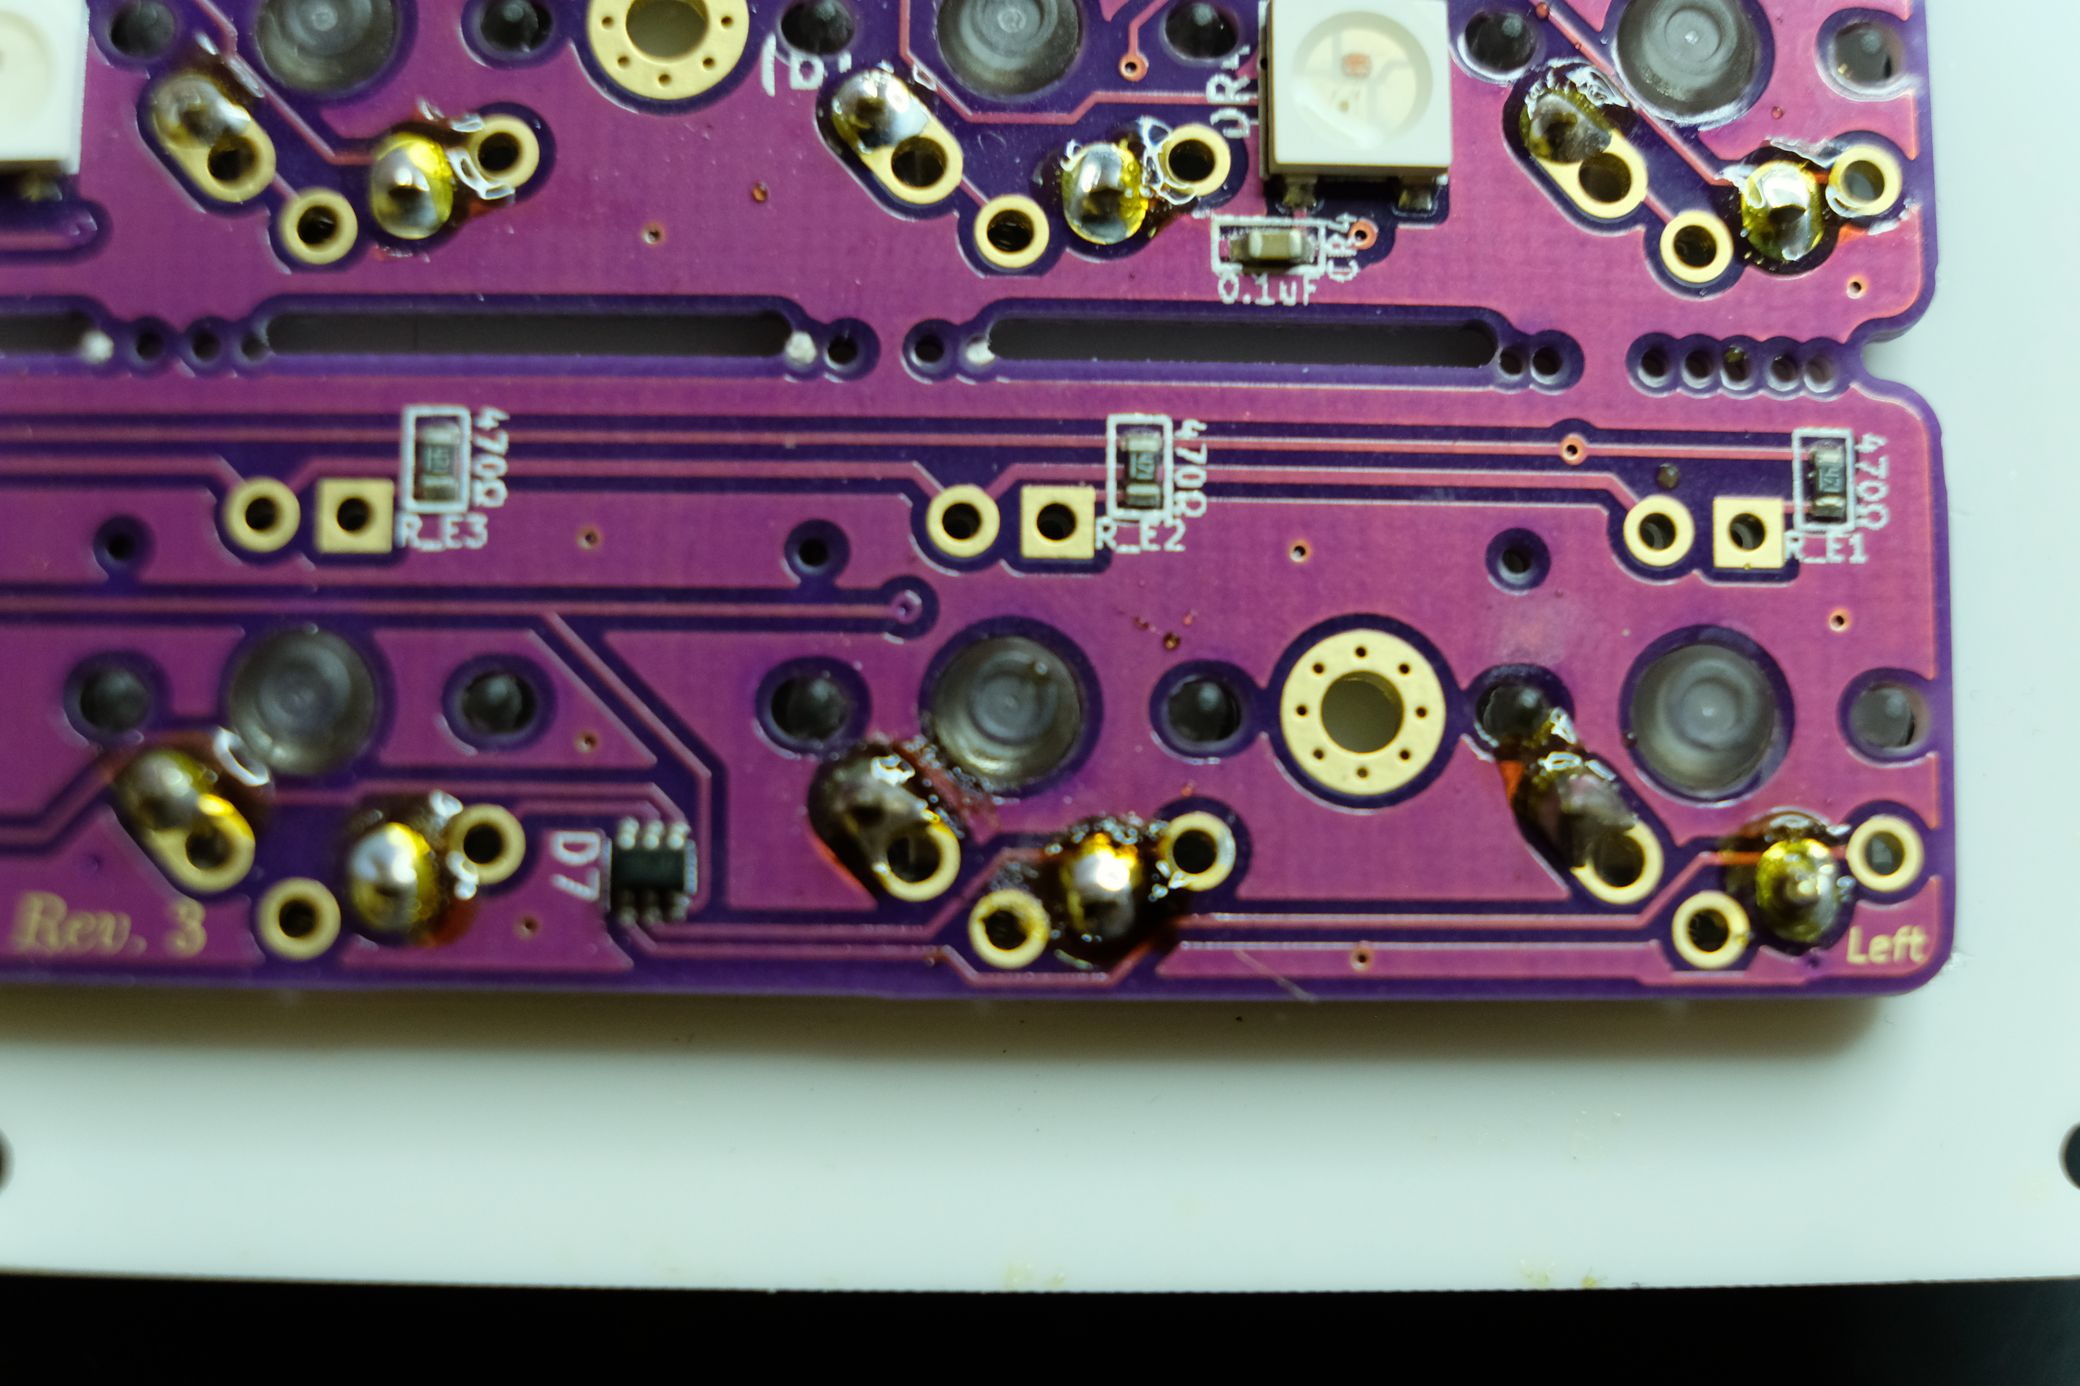
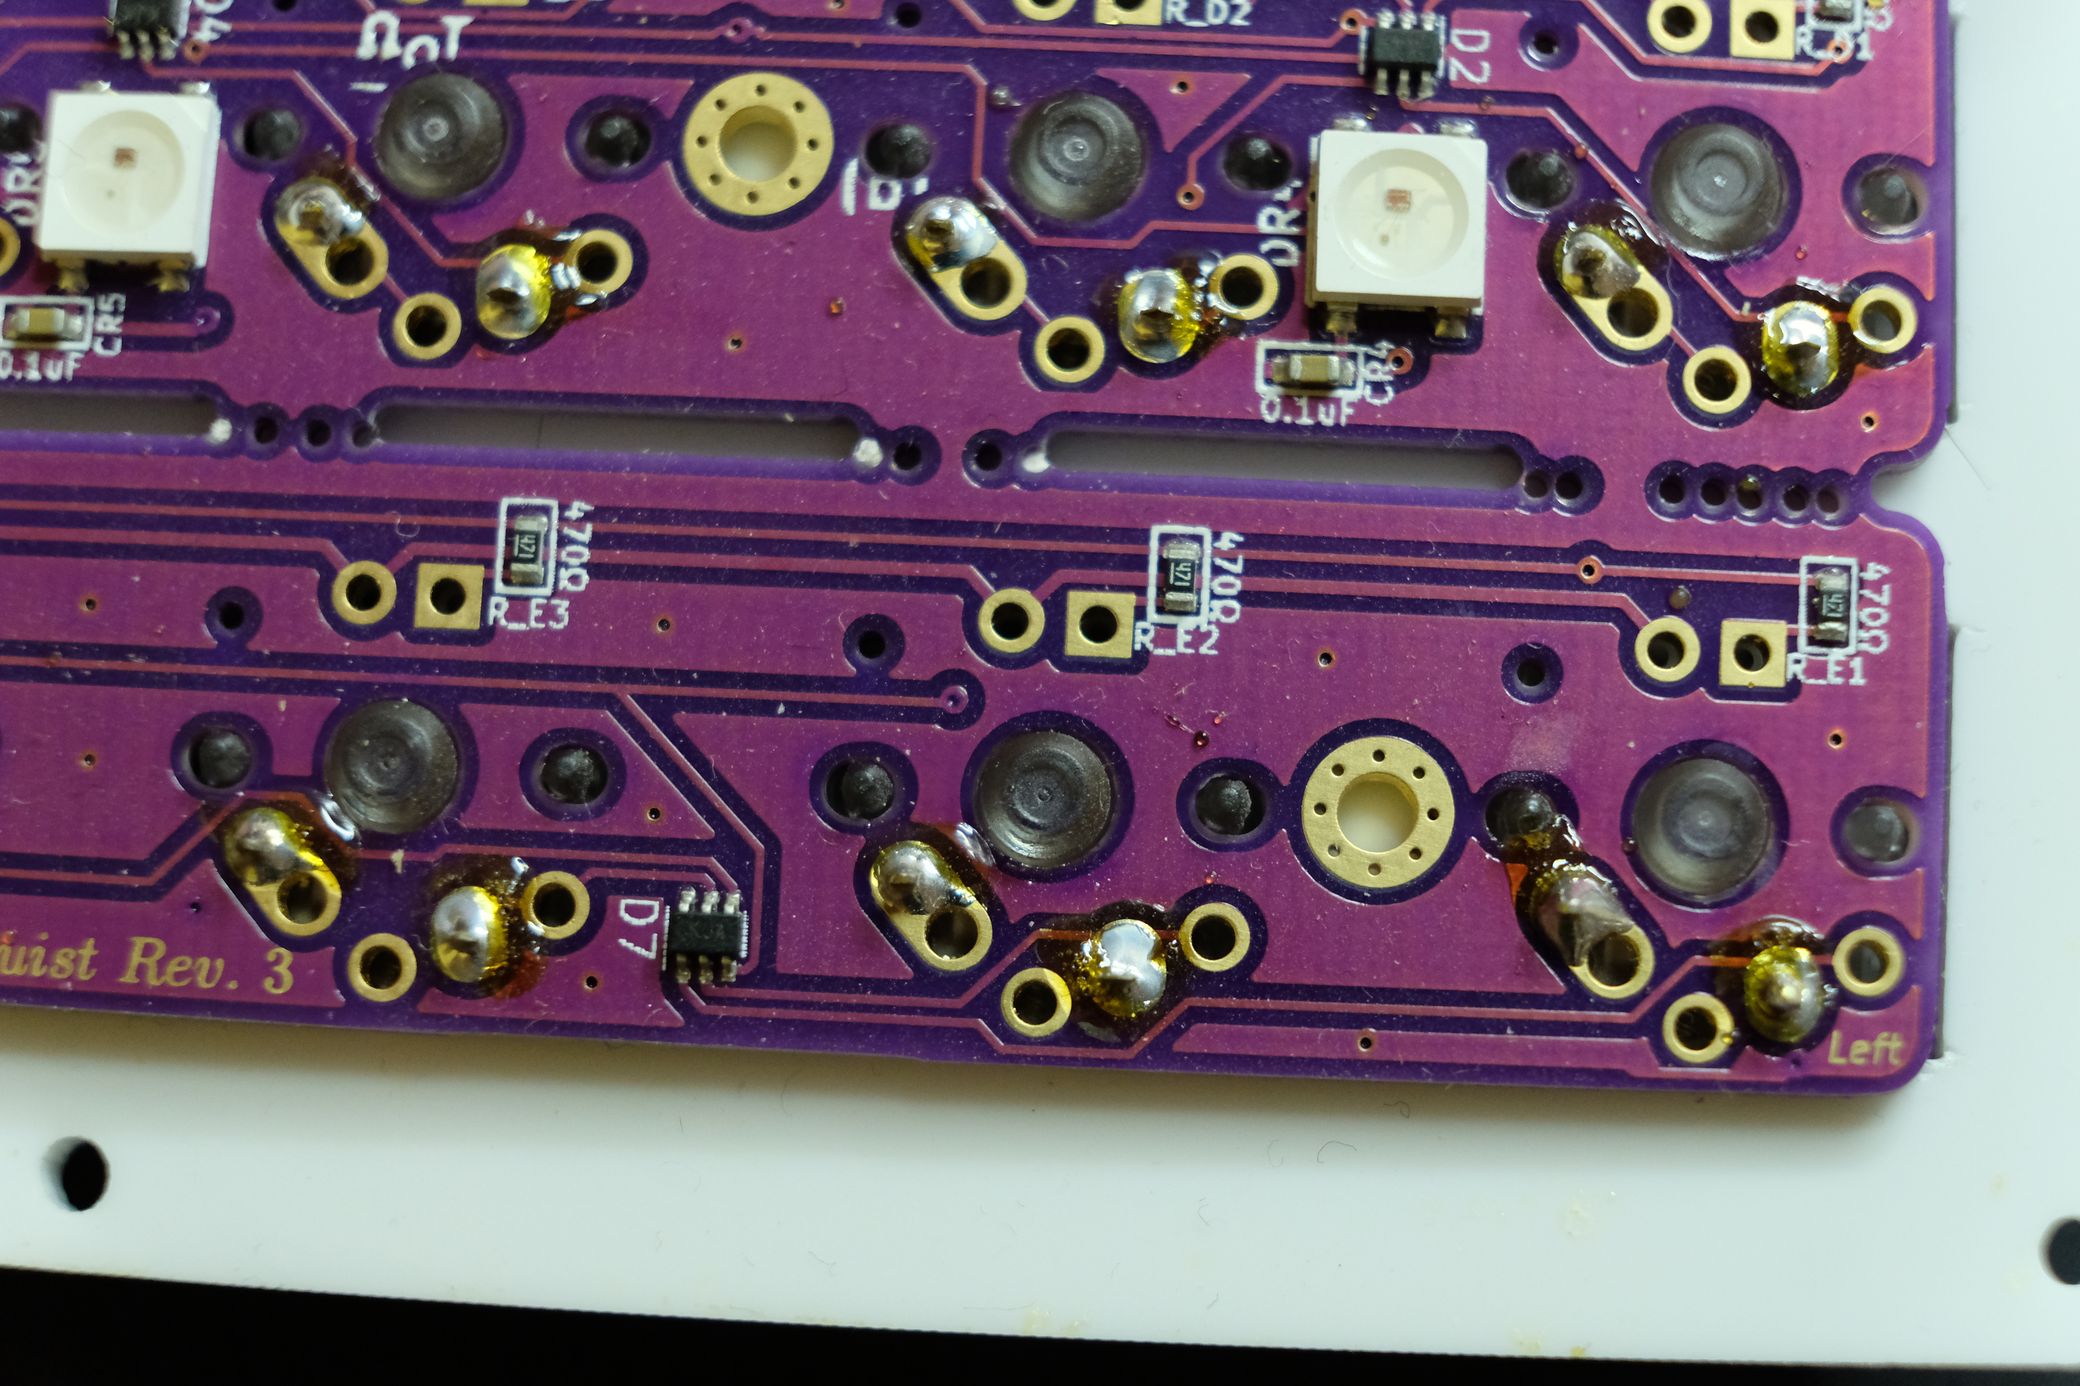 You should see nearly the same thing on your ErgoDox EZ (ignore all the extra empty plated holes here): both pins are sitting in mounds of solder.
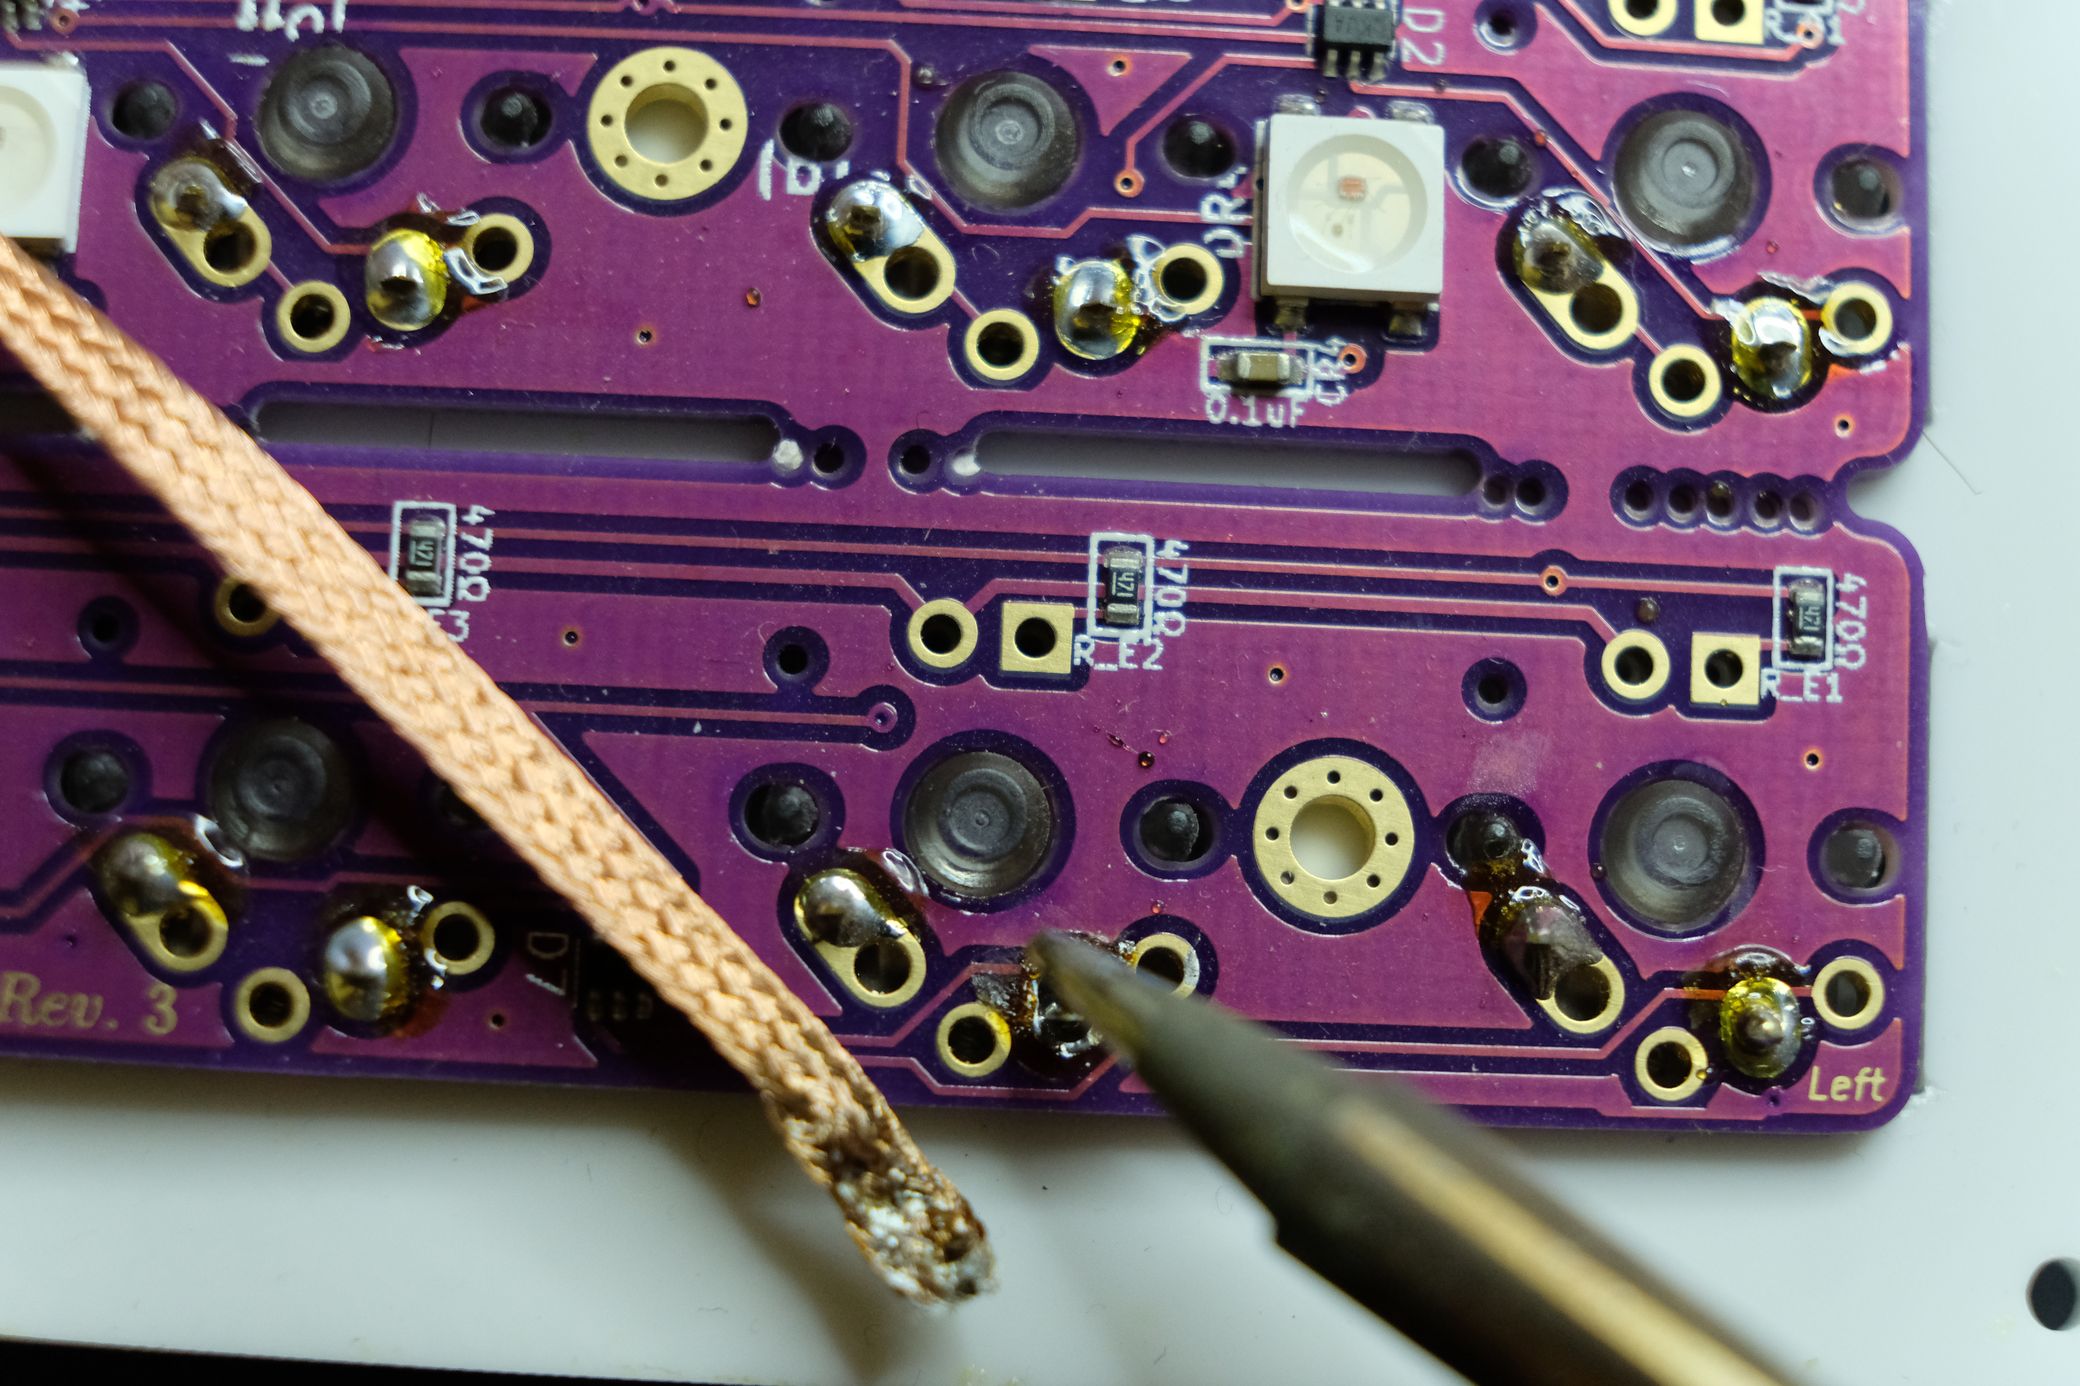
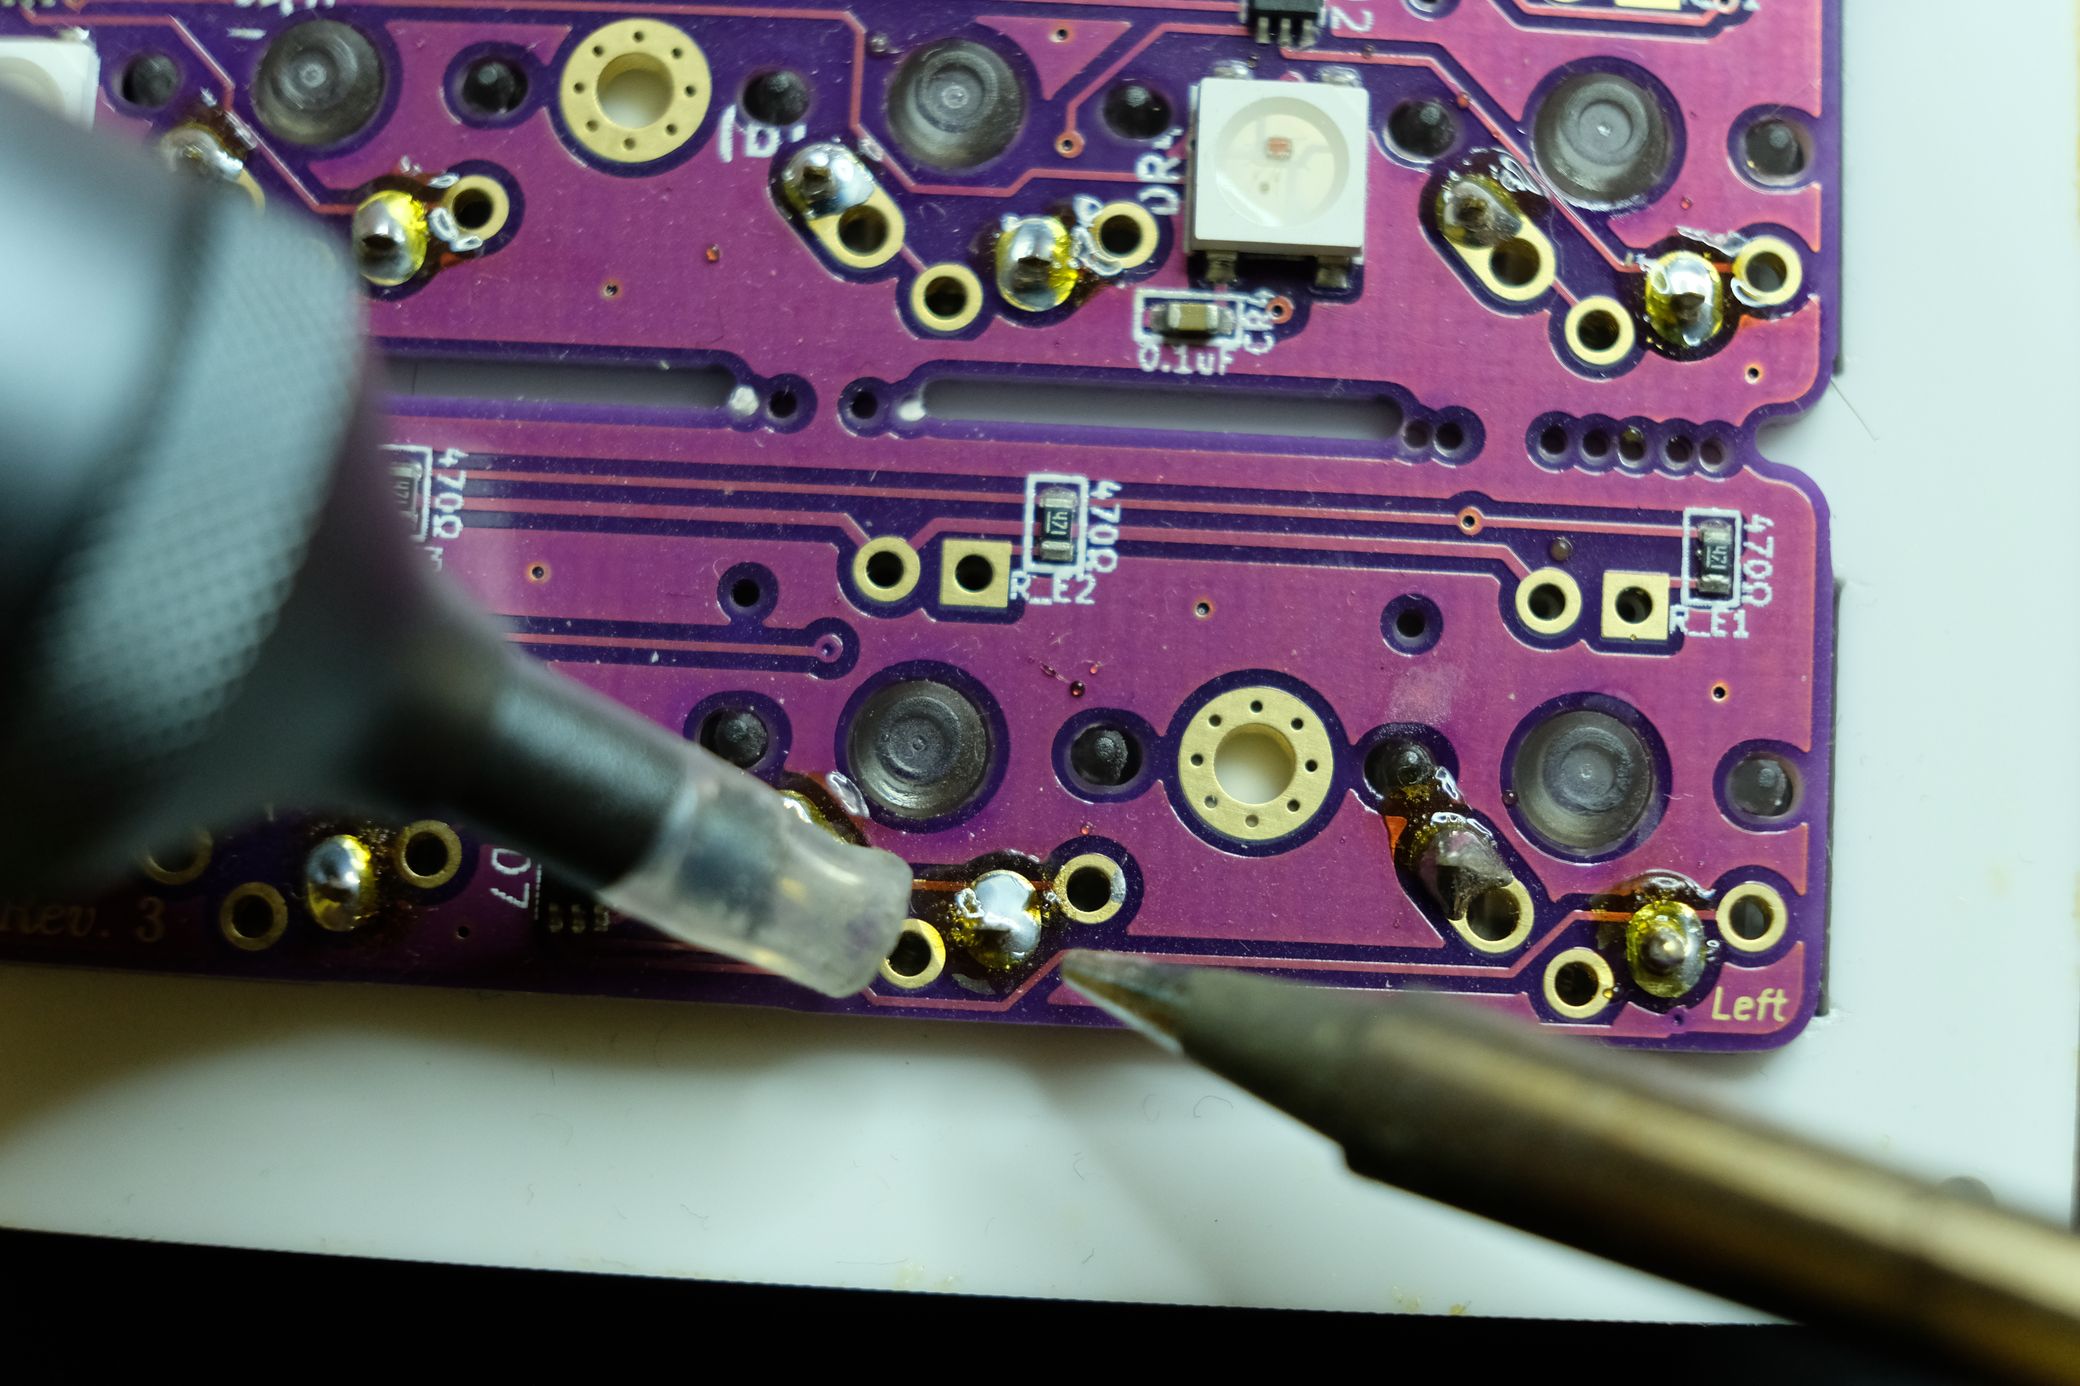 To desolder a switch, you'll want to heat up the solder until it's nice and liquid-y, then use a tool to remove it. Pictured here is a solder sucker, which is my preferred method. It's like a reverse syringe that creates a brief vacuum to quickly pull liquid solder up. You may want to repeat this a few times just in case you don't remove quite enough solder with the first attempt. This is normal.
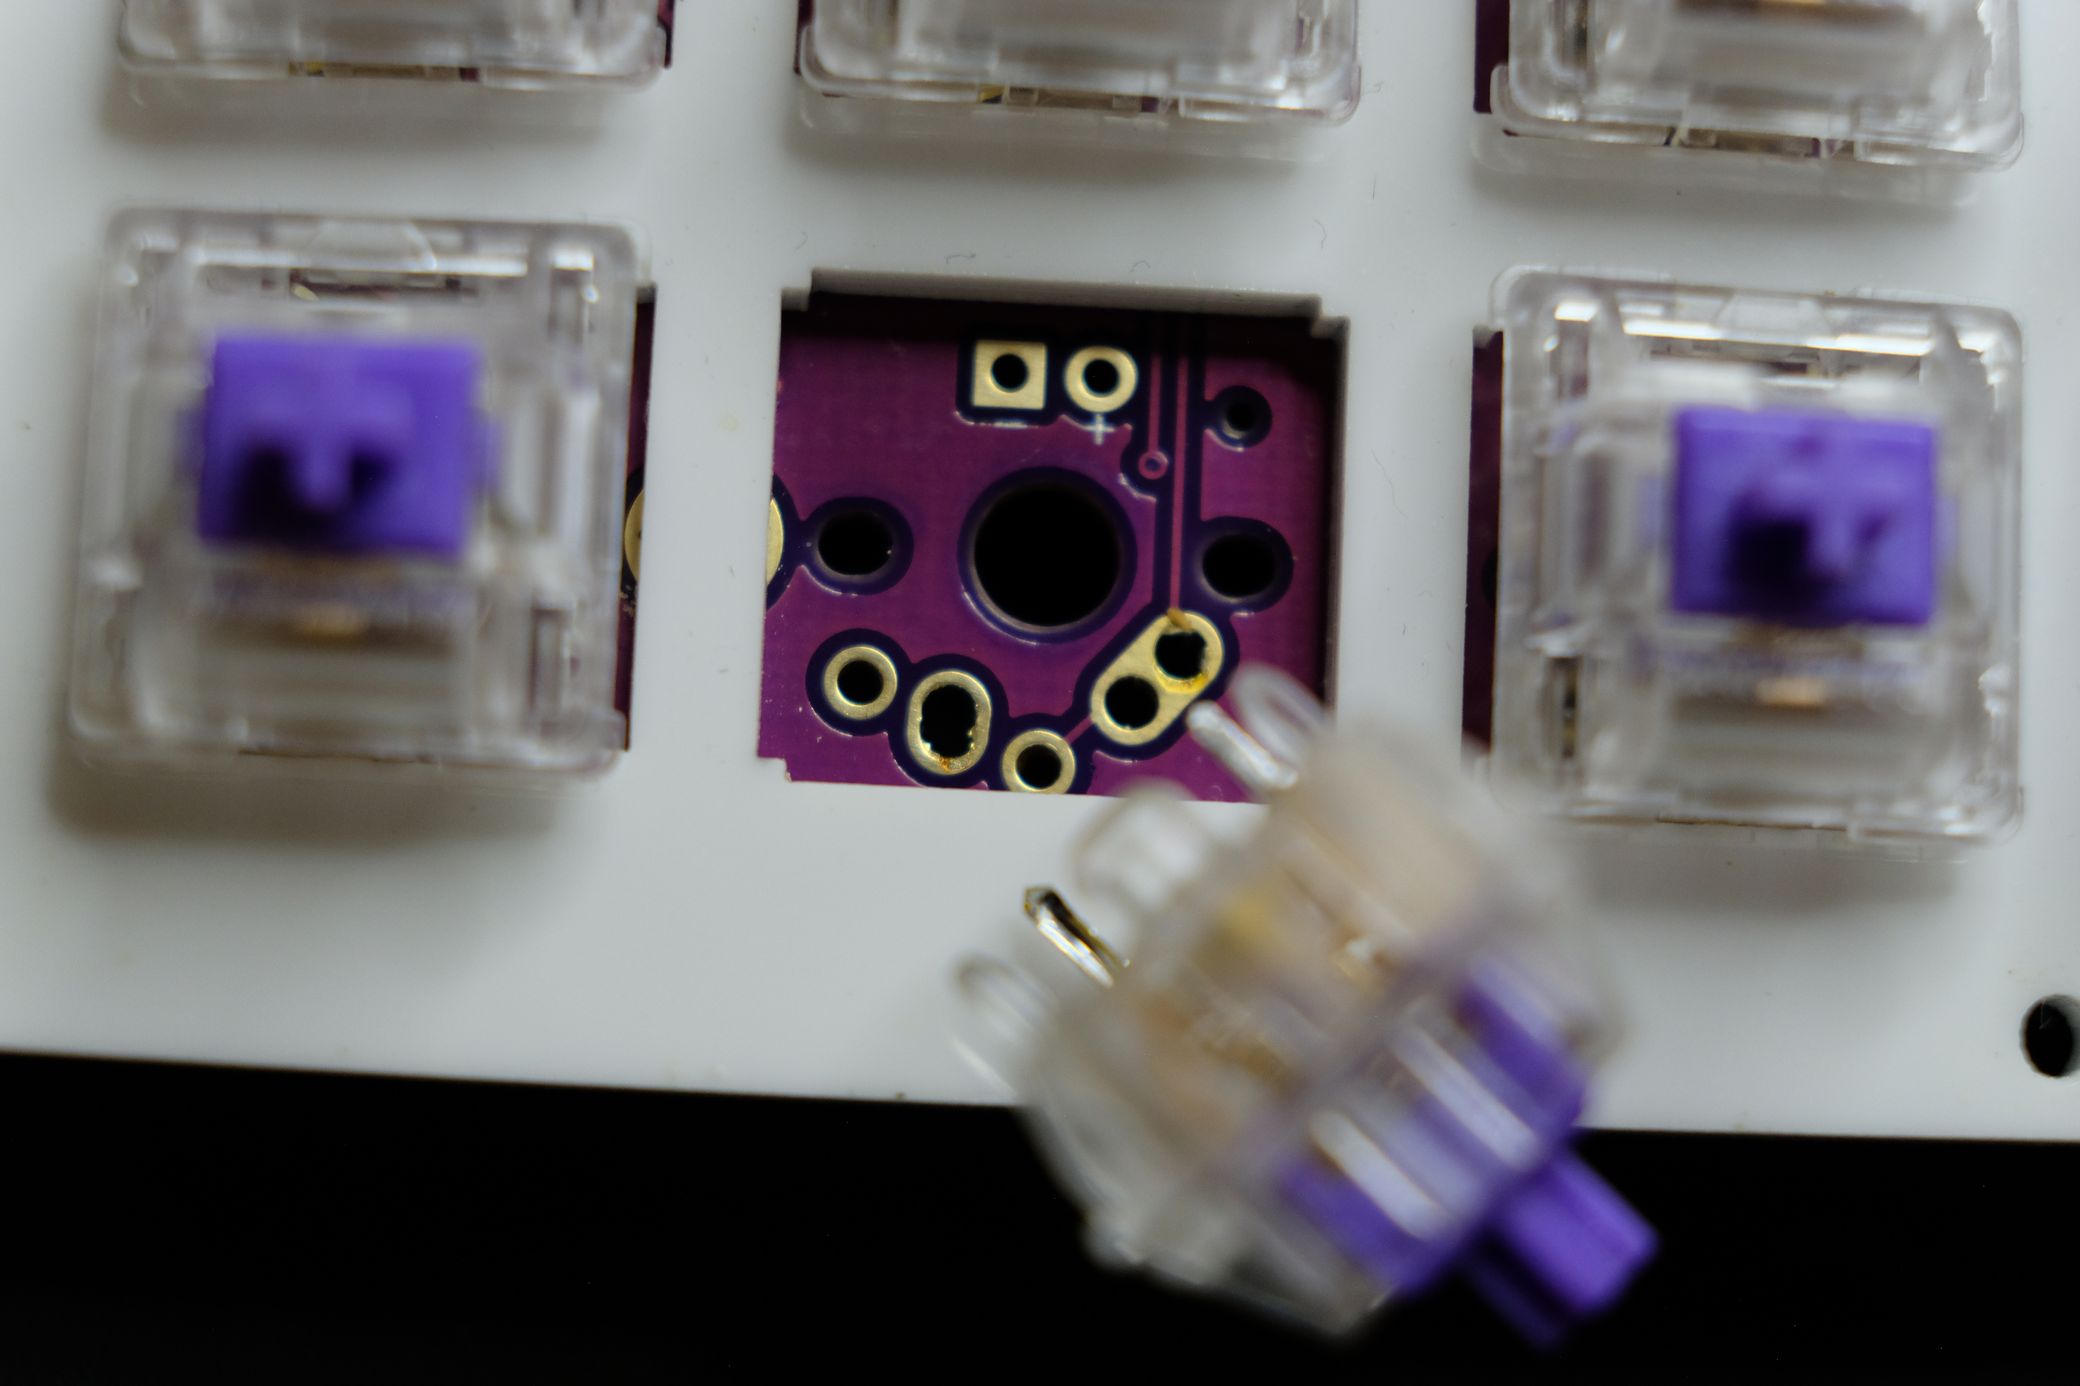
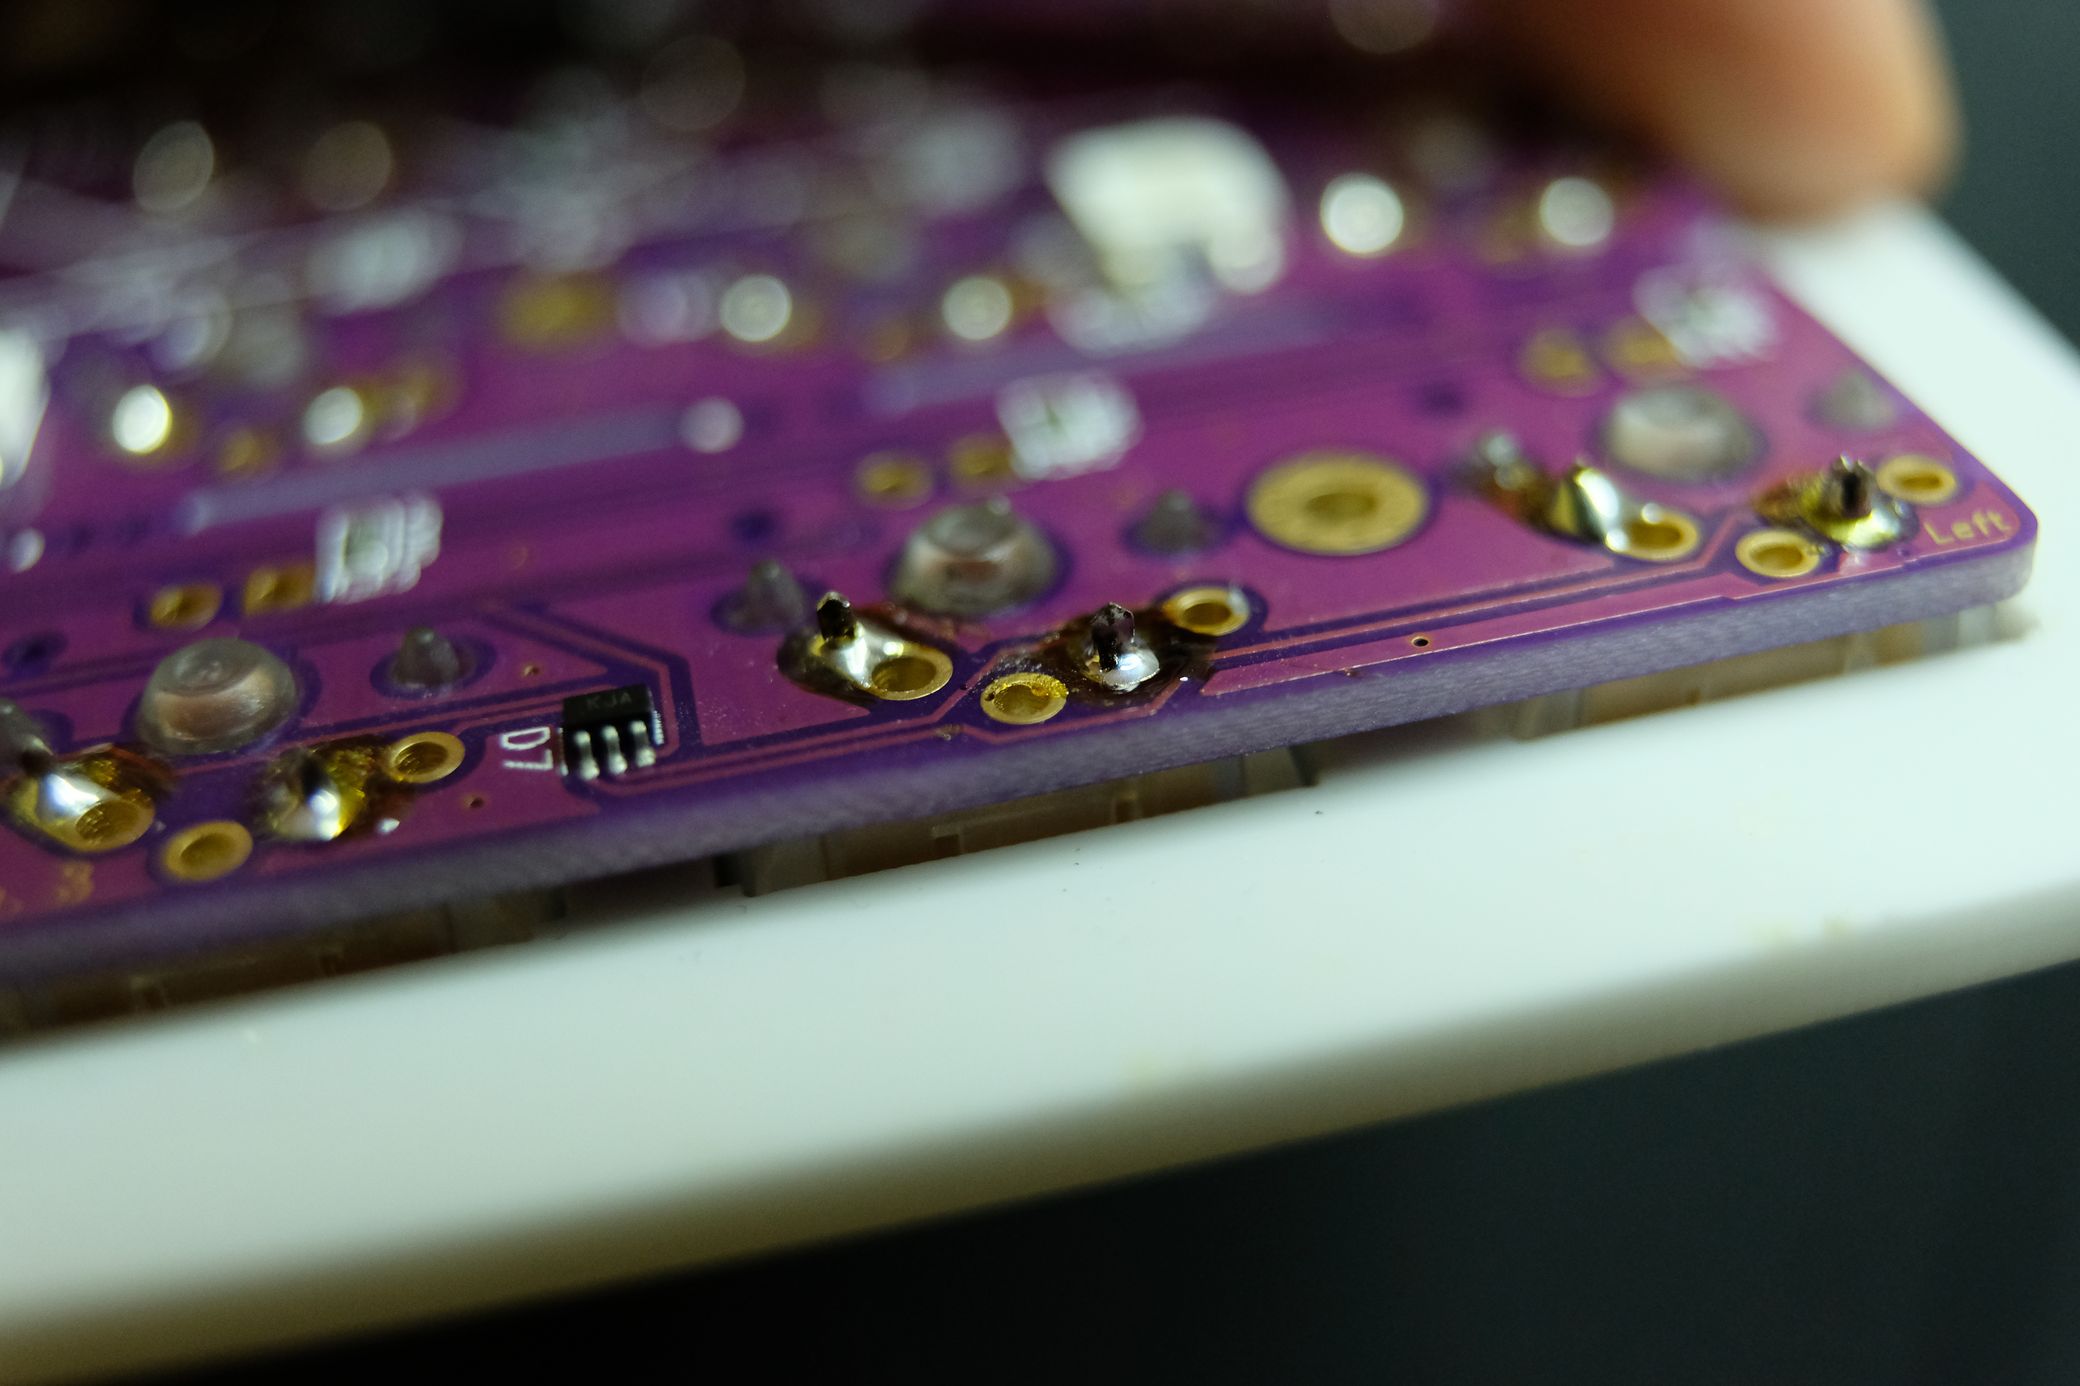
 It looks a bit gnarly from this angle, but everything is fine. The solder is removed and this pin is pretty much free. The black reside can be carefully cleaned and scraped away, but it's not really necessary.
 You can also use solder wick to soak up the solder around a pin, but I find solder wick doesn't usually work as well for switch pins. It doesn't always have quite enough pull to efficiently deal with through-hole components where the solder may be far from the surface of the board, like in the case of switch pins. Ideally, you would have access to both a solder sucker and solder wick to be extra versatile, but just one or the other can work. If you're replacing a whole board's worth of switches, I'd recommend picking up both tools to try them out. They're not usually very expensive, and anything that makes the desoldering process go faster will be very welcome -- trust me.
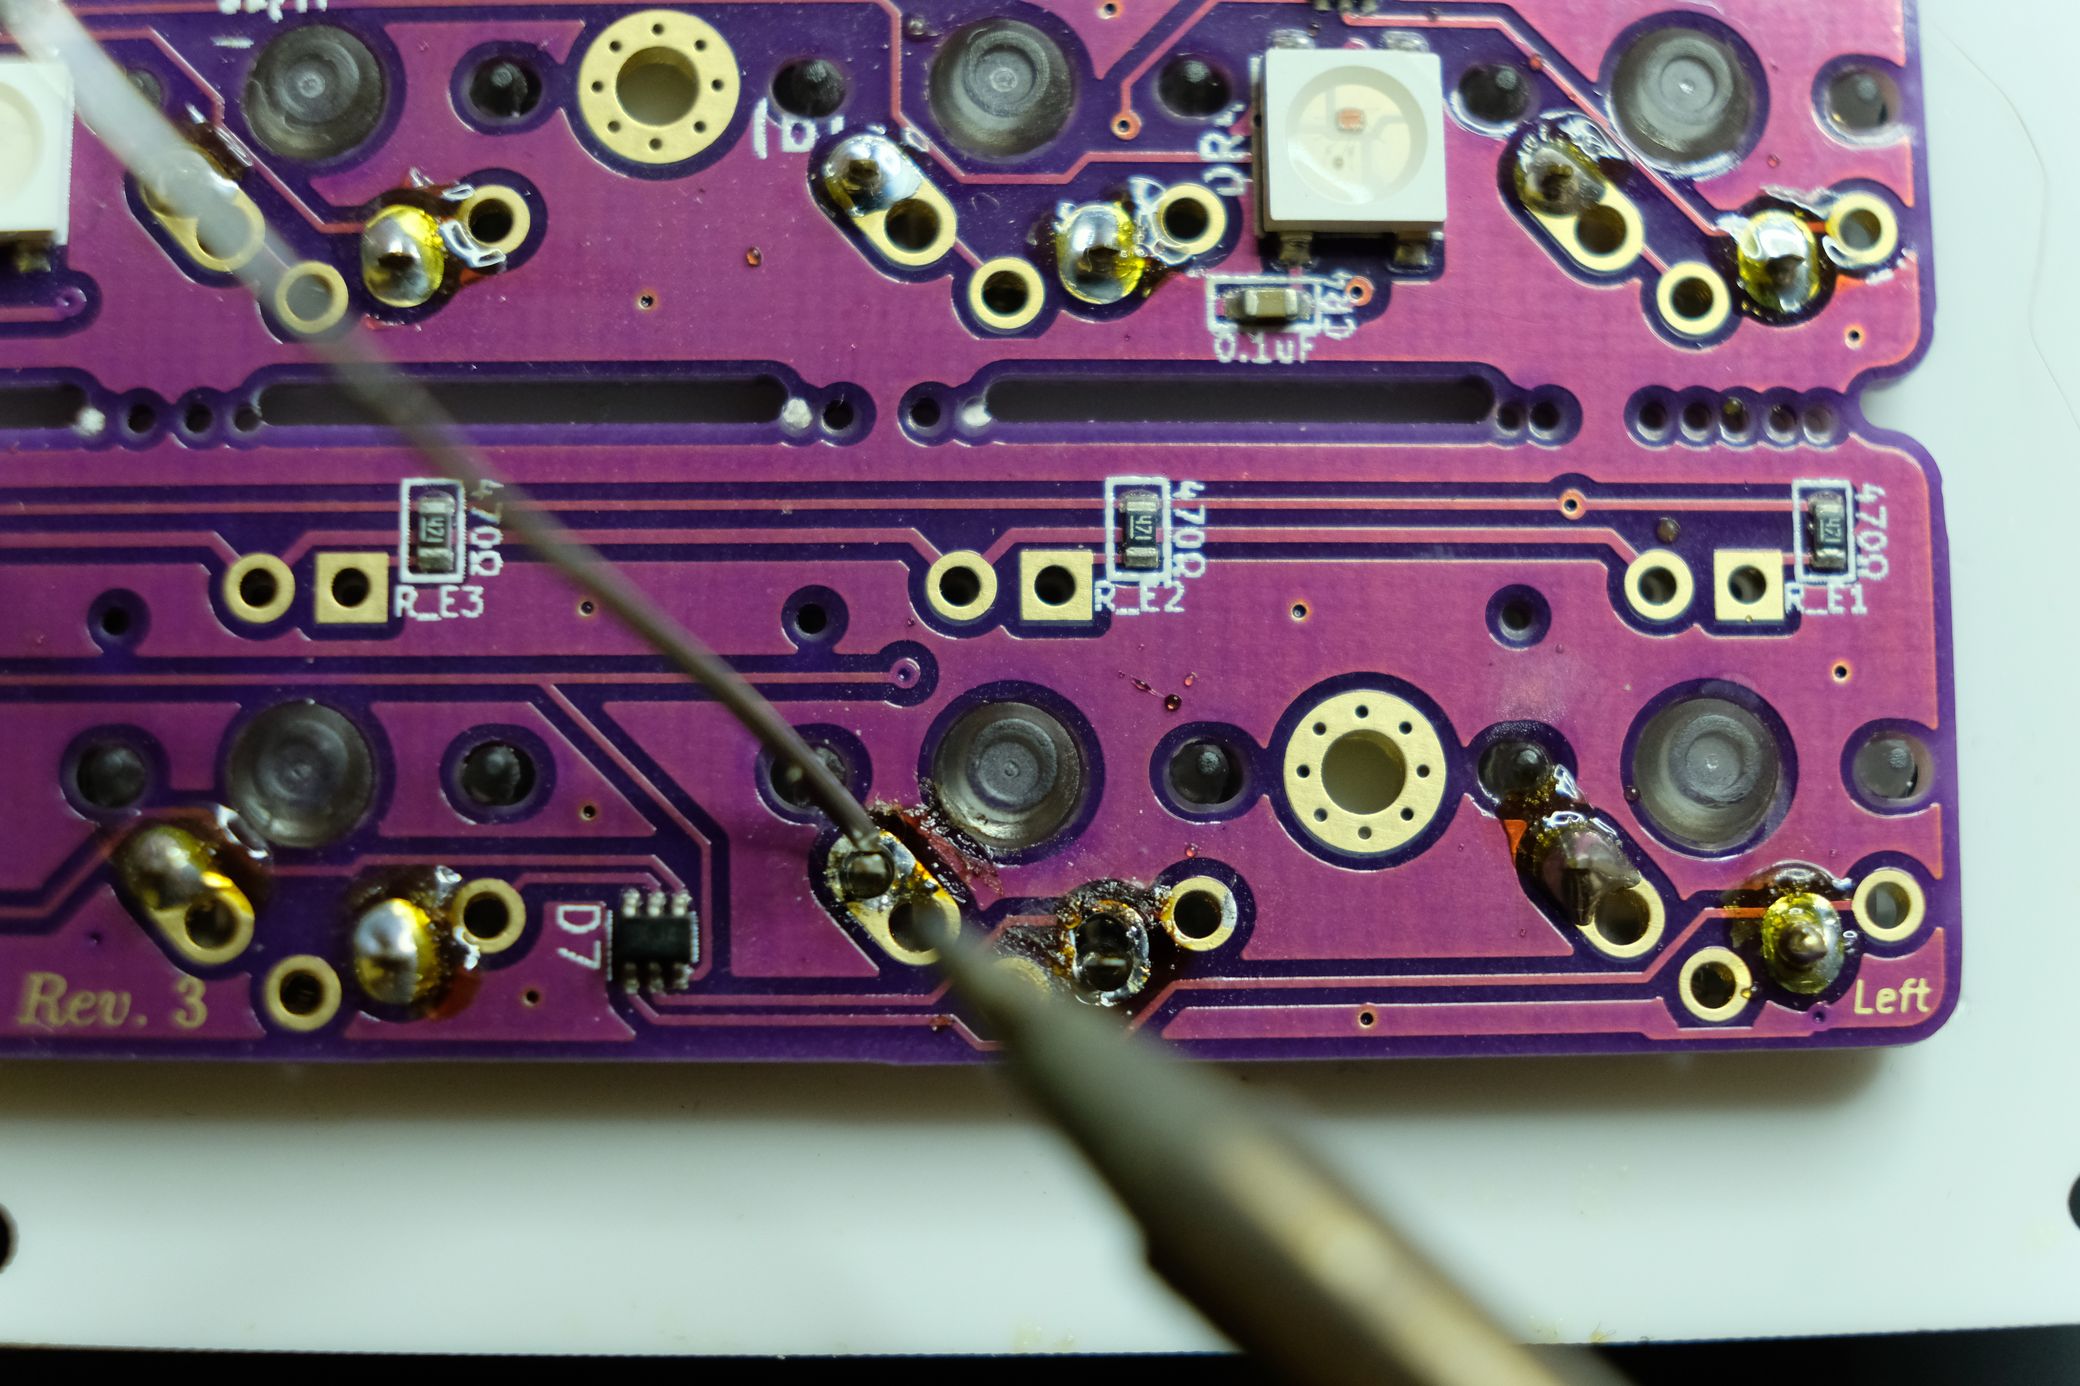
 Eventually, you'll remove enough solder and you can pull the switch out. You don't have to get every single bit of solder, but you'll want to try to get most of it. Knowing if a switch is ready to be pulled out can be slightly tricky. It will require a bit more force than pulling a switch out of a hotswap socket because there will likely still be tiny bits of solder holding it in place. I'd err on the side of being overly thorough about desoldering for at least a few switches while you get the hang of it.
As a general guideline, I recommend starting to pull gently and gradually increasing the amount of force you're applying. If you feel yourself start to really strain at all, stop. The switch probably needs more desoldering. If you accidentally rip a switch in half, you can still remove it, but it can be harder to get a good grip with a key puller, and you should desolder more before trying again.
Soldering a new switch
If you're planning to replace all your switches, work row by row rather than taking them all out and then putting all the new ones in. This will help make sure everything stays secure. First, insert the switch through the top of the case and position it so the pins go through the PCB. Make sure the switch clips into place on the case of the board, and that the PCB is nice and flat against the bottom of the switch.
Next, add some solder to one of the pins and let it cool. If this is a switch in the middle of the board, this probably isn't necessary, but if it's on the outside, you may want to pick up the board and reheat the solder while pushing the PCB into the switch. This will just make sure that everything is in the right place.
Finally, just add solder to the other pin, and you're done!
This is more or less what things should look like. If I were being more of a perfectionist, I would add a bit more solder here.
Ideally, if you're fully replacing switches, you want a little bit more of a cone shape to the solder with each switch pin sticking out of the top. However, if you're just trying to diagnose whether you have a bad switch, this is a perfectly fine amount of solder for testing purposes. You can always go back to add more for security if things work after some initial testing. The main thing here is making sure that there is a nice mound of solder completely surrounding each pin.
If you're trying to diagnose whether you have a bad switch, now you can go ahead and plug the board in to test it. If you're replacing a whole board of switches, you just have to repeat this process 75 more times. This really does start to go faster as you get used to it. A podcast helps. Good luck!