Imagine you have a piece of paper with things written on it. Now, imagine you put two pieces of paper on top of it. You can read the top page, but you need to read something on the bottom page. How do you do that?
There are two options (aside from some fancy X-ray tech):
- You could remove the top sheets of paper from the stack. This is what most of us would do naturally.
- You could grab the bottom sheet and yank it out of the stack. Maybe you only need this sheet for a while, so it's easier to just take it out.
This is exactly how layers work in Oryx and our underlying firmware, QMK. You start with your base layer, a single “page”. When you switch to a higher layer, you're adding it on top of your base layer in a stack. When you want to go back to a lower layer, you have two options:
- You can remove the upper layers from the stack. This is how most layer switching keys work:
MO,TG,OSL, etc. - You can clear out the entire stack and "yank" the layer you want out on its own. This is how the
TOkey works. This article won't cover theTOkey, though. We recommend getting familiar with the stack concept, then you can experiment withTOif you have a good use for it.
If you're unfamiliar with the the layer switching keys, we define the most commonly used ones in our firmware terms guide.
What's the point of layers?
Why not just make a keyboard with more keys? Why use layers at all?
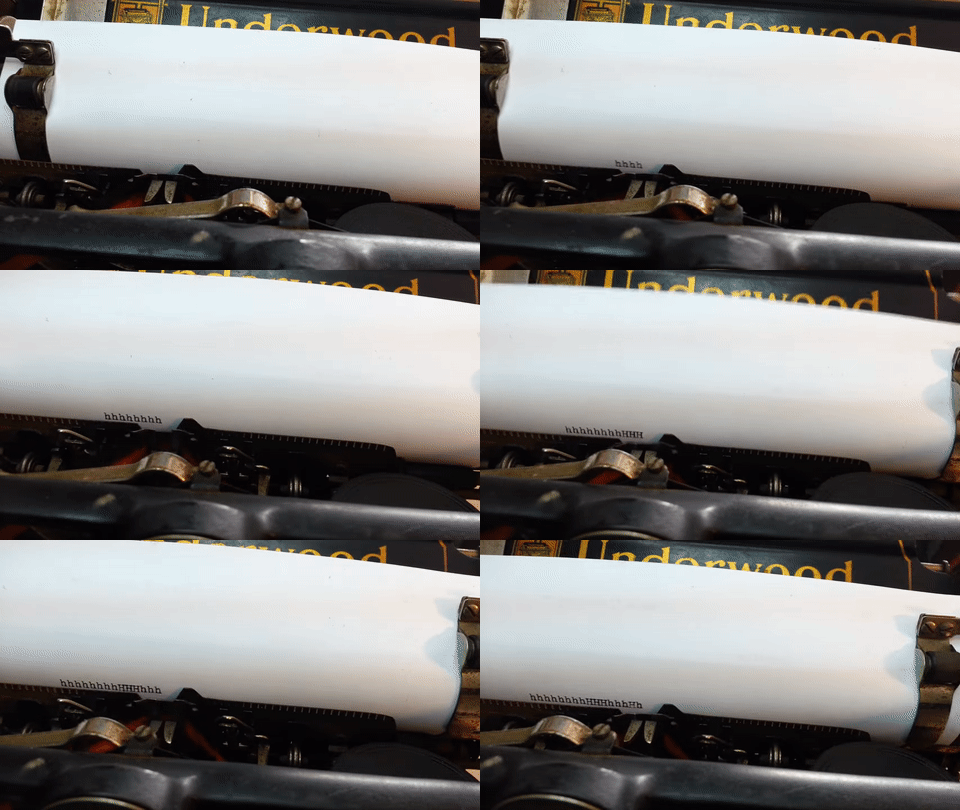
Think about Shift. Back when we were using typewriters, some models had two sets of characters per striker. The Shift key would literally shift all the strikers up or down so the secondary set of characters would hit the page instead of the default characters, allowing for capitalization and additional symbols.
This was extremely practical as typewriters were already fairly bulky — an entire additional set of keys and strikers of all individual characters would have made them massive, but adding a whole extra layer of capitals and symbols allowed for more expression without changing their size.
You can see what a physical shift looks like in this typewriter repair video.

In our modern day, with the aid of firmware, we can take this even farther. One key can do two things or ten things. Keyboards are more flexible and comfortable with fewer keys (up to a point). Typewriter designers understood this principle decades ago. Adjusting to layers can take some time and practice, but it's worth it.
Arranging layers
Think of layers like a stack of paper. When you add a layer to the stack, it needs to first be “pulled back” to see a lower layer.
Practically speaking, this leads to an easy way to think about layers: arrange them from most to least used, starting with your base layer. Let's look at a few examples.
Layers for an email
Let's say you want to type the following:
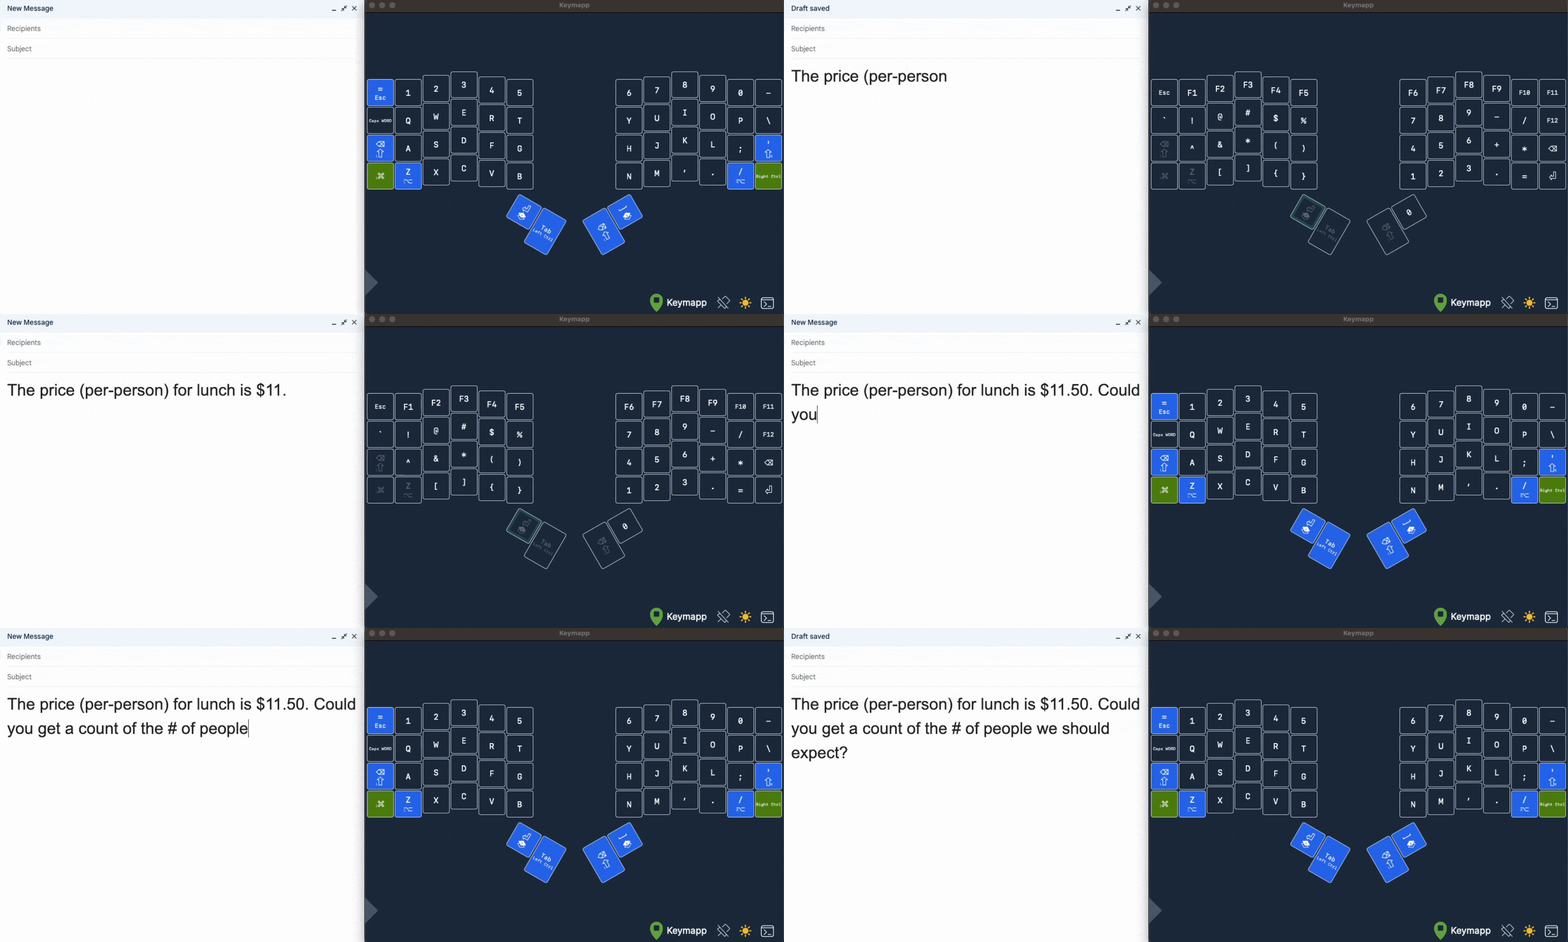
- The price (per-person) for lunch is $11.50. Could you take a count of the # of people we should expect?
Technically, you could accomplish this message using only one layer using Shift and number row. Even though shifted symbols aren't shown in Oryx, they still work as you expect, so Shift + 9 would give you (, Shift + 3 would give you #, etc. (other input locales may have different shifted combinations).
However, let's say you want to use a layer for this instead. Using the default Voyager layout as an example, you type away, and when you get to the first ( character, you hold a layer switching key. While you're holding this key, you have access to the symbols layer, so you hit the parenthesis key, then let go of the layer switching key, and you can continue to type the text, briefly switching back to the symbol layer as needed. This works exactly like a Shift key, but the benefit of layers is you can customize what each key does. It's a simple form of “chording” because you are holding a key and tapping another key.

Note: This typing is slowed down slightly to emphasize the layer switches. With practice, you can type quickly using layers.
Layers for code
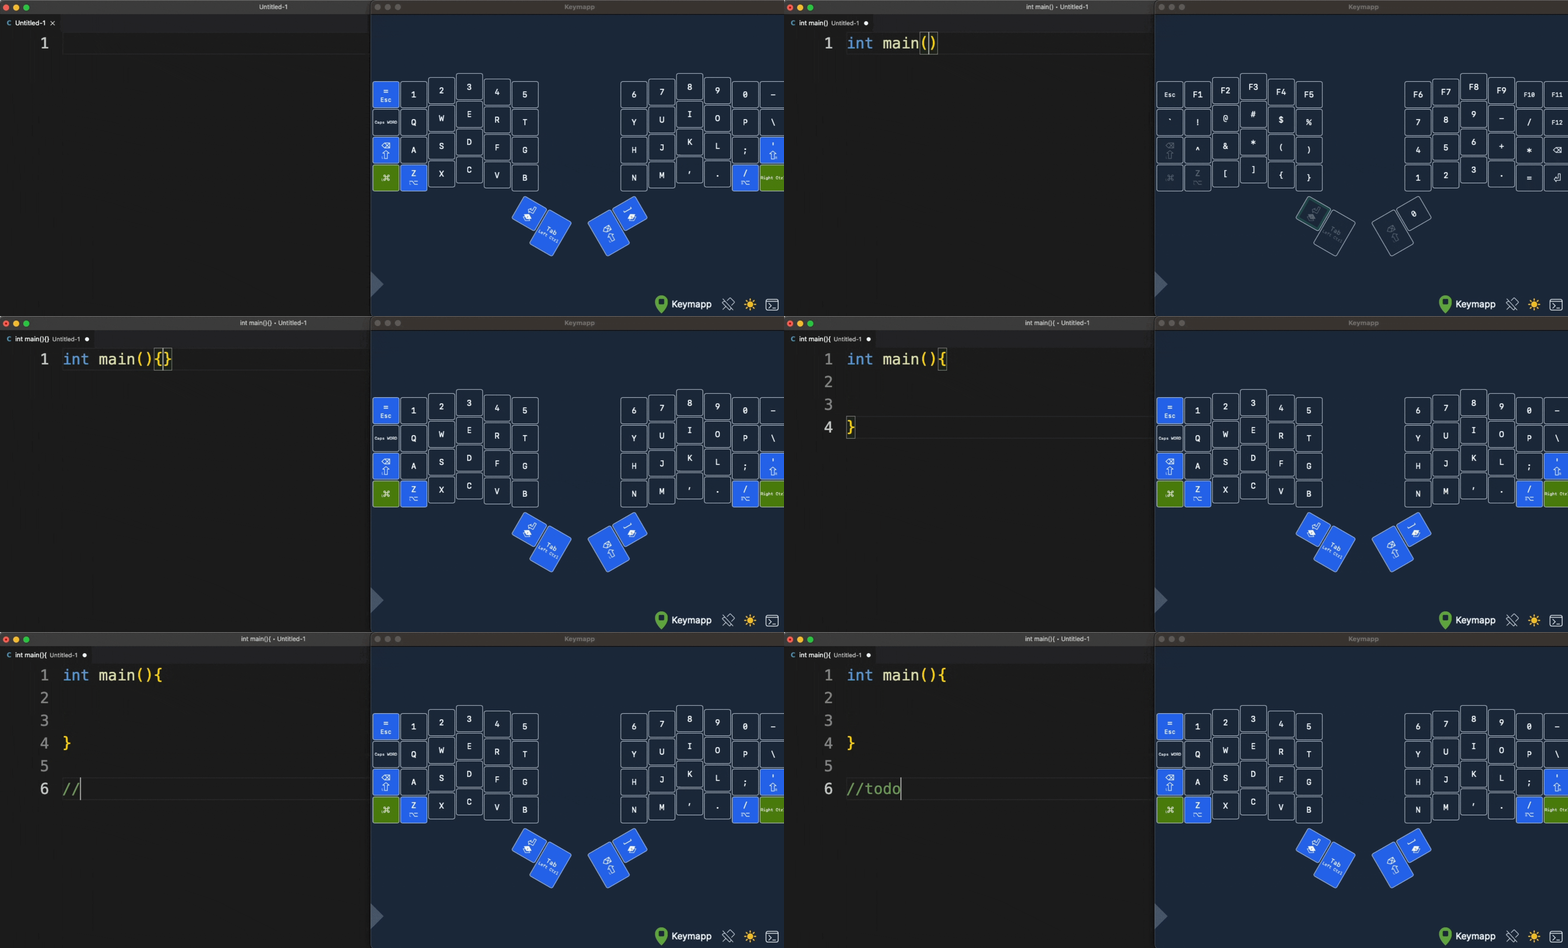
Code is similar to the above, albeit with more symbols and less straightforward text, but let's add one other element. Let's say you want to set up an empty function that you will then fill in. It would look like this:
int main () {

}
The trick here is you need the arrow keys to navigate around the lines quickly. On the Voyager, it's difficult to fit the arrow keys on the base layer, so we'll need a layer for this.
This involves switching to two different layers, which might sound complicated, but since you can set up the keys in layers however you want, you can make this very intuitive. The default Voyager layout puts the arrow keys right on the home row where your fingers already are, so navigation can be very quick, like this:

Layers for data entry
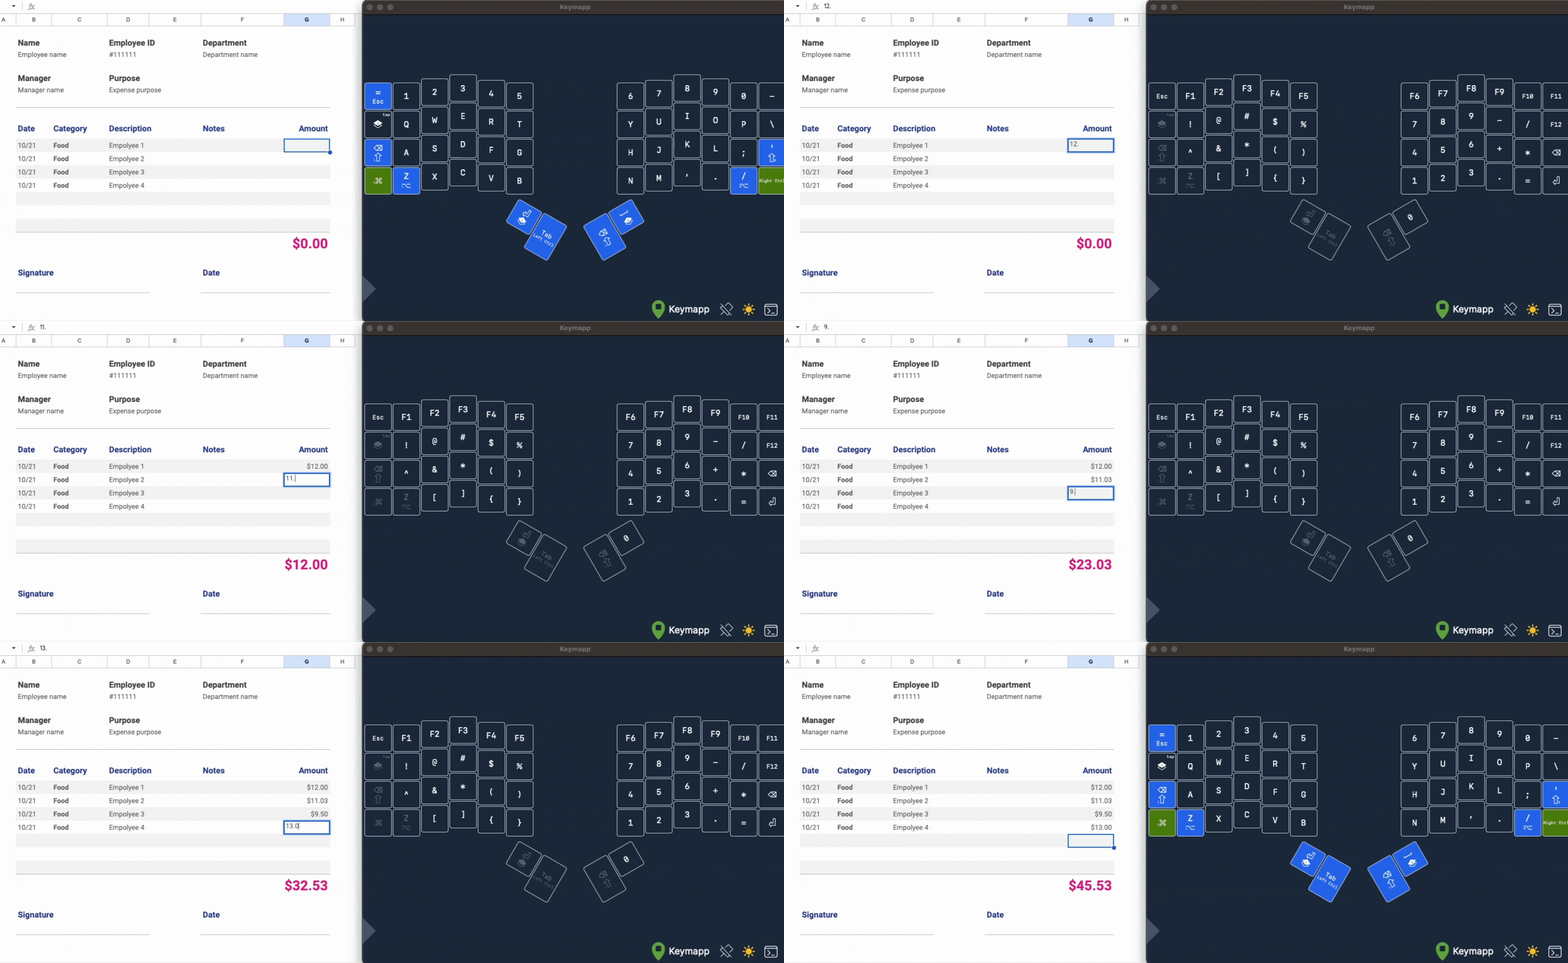
Finally, let's say you need to type numbers, and you know you'll need to do this for a while. Maybe instead of the above email example, everyone got their own lunch, and you need to enter the lunch prices for everyone in a spreadsheet.
If you do this kind of typing regularly, this is a prime use for the TG key. I'll make a quick edit to the default layout to replace Caps WORD with a TG key, and then I can enter the values like this:


