Did you know you can dye the Voyager's PBT keycaps at home in almost any color you can imagine, and even create funky gradients?
It isn't expensive or complicated, and does not require specialized gear. Of course, as with any DIY activity, there's a non-zero chance you'll mess up your keycaps. So before you ask, no, this is not covered by our warranty. However, if something does go wrong, you can always reach out to us about replacement parts.
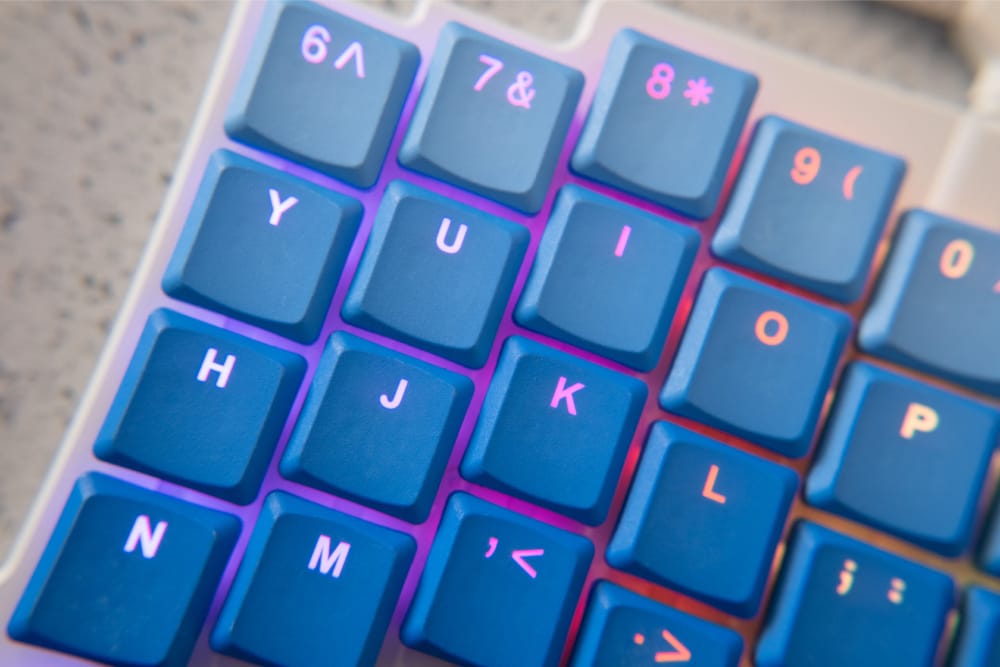
In an effort to share the simplest and most reliable way to do this, I've spoken to a user who got great results (thanks, Trym!) and then proceeded to do a whole bunch of testing on my own. It turned out this was much easier than I thought it would be, and the results are awesome!

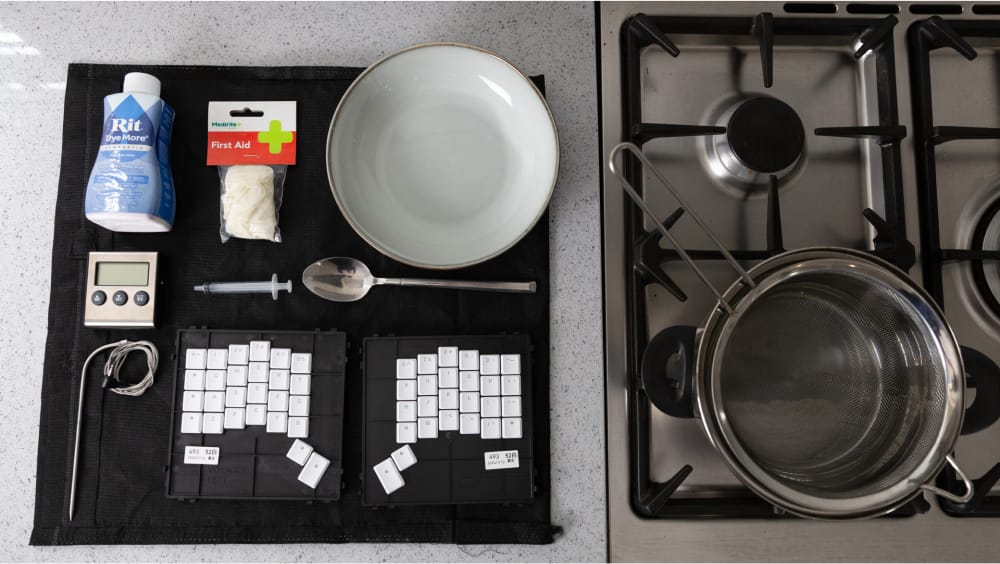
Materials
Here’s what you’ll need:
- White PBT Keycaps. I’m using a Voyager set.
- Synthetic dye. I’m using Rit Dyemore. This seems to be the dye of choice for PBT. Note that you’ll need the Synthetic dye: The All Purpose version does not work. You can get this at a craft store or online.
- A thermometer. A cooking one works fine, just know you’ll be sacrificing the probe as it will be sitting in the dye.
- A syringe, for measuring.
- A timer (I used my phone).
- Gloves, so you don't get the dye on your skin.
- Water. I used filtered tap water, not distilled.
- A stovetop or some way of maintaining a consistent temperature for your water.
- A pot.
- A strainer or sieve, just something to hold the keycaps in the pot while they are cooking and lift them out easily.
- A spoon for stirring (not a large serving spoon — see tips below).
- A bowl with water for rinsing the keycaps.
For the last four items I would recommend just picking some up at a thrift shop: Dye is not something you want in your food utensils, so these should be “diy-only” items after this project.
You should also make sure the area is well ventilated, with a fan or some airflow going through the area. Please don’t stand over the stove breathing in the fumes, and wear eye protection if yours are sensitive. Check the dye you’re using for any more precautions, as well as if it’s safe for drain disposal.
Step One: Preparation
Wash your keycaps, and order them by rows if you’re doing different times within a set.
Put some cold water in your rinsing bowl and place it nearby for later.
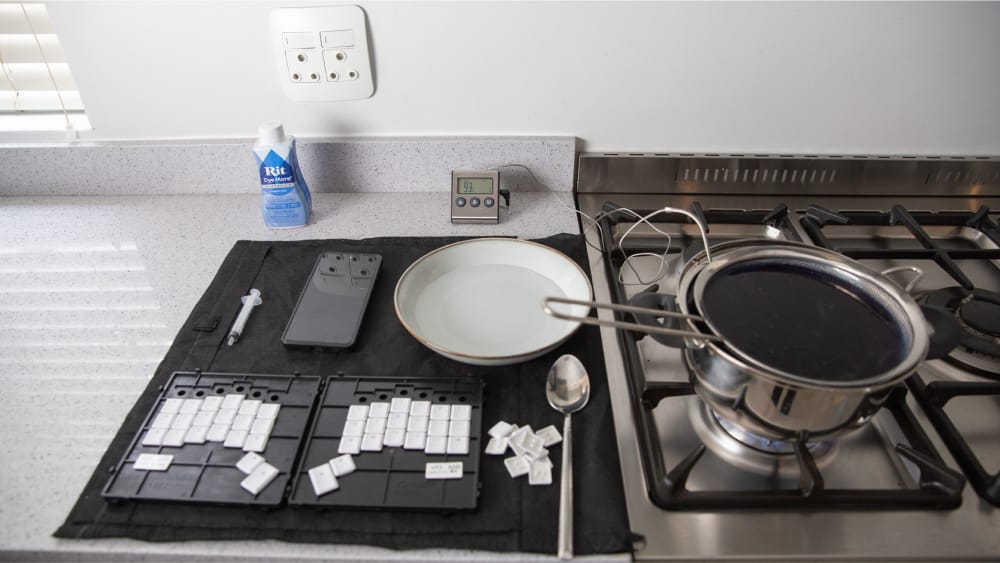
Next, measure out the water. I used 2 liters of filtered tap water. Get the temperature to a steady 93° C (200° F) to 96° C (205° F) range. It’s easier to just let the water boil and then bring it down to that range. Keep the heat on: It should be consistent throughout.
After the water is at a steady heat, add the dye. I used 12ml of dye for the 2 litres of water.
Step Two: Dyeing
With your timer set, drop in your keycaps and immediately stir. You don’t want air bubbles to hang onto the keycaps, so don’t be scared to bash them around a little when stirring. I keep stirring the whole duration, then lift out the caps and drop them into the bowl to rinse them off, before running them under the tap to remove any extra dye.
And that’s it. You’ve dyed your keycaps. No need to apply sealant or do anything else. Just make sure they're totally dry before you put them back on your keyboard (!). The dye “cooks” into the plastic, so you shouldn't see wear over time, and I haven’t found the keycap texture to be affected, either.
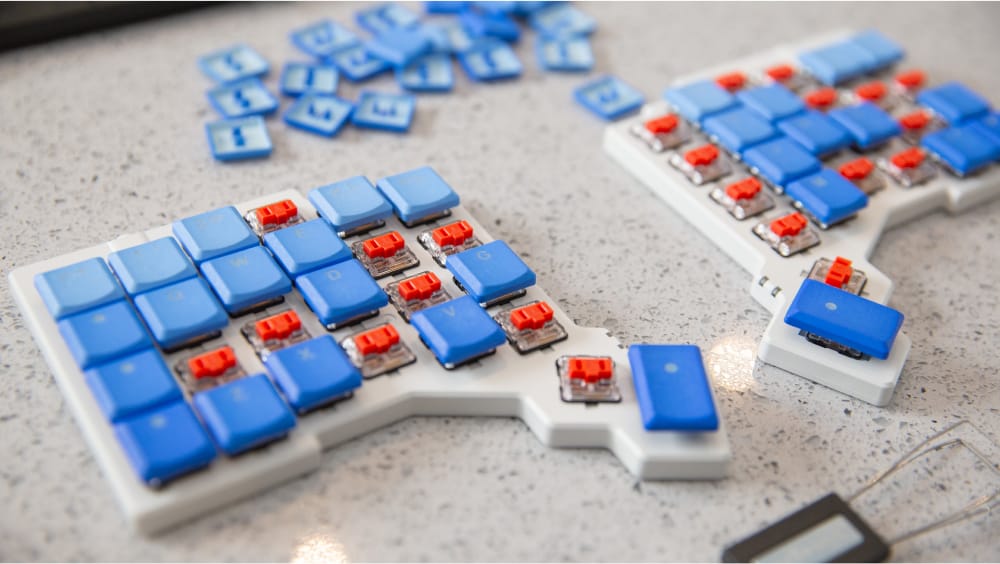
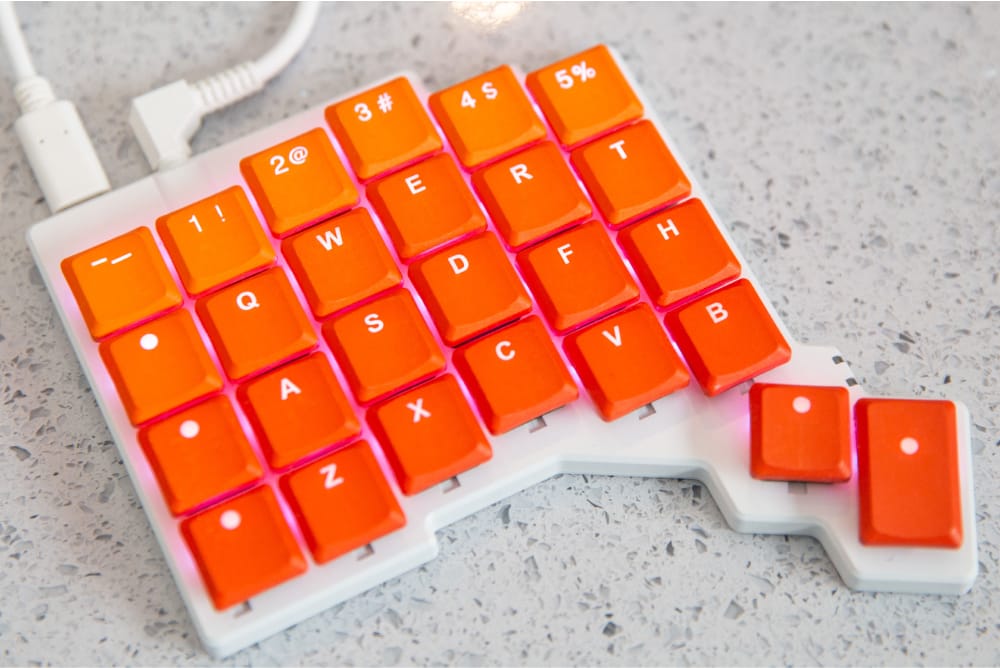
If you want to try a gradient set, here’s the times I used, with a concentration of 2 litres of water to 12ml of dye.
I did half a row at a time (6 keycaps), except for the bottom row of 4 (the thumb keys).
- Top row (lightest): 1 minute
- Row 2: 2 minutes
- Row 3: 3 minutes
- Row 4: 4 minutes
- Bottom row (darkest): 5 minutes
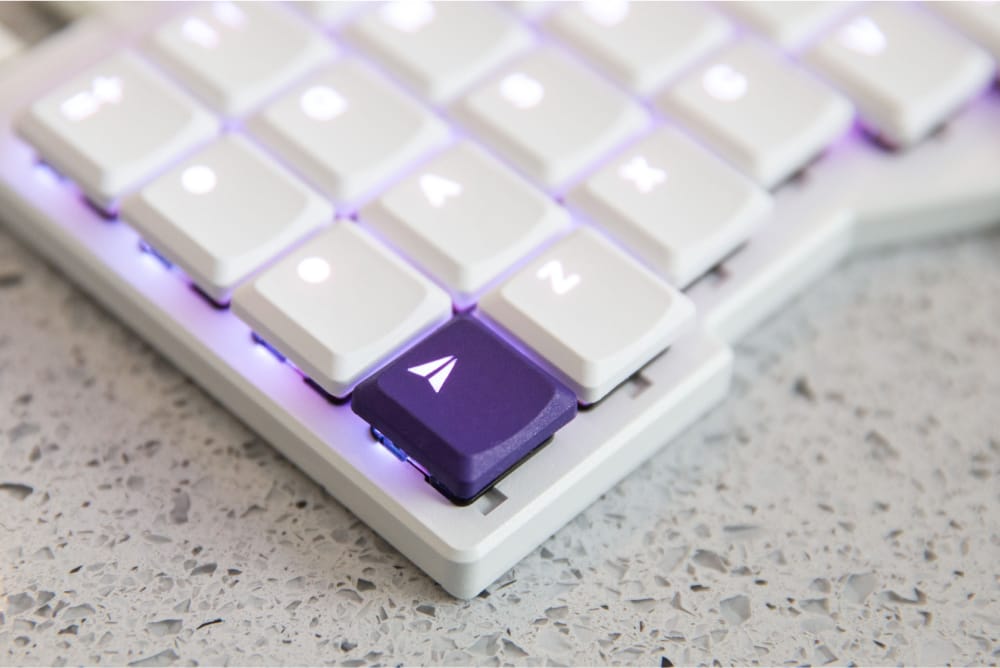
I used this same method and times again for an orange gradient set, and then a few accent keycaps in darker purple (6 minutes).
Keep in mind
Stuff you should know before you get started:
- Like I wrote above, this will void your warranty on the keycaps. Unfortunately, we can't cover damage due to modding. Still totally worth it, if you ask me.
- Consider getting a cheap set of PBT keycaps to practice first (Tai-Hao makes small sets with the same profile as Voyager keycaps). It takes a couple tries to hone in your temperature and technique. Don’t waste a really nice set of keycaps on your first go.
- Depending on the color you use, you may occlude the double-shot lighting. Interestingly enough, the dye didn’t seem to affect it at all for me (check out the shine-through images below!), but with a darker color you may in theory get a tint on your LED lighting.
- This will not work for ABS keycaps. The temperature you need to maintain is too high for this type of plastic, and the keycaps will warp or melt. You need PBT (all of our keycaps are made of PBT, except for the ones for the non-backlit ErgoDox EZ models).
- The dye will stain many surfaces, even when diluted. Put down some paper or a rag to protect any surfaces, and immediately wipe down any spills to prevent stains.
Tips and tricks
I did many test runs to come up with the procedure I shared above. A few things I learnt:
Maintain a consistent temperature. I kept mine between 93° C (200° F) and 96° C (205° F). Don’t go to boiling, this caused bubbles and an uneven color for me. You just need a simple candy thermometer for this, no need for a fancy sous vide setup.
The first few runs I did I was getting these darker marks around the edge of the keycap. I thought this was because of the thickness of the plastic, and tested higher concentrations for less time, not stirring, lower temperatures — and in the end what fixed it was just using a regular tablespoon instead of a serving spoon to stir.
The longer you “cook” the keycaps, the darker they're going to get. Darker runs are also much more forgiving, and I would suggest starting with the darker keycaps if you’re doing a gradient set or using the same pot to do a lighter and darker set.
Smaller batches of keycaps seemed to work better for me: There were less scratches and bubbling. Five or six keycaps at a time was ideal. This does make it tricky if you’re doing a gradient set though, because then you’re splitting one color into two cooks. Just be careful with your timer and temperature and you should match the color easily.
You may be tempted to double the amount of water and dye so you can fit more keycaps in. I would advise against this: The keycaps will still settle and collect at the bottom of your sieve, and they easily scratch against each other.
Stir your keycaps as you drop them in. If air bubbles cling to the keycap, you'll end up with a bubble pattern on the keycap. It actually looks pretty cool, but not if you’re going for a solid color. I stirred throughout the cook as well.
Rit Dyemore suggests adding a bit of dish soap to your dye, but from looking online and testing myself, I didn’t see a difference when not using any. In my opinion you can skip this.
Don’t expect perfection — think "artisan" not "factory". There are still tiny variations on even my best set of keycaps. You can’t see them unless you really look for them, but if this is going to bother you, just get a set of colored keycaps.
This is a very fun DIY project. It takes a little practice and patience, but you can get such a nice result. It’s not time intensive, the process is very rewarding, and you can get super creative.
Share your creations
If you’re feeling inspired and end up trying this, please email us photos! We’d love to see what you come up with :) [email protected].
Thank you for reading!

