Installing O-rings is one of the simplest and most risk-free keyboard mods out there. O-rings are cheap, super easy to install and uninstall, and there's lots of variety to choose from.
There are two main reasons to install o-rings:
- You want to make your keyboard quieter
- You want to reduce the travel of the switches
You can get o-rings that accomplish both these things, or you can focus more on one or the other depending on the specifications of the o-rings. There are two specs to care about: thickness and hardness.
Thickness is typically measured in millimeters while hardness is measured by a durometer in "A", but "A" is not an actual unit. Hardness is relative to other materials measured, so there's not exactly an objective measurement for what 30A or 70A is like. Measuring hardness can get pretty complicated, but o-rings are nice and simple because they're all made of very similar materials, have similar shapes, etc., so they're easily comparable without going super deep into hardness scales.

For the sake of this guide, I'm using MK Pro's sample pack of o-rings, but there are tons of different o-rings out there, so feel free to shop around. This sample pack just provided a great variety to showcase what things to look for. Each color of o-ring represents a different hardness, and from top to bottom, each ring measures 3mm, 2.5mm, 2mm, and 1.5mm thick. Purple is the hardest set at 70A, then 60A, 50A, 40A, and finally the yellow rings are 30A.
How to install o-rings
Although o-rings primarily change how switches feel, they actually get installed onto keycaps. The procedure is very simple. Just remove the keycap, push the o-ring onto the keycap's stem all the way down, and push the keycap back onto the switch. When you put the keycap back on, it's a good idea to push a little harder than you might otherwise, to make sure the o-ring is as deep into the cap as it can be.
The key puller tool that comes with all of our boards is actually great for installing o-rings as well. I like to use the keycap puller end to roll the o-rings down the keycap stem.

To remove an o-ring, all you need to do is roll it back up the keycap stem. Again, our key puller tool is helpful here. The switch pulling end is perfect to hook onto an o-ring and gently pull it up.

Stacking o-rings
Another thing you can do is get two or more thinner o-rings and stack them on top of each other rather than use one thicker o-ring.

The main reason you might want to do this is if you're not quite sure exactly what you're looking for out of o-rings. Stacking o-rings is more flexible because you can always remove or add an o-ring, but you can't really make a thicker o-ring thinner. Keep in mind that two 1.5mm thick o-rings will actually compress slightly more than a 3mm o-ring even though they add up to the same thickness on paper. In the image below, the left key is the stack of two o-rings and the right key is one thick o-ring.

This means that, in theory, you can get away with several thin o-rings on a switch for a huge reduction in travel. Here's the setup from the last image but with a stack of two 2mm o-rings. You can see the bottom-out point of the key is slightly higher than the 3mm ring now.

Just be careful because when you get to a total thickness beyond 3mm, you may find it hard to make your switches register consistently unless you have a switch with a high actuation point, such as our Speed Switches (Kailh Silver and the like).
O-ring compatibility
You don't have too much to worry about when it comes to compatibility with o-rings, but do note that they will not work with Kailh Box switches or similar designs.

Any kind of enclosed switch stem prevents the o-ring and keycap from going down all the way, giving you a much looser and higher keycap and defeating the purpose of o-rings.
Installing o-rings on silent switches is also worth mentioning. Because silent switches already use internal sound dampening, o-rings don't do anything to further reduce the sound these switches make. The only benefit of installing o-rings on silent switches is reducing their travel, but if noise is your only concern, o-rings won't help.
O-rings with Choc switches
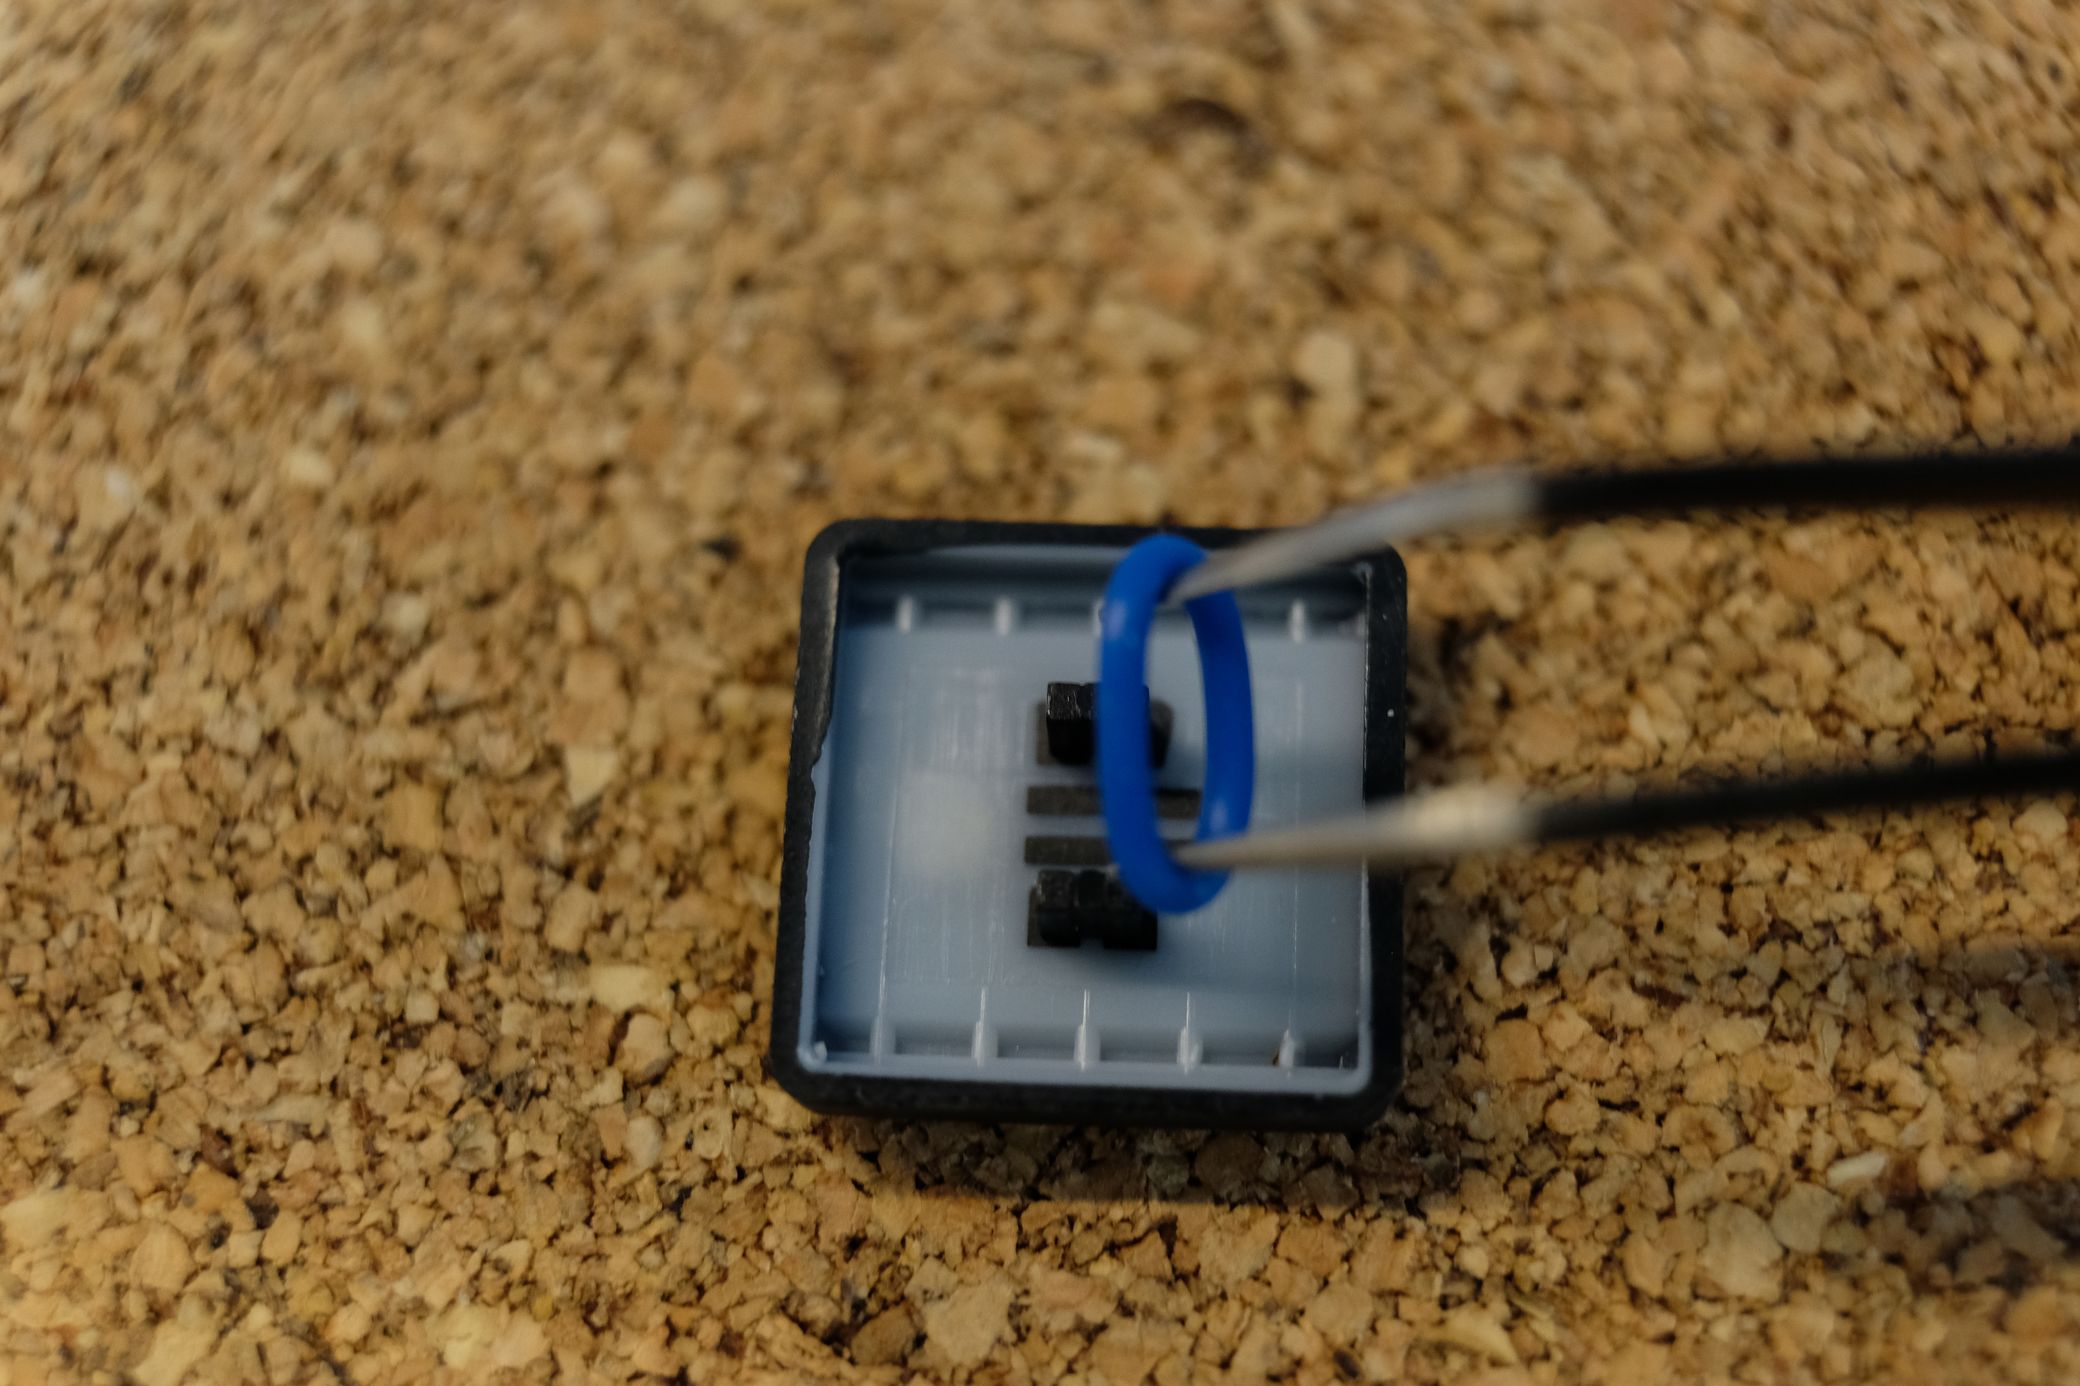
It is also possible to use o-rings with Choc switches, but the installation process is slightly different. A pair of tweezers helps a lot here. The o-ring needs to be stretched around both pegs of the Choc switch.
O-rings do make a slight difference when installed on a Choc switch. It makes them a good amount quieter, but not silent. If low noise is your number-one priority, I'd look at the Ambient line of Choc switches. They're even more quiet than o-ring-modded switches right out of the box without any need to spend time installing o-rings

If you do decide to go the o-ring route, try 1.5mm o-rings or thinner with Choc switches. There isn't that much extra travel to cut down on. Choc stems are also somewhat fragile, so be careful while installing them.
What o-rings to get
Now the fun part: what is the best o-ring?
Well, like most things, there is no objective best. It depends on what you're looking for.
Here's a little comparison of the differences in key travel with o-ring thickness. It goes from thickest on the left to thinnest and finally no o-ring all the way on the right.

And the same test but this time with the various hardnesses and the same thickness (3mm). The hardest o-ring is on the left while the softest is on the right. The final image is no o-ring at all.

As you can see, the thickness of the o-rings creates a noticeable difference in height. The thickest o-rings reduced key travel by quite a lot while the thinnest o-rings were almost undetectable — both good depending on what you're looking for.
Differences in hardness are much less noticeable to the naked eye, but you'll still feel them. The hardness ratings felt more like a binary choice to me: the o-rings either felt soft or hard. The degree of hardness was pretty difficult to notice while typing. 30A-40A felt pretty soft while 50A and above felt hard. This is relevant for whether or not you like to bottom out your keys. Bottoming out a switch with a hard o-ring feels nearly the same as bottoming out a default switch, but it's easier to bottom out a switch with an o-ring.
Using o-rings to reduce key travel
A somewhat common question we get is: I'm coming from a laptop keyboard. What keys are like that?
The honest answer is MX-style keys just aren't really like that. They're a totally different design and mechanism, so it's like comparing apples to oranges. O-rings do make things a bit closer, though.
Installing o-rings won't reduce the physical key height, which is important to keep in mind, but it will change how far you can push the keys down. O-rings work because most MX-switches register as pressed before they are pushed all the way down (the exact actuation point varies), so limiting the total key travel by a bit makes no difference to the switch. This makes MX switches feel more like a laptop-style keyboard, even though they will still be visually tall keys.
If you're interested in this, I would go for a 3mm o-ring, or you could try stacking o-rings. Hardness is more personal preference. I suggest something medium to soft, 60A or less, since you'll probably be bottoming out the switches more, and you'll really start to feel this with harder o-rings. Switches with high actuation points are also helpful. Kailh Silvers, Coppers, and Golds are all Speed switches with high actuation points, so you have more freedom to reduce their travel without affecting how they work.
Using o-rings to reduce noise
If you're mainly interested in making your switches quieter, o-rings will help, but they do have some drawbacks for this case. You'll want a soft, thick o-ring for as much noise reduction as possible. This provides the most cushion and dampening so your switch won't rattle or clack as much. However, this will change the feel of your keys quite a bit. Soft, thick o-rings feel mushier when you press them. Personally, I didn't really mind my 30A 3mm sample (the thickest and softest o-rings I have on hand), but everyone is different. I'd recommend picking up a few different types of o-rings or a sample pack like I did and trying them out for yourself.
Harder and thinner o-rings do help reduce noise somewhat, but it's a steep drop off in effectiveness as you move down the specs. I found switches with 2mm o-rings to be noticeably louder than switches with 3mm o-rings of the same hardness installed. Likewise, anything above 30A hardness was much less effective at reducing noise.
If you just want a little reduction in noise without changing the feel of the keys too much, I would look for something around the 40A and 2-2.5mm thickness range, but keep in mind this middle-ground will not completely change the sound of your keys. It will be a subtle change.
Lastly, a note on clicky, tactile, and linear switches when combined with o-rings.
- Clicky switches are easy: o-rings make zero difference in sound. The sound of clicky switches comes from an internal click bar in each switch, so o-rings don't affect this sound at all.
- Tactile switches are trickier. The sound they make isn't totally unaffected by o-rings, but the difference is very small. Even using the softest and thickest o-ring I have, a Cherry MX Brown sounded nearly the same to my ears. This does make some sense, though. A satisfyingly tactile yet quiet switch is very hard to pull off because those two features kind of work against each other. The engineering is much more complicated, so purpose-built silent tactile switches are really the way to go if this is the kind of switch you want. You can always get more specialized switches and simply install them on your ZSA board because all of our keyboards are hot-swappable.
- Linear switches have the most noticeable reduction in sound when installing o-rings. The majority of the sound of linear switches comes from the stem and keycap impacting the lower parts of the switch, and o-rings address this perfectly.
Some combinations to try
Here are some switch and o-ring combos that you might want to try out if you're not sure where to start.
- It's not uncommon these days for people to be heading back into the office for at least a few days a week. If you want to bring your board but you don't want to annoy your coworkers, a thick, soft o-ring should make linear and tactile switches make a little less of a racket. Depending on your work environment, it might not be a perfect solution, but o-rings are at least a pretty cheap option to try out.
- For something as close to laptop keys as you can get, Kailh Coppers with a medium spec o-ring (2.5mm and 40A, for example) is it. This combination will still be a bit louder, but you'll have the shorter travel and tactility of the best laptop boards.
- To go even one step further, if you don't care about noise at all, but you want a very snappy yet short traveling key, MX Blues or Kailh Golds with thick o-rings are worth a try. Hardness doesn't matter too much here since the clicky-switch snap will be more noticeable than anything else, but around 50-60A should be good.
- If you want an easy-to-press switch with as short of travel as possible, Kailh Silvers with a thick o-ring or two thinner o-rings is a great way to go. This combo is nice and quiet and your fingers can just glide across the keys. Just be careful if you tend to rest your fingers heavily on keys since you might get some accidental actuations.
Happy typing!