If you’re sensitive to how your switches sound, the Choc Reds and Browns can be tricky. They are decently quiet switches under most circumstances, but inside, they have a metal stabilizer bar that can rattle.
Some people find this unpleasant. You can always swap out a different switch (like the Pro Reds which do not have this bar), of course, but if you like using your Reds or Browns, it’s also very easy to remove the stabilizers yourself.
Opening a Choc switch
You might see specialized switch-opening tools around the internet, and they do work, but if you’re only doing this to one set of switches, I don’t think you need one. A basic pair of tweezers works perfectly fine. Here’s a nice video guide I’ve linked to before on opening MX-style switches without a switch opener:
The process for opening Choc switches is nearly identical. There are two tabs on each side of the switch.
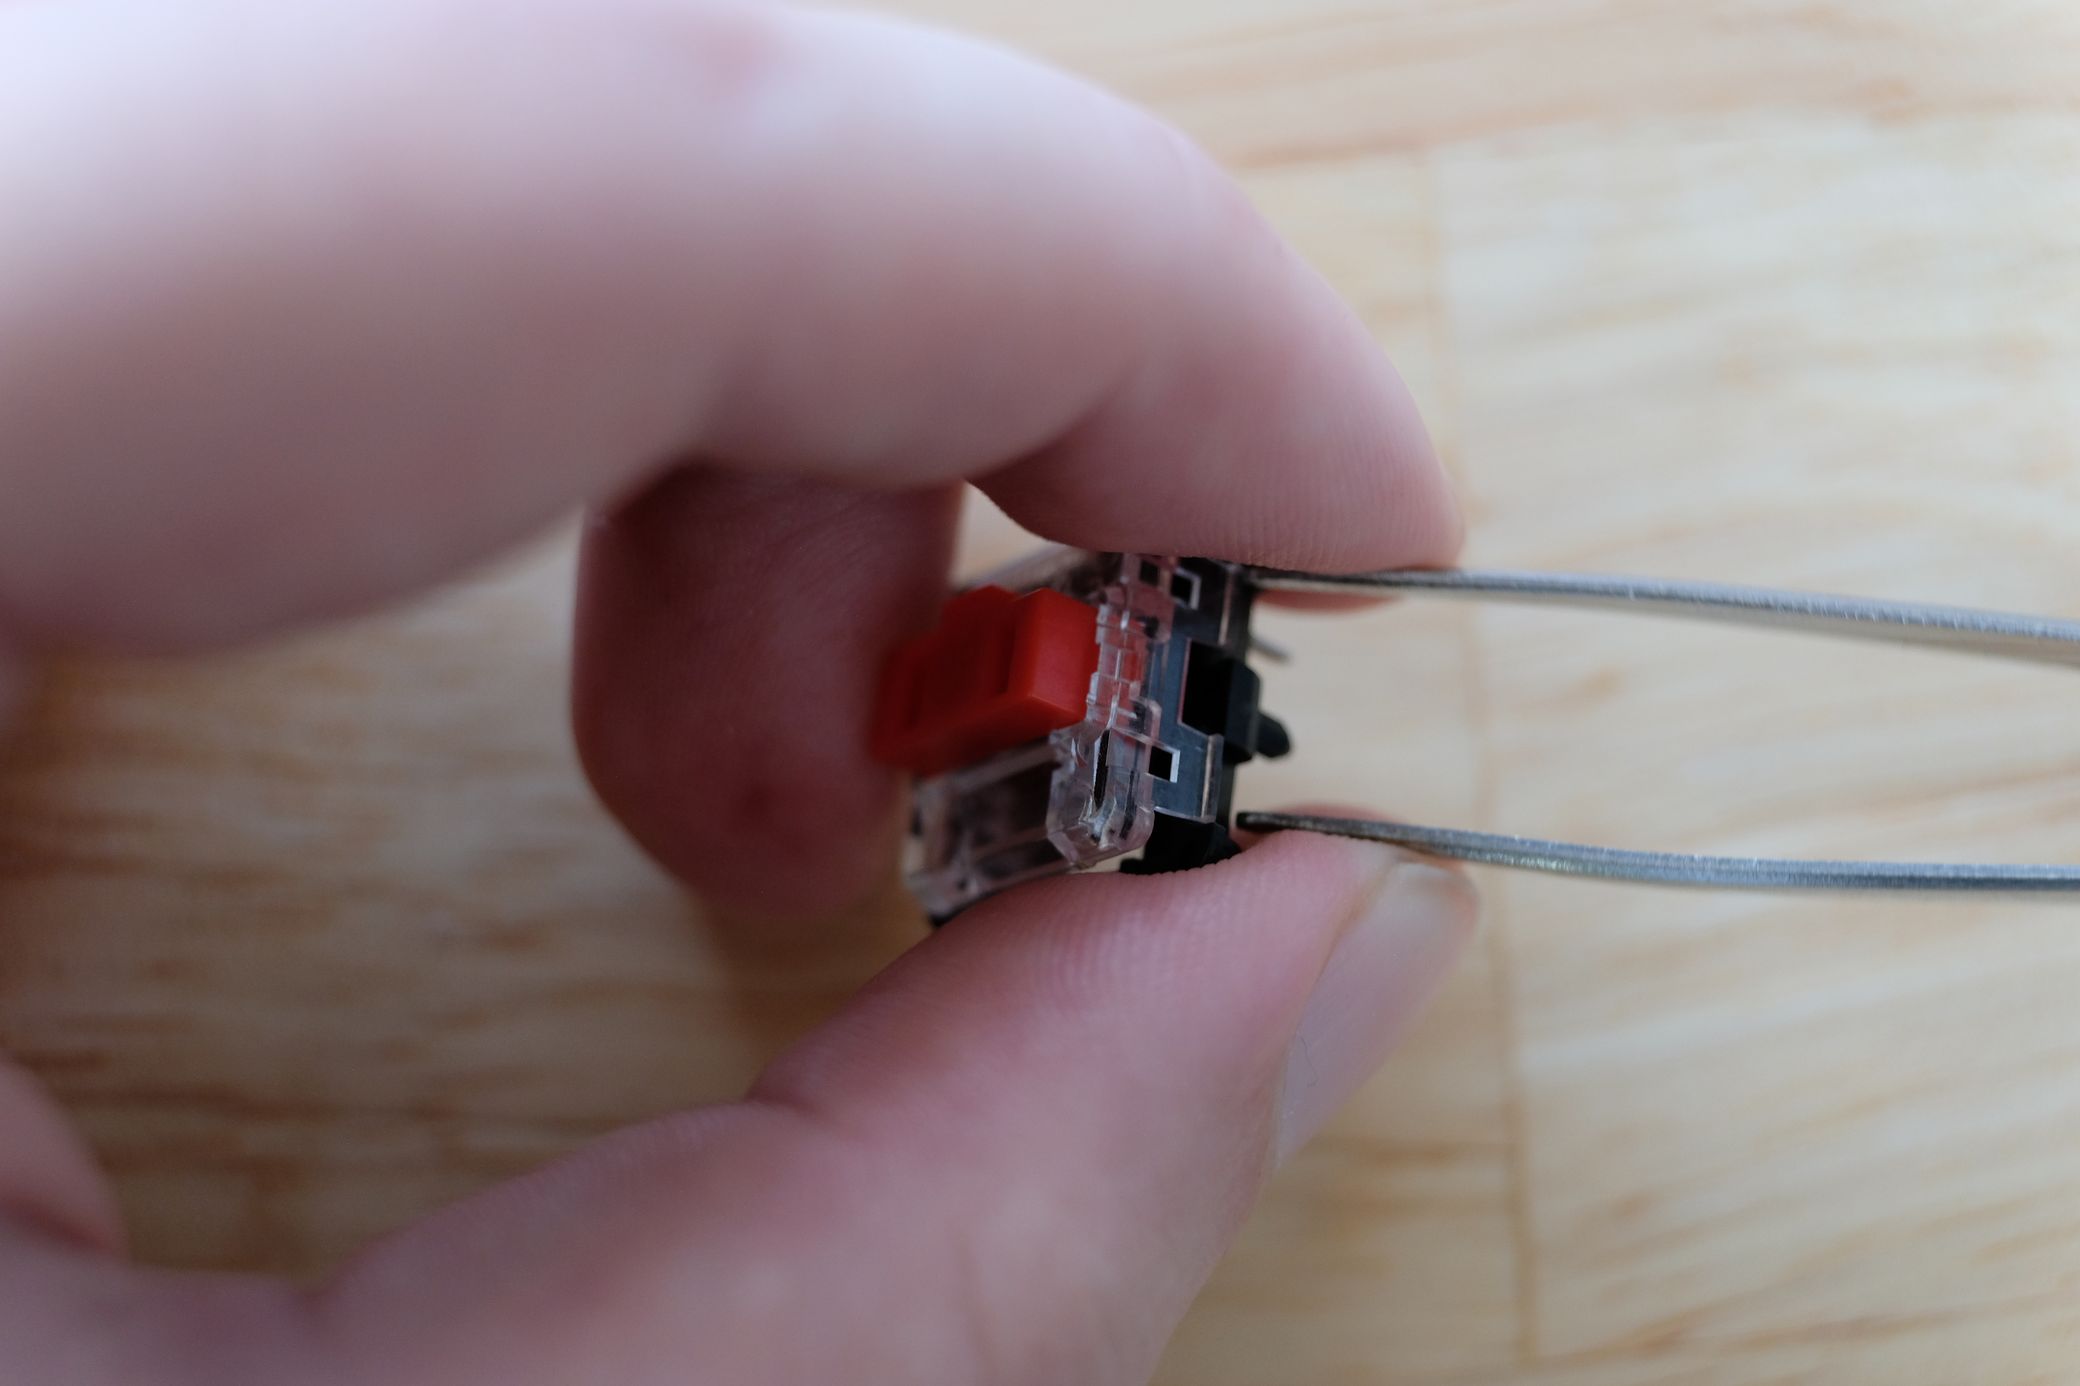
You’ll want to get under these and push up. You don’t need too much force. The top of the switch will come up, then squeeze the switch to either get your fingernail or the pads of your fingers between the top and bottom housing. This just makes sure it doesn’t close up on the side you just opened. Then, unhook the clips on the other side. Be careful of the spring. It’s still going to be under some tension and it will want to fly out. Here’s a video of me doing all this with my absolute cheapest pair of tweezers so show you really don’t need anything special.
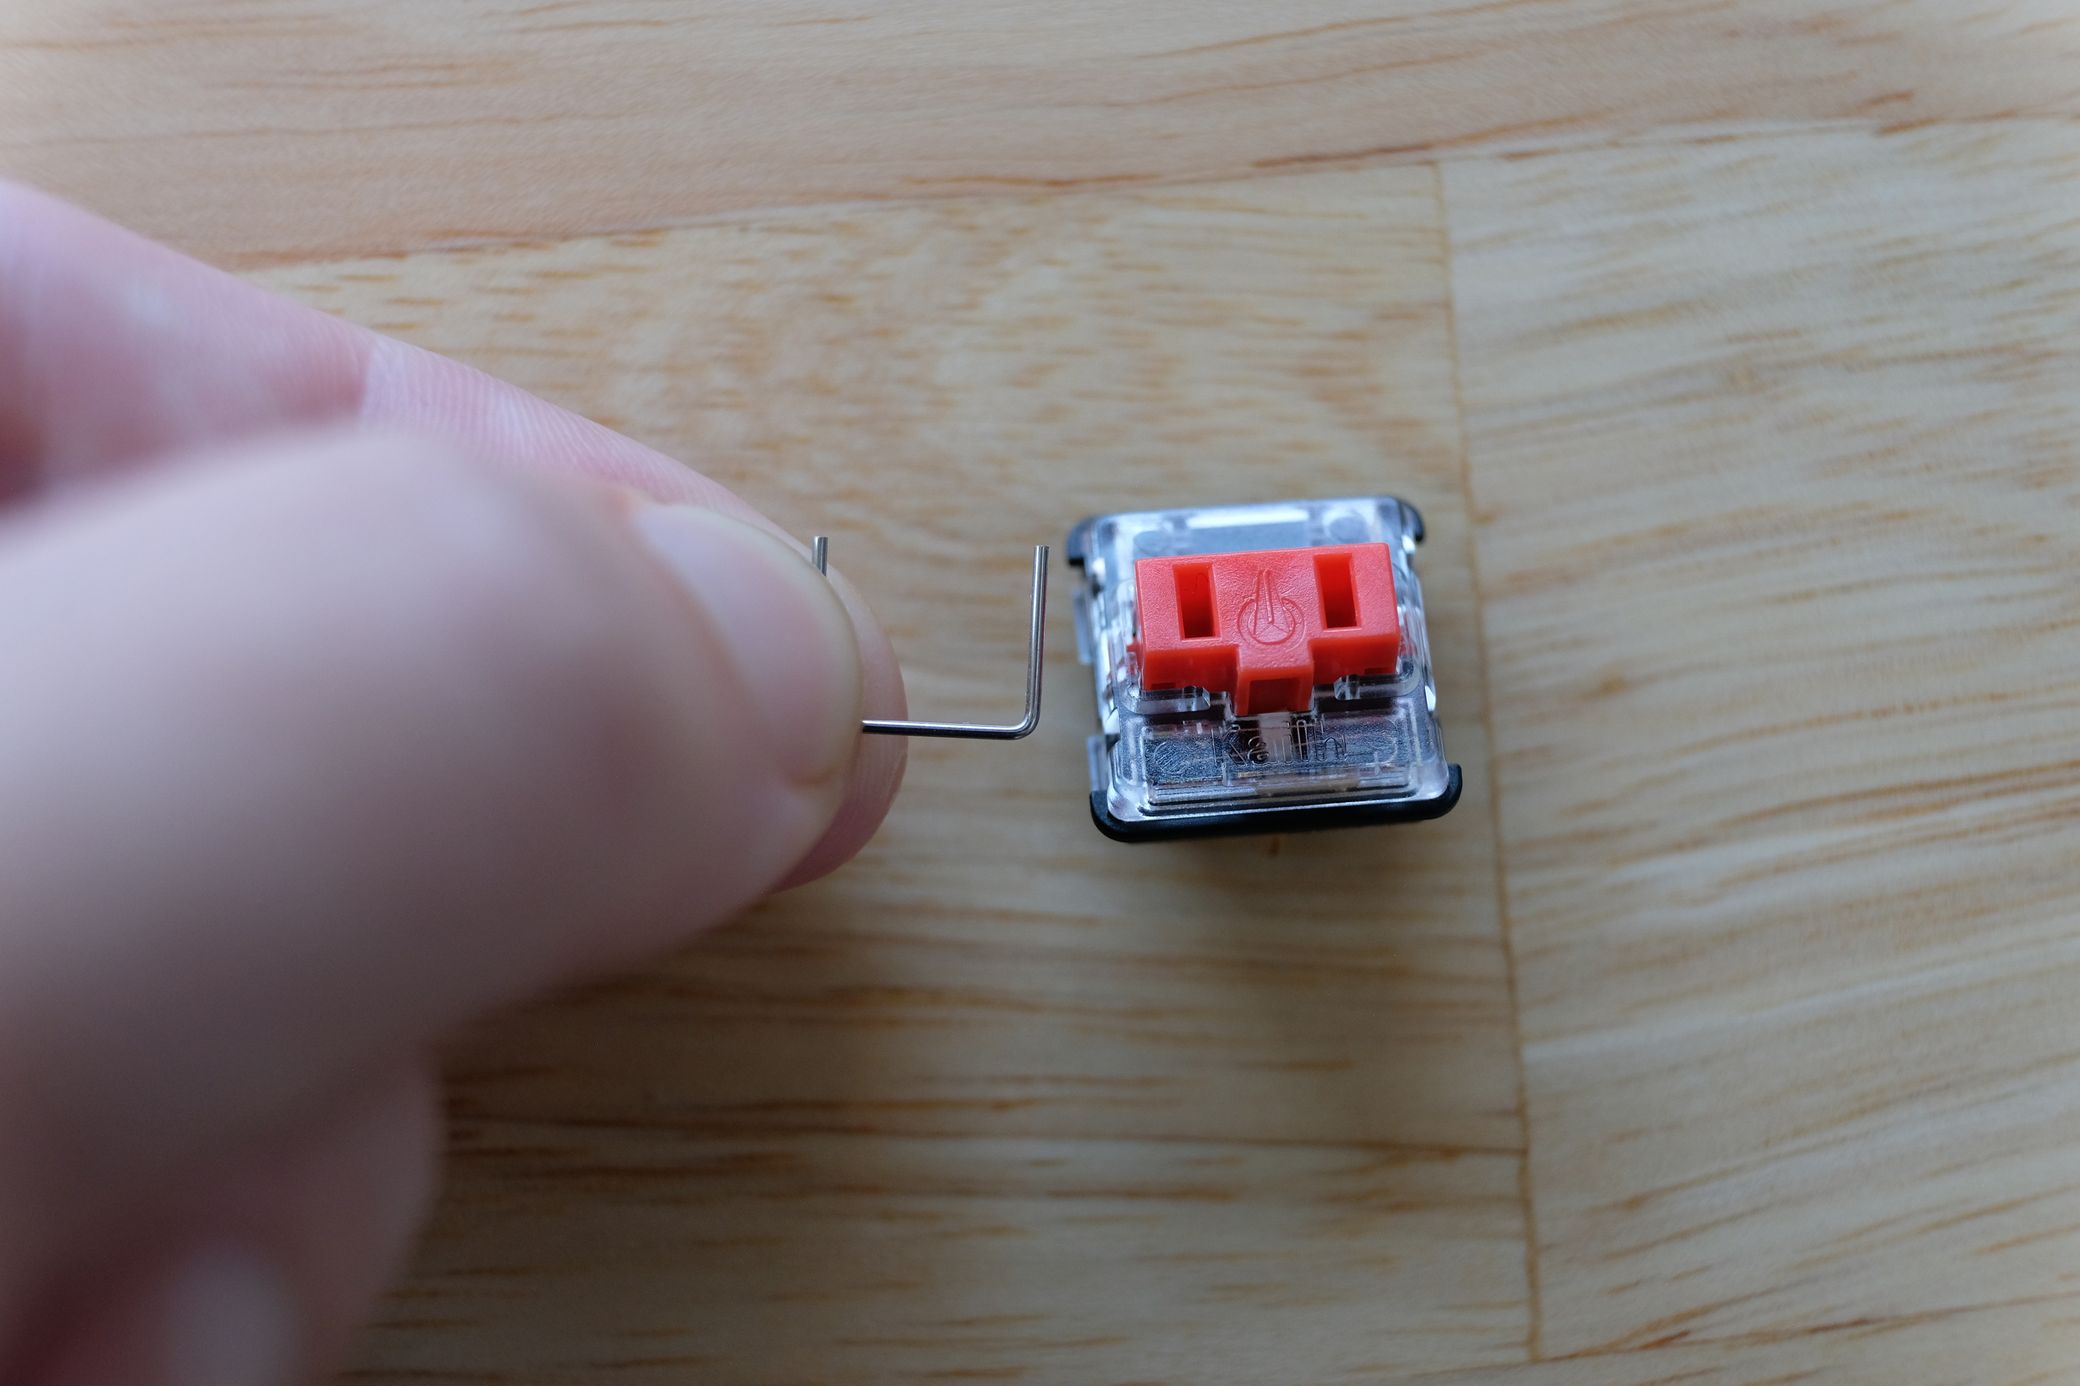
Disassembling a Choc switch, 37 secondsOnce you open the switch, the stabilizer is easy to pull out. You can grab it with the tweezers or push the stem out through the top housing and the stabilizer will come with it.
If you’re a keyboard sound connoisseur, this is also a good chance to lube your switch springs.
Reassembling a Choc switch
The reassembly is the same process in reverse, just without the stabilizer. Put the spring on the peg in the lower housing, reorient the stem in the top housing (the shape makes it so you can’t get this wrong), and clip everything together. Be careful with the metal pins on the bottom housing to avoid bending them. If they do get bent, you can usually bend them back, but installing them bent won’t work or will lead to weird behavior.
Reassembling a Choc switch, 32 secondsThe only tricky part is it can be difficult to keep both the spring and the stem in place while you push the halves together. Going horizontal like I do in the above video helps a lot.
Does anything bad happen without the stabilizer?
If you compare MX-style switches and Choc switches, you’ll see an immediate difference: Choc switch stems (the part that moves up and down when you press the switch) are much wider.
Because the stems are wider, in theory, they’re easier to hit off-axis, i.e. hitting a Choc switch at the extreme edge and pushing it down at an awkward angle. In practice though, this is not really a problem. Even though Choc switch stems are wider, they are still quite small, and the housings of Choc switches are high enough not to catch on the sides of the stems.
I don’t think Kailh has ever explicitly confirmed this, but I suspect it was this theoretical issue that made them add internal stabilizer bars to the first Choc switches: Choc Reds and Choc Browns. More recent Choc switches like the Pro Reds do not have these bars. I haven’t done thorough enough testing to say whether the internal stabilizer bars ever make a difference — there may be some niche cases where they help — but I can say in most cases, they do not make much a difference in stability. You shouldn’t run into any major issues if you do want to give this a try.
Happy modding!