Do you enjoy the convenience of Oryx but wish you had easy access to even more powerful QMK features? If you're comfortable with code, I've got just the GitHub workflow for you. It lets you enjoy the best of both worlds — here's how.
Oryx is a powerful tool for creating and customizing complex keyboard layouts with an easy-to-use graphical interface. For more than 10 months, it perfectly suited my needs, allowing me to craft intricate configurations with ease. However, as I delved deeper into the world of minimalist 34-key layouts and home row mods, I started to encounter limitations. Some of the advanced features I wanted—like Achordion and Key Overrides—couldn't be configured through Oryx's UI alone and required direct customization in QMK firmware.
While Oryx does allow you to download your layout's source code and modify it manually in QMK, the downside is that once you edit the code, you lose the ability to continue using Oryx's graphical editor. I loved the flexibility of QMK but did not want to abandon the convenience and visual layout editing that Oryx provides.
That's where the idea to create a tool that bridged the gap between Oryx and QMK came in. I wanted to allow users the ability to use Oryx's graphical interface while still taking advantage of QMK's full feature set. In this article, I'll walk you through the entire process—how to install the tool, customize your layout with advanced QMK features, and automate firmware builds with GitHub Actions, all while preserving the ability to tweak layouts through Oryx. But before we dive into the technical steps, let me show you some of the cool features you can unlock by modifying QMK code directly.
Editor's note: Please refer to the QMK docs and issues in the GitHub repo above if you're having trouble with any syntax. QMK is prone to change over time, so the examples here may go out of date by the time you're looking at them.
The Magic of QMK: Features You Can Only Access Through Code
Here are some of my favorite features that are only available by editing the QMK code:
- Key Overrides: Key overrides allow you to customize modifier-key combinations to send a different combination or perform custom actions. For example, you can send
Deletewhen pressingShift+Backspace, or adjustBrightness Up/DownwithCtrl+Volume Up/Down. - Achordion: Achordion modifies when tap-hold keys are considered held vs. tapped, depending on the next key press. This is especially useful for home row mod users.
- Send Unlimited Length Macros: Oryx limits macros to 5 characters for legal reasons, but by editing the code, you can remove that restriction (though, please avoid storing passwords in macros). Editor's note: Just to reiterate this point, the same issues of privacy apply even with this custom QMK method. If you store a password or any other sensitive information as a macro, it will be accessible by anyone. Seriously, please do not use QMK macros for anything you would not want others to see.
- Autocorrect: Automatically correct typing errors as you go.
- Repeat Key: The Repeat Key performs the action of the last key you pressed.
And there's so much more to explore in QMK's features list here.
Editor's note: There are indeed a bunch of cool QMK features to try out. Please keep in mind though that we at ZSA deliberately do not implement some features in Oryx for various reasons, and we won't be able to help you troubleshoot them. If you have a question about a QMK feature that Oryx does not have, please refer to QMK's own support resources.
We like this tool so much that we made a video of the setup process. This is a brief example that shows adding Achordion to a layout. Check it out if you'd like to see a condensed version of the whole process before diving in:
How to Install the Tool
The tool is a GitHub Action that is going to build the firmware with both modifications made in Oryx and directly in the code. It takes your Oryx layout and changes you make in your GitHub repository, then combines them into a single file.
1. Fork the GitHub repository
The first step is to fork this repository on GitHub (you will need a GitHub account to proceed). You can choose any repository name you like; I personally named mine my-zsa-voyager-keymap. Just make sure to uncheck the "Copy the main branch only" option during the forking process.

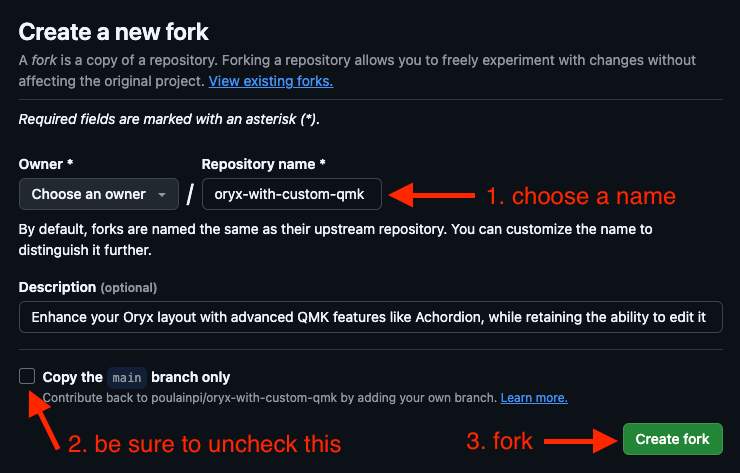
The repository contains two branches. The main branch is where you will make your QMK code modifications. The Oryx branch is solely for tracking changes from Oryx and will be updated automatically by the workflow. You should never commit anything directly to this branch.
2. Initialize the Repository
At this point, the repository will be empty, so you will need to add your layout sources. To do this, run the workflow for the first time.
-
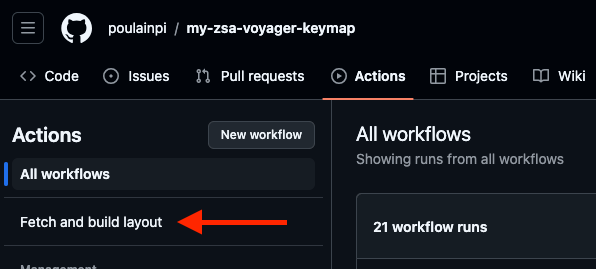
Go to the Actions tab.

-
Click Fetch and build layout.
-
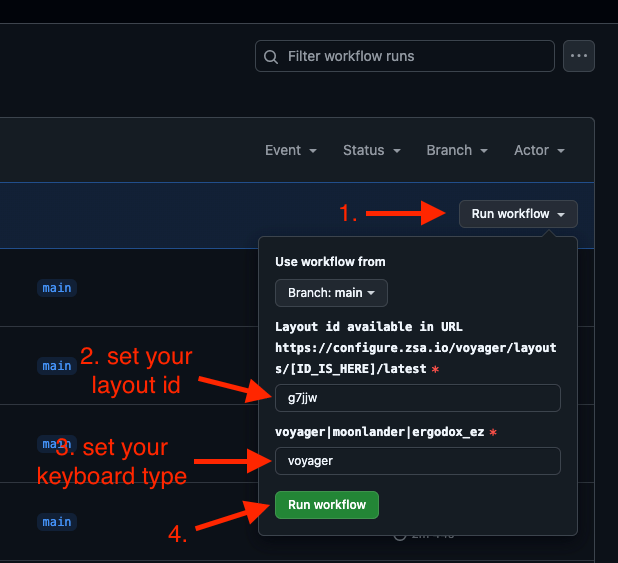
Click Run workflow, enter your layout ID and keyboard type, and then click Run workflow.
You can find your layout ID easily here: 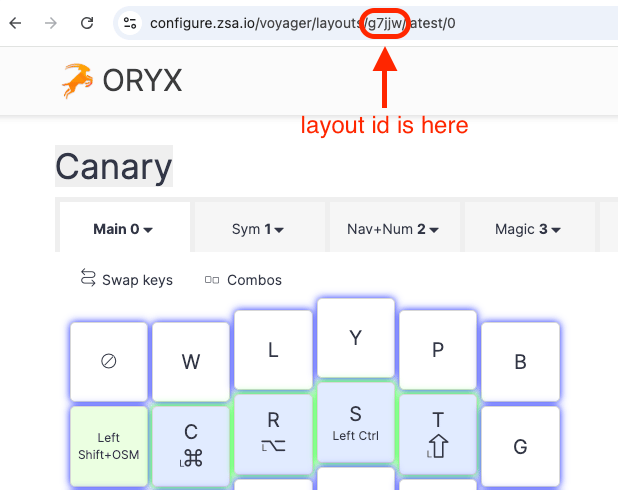
Note that your layout must be set to public in Oryx. You can update the default values later, so you won't need to input them again the next time you run the workflow.
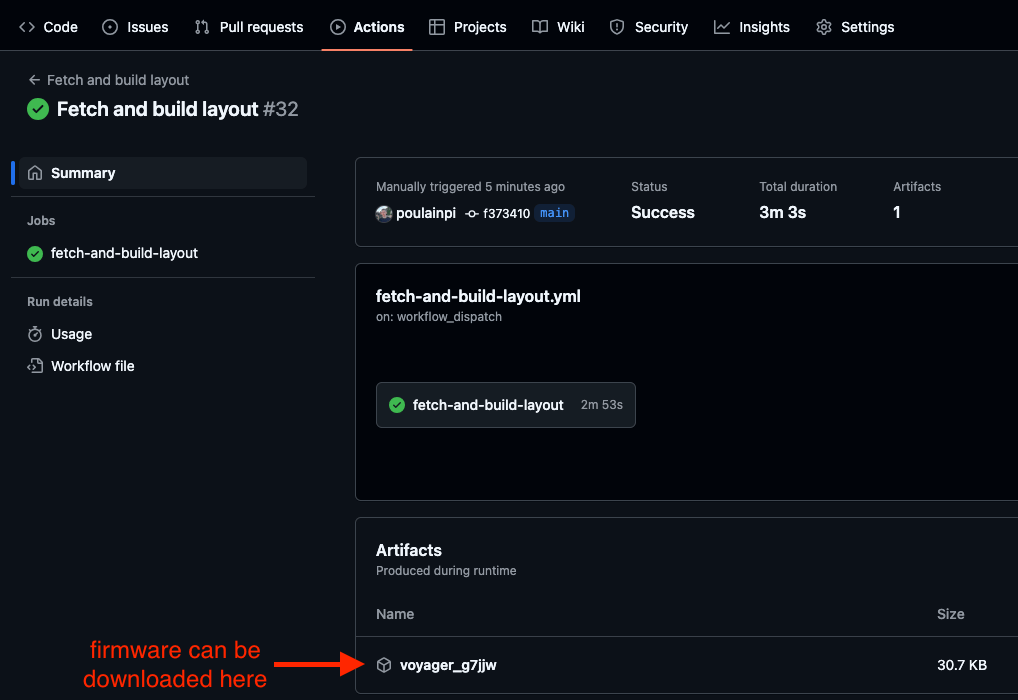
After the workflow finishes, the firmware will be available for download. For now, since you haven't made any code modifications, the firmware is identical to what you'd download directly from Oryx.
Additionally, your layout code will be initialized in the main branch of your repository.
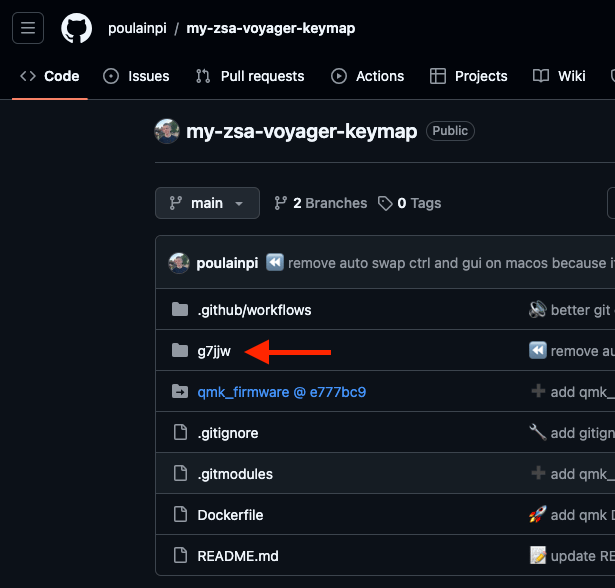
The folder now contains the source code of your Oryx layout. These are the files you will be editing to add new features to your layout.
Customizing the Layout with QMK Features
Now comes the exciting part: adding features to your layout that are only available by modifying the QMK code!
Begin by cloning the repository to your local machine:

Adding QMK features is quite straightforward, especially with the help of the excellent QMK documentation provided. For this tutorial, I'll show you how to implement a simple feature: sending Delete when pressing Shift + Backspace using Key Overrides. To do this, follow the steps outlined in the Key Overrides documentation. Let's dive into the code and make this customization!
First, open your fork in your preferred IDE. The files you'll be editing are located in the folder that matches your layout ID (for example, mine is named g7jjw).

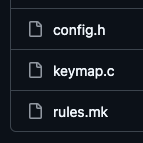
The folder contains three important files:
config.h: Fine-tunes your QMK firmware for your hardware and sets keyboard behavior options.rules.mk: Configures which features and modules are included in the firmware and sets how it will be compiled.keymap.c: The core file where key mappings, macros, and all keyboard behavior are defined. This is where most customizations happen.
Enabling Key Overrides
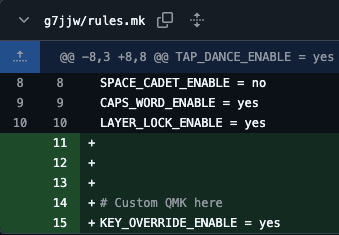
To add a custom Delete when pressing Shift + Backspace functionality, you first need to enable the Key Overrides feature by adding KEY_OVERRIDE_ENABLE = yes to the rules.mk file:
# Custom QMK here
KEY_OVERRIDE_ENABLE = yes
I suggest adding some blank lines between the Oryx code and your changes to avoid potential Git conflicts when merging future changes from Oryx.
Adding the Key Override
Next, in the keymap.c file, define your key override at the end of the file:
// Custom QMK here
const key_override_t delete_key_override =
    ko_make_basic(MOD_MASK_SHIFT, KC_BSPC, KC_DEL);

const key_override_t **key_overrides = (const key_override_t *[]){
	&delete_key_override,
	NULL
};
If you're using tap-and-hold functionality on the space key, the code above may not work directly. In such cases, you might need to adjust the override logic for compatibility with your tap-hold keys. Check out the QMK Keymap documentation for guidance on adapting the code to work with tap-hold keys.
Don't hesitate to dive deeper into the QMK docs if you want to implement more complex behaviors!
Pushing Changes to the Repository
After adding your custom feature, it's time to push the changes to the GitHub repository. Simply commit and push the changes from your local machine:
git add -A
git commit -m "Delete when pressing Shift + Backspace"
git push

Update the Default GitHub Action Parameters
To avoid having to re-enter your layout ID each time you run the workflow, update the default values.
In .github/workflows/fetch-and-build-layout.yml, modify the default layout_id and layout_geometry with your specific values:

Then, commit and push your changes:
git add -A
git commit -m "change default worflow input values"
git push
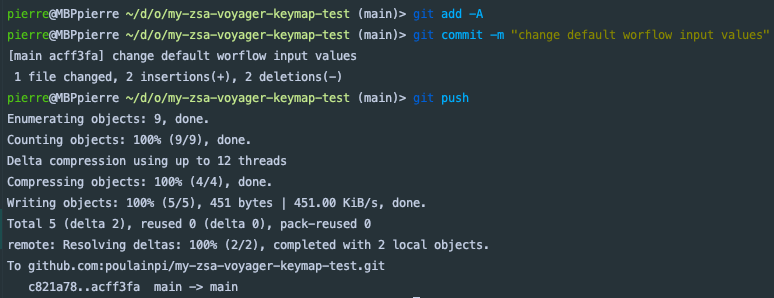
Now that the changes are live on GitHub, you can run the GitHub Action to build the firmware. Just relaunch the Action as you did previously. After a short wait, you will have a new firmware with your layout and you custom changes.
Flashing the Firmware
Once your GitHub Action workflow completes successfully, you're ready to download and flash your new firmware. In the workflow details page, you'll see a link to download the firmware:

Click to download the file. The firmware will be downloaded as a ZIP file, which you will need to extract:
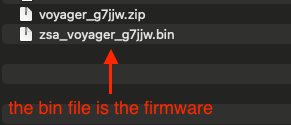
1. Installing Keymapp
To install the firmware, you can use ZSA's official tool, Keymapp. Head over to the download section and follow the installation instructions for your operating system:
2. Flashing the Firmware
Once Keymapp is installed, open the app and click the Flash button:
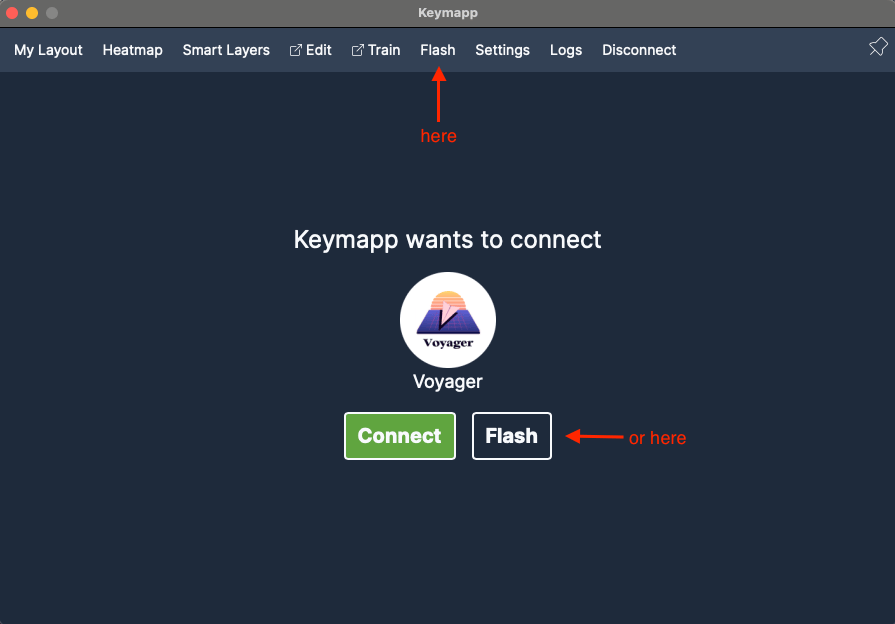
Select your extracted firmware file:
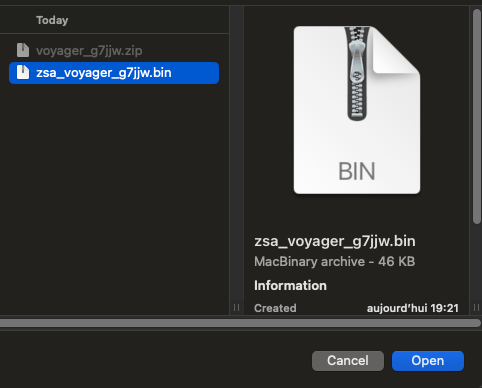
Finally, press the reset button on your keyboard to enter flash mode:
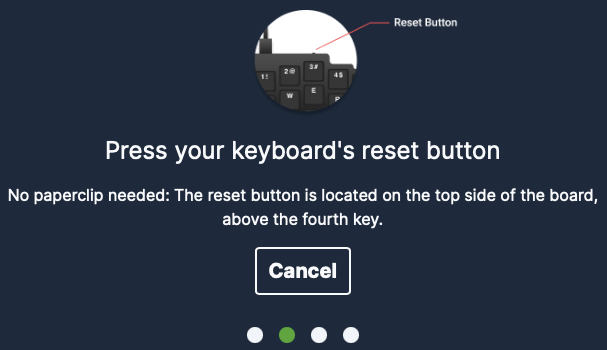
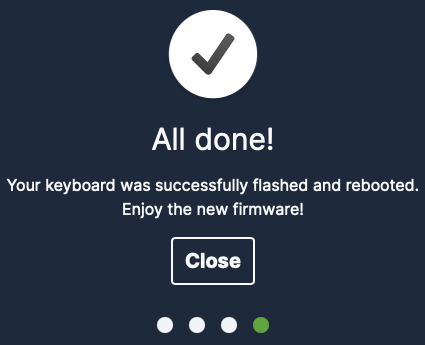
After the flashing process is complete, your Oryx layout with custom QMK code will be running on your keyboard.
Congratulations on customizing your keyboard with both Oryx and QMK!
Continue Using Oryx
Want to update your layout with Oryx without losing your added QMK code? No problem! Here's how to do it:
- Make your changes in Oryx.
- Once you're done, optionally describe the changes made, and click the Compile button:
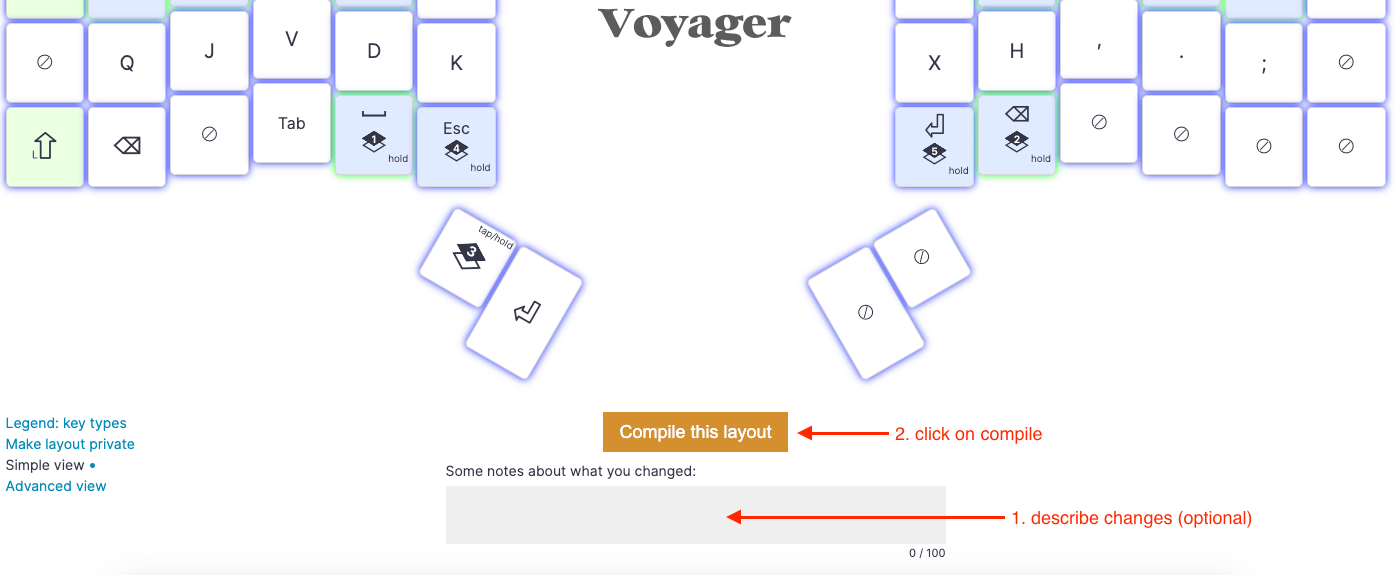
- Rerun the GitHub Action. The Oryx changes will be fetched and added to your Oryx branch, which will then be merged into your main branch:

- Download and flash the firmware just as you did in the previous part.
You can continue updating your layout through Oryx or by modifying the QMK code indefinitely!
Resolving Conflicts
You may encounter a workflow failure when Git cannot merge the Oryx changes from the oryx branch with the QMK code on the main branch. Editing files at the top or bottom poses little risk, but changes made in the middle of a file increase the likelihood of a Git conflict.
To illustrate this, I'll try to add the Repeat Key feature to a layout.
In your rules.mk, add:
REPEAT_KEY_ENABLE = yes
Next, in keymap.c, search for keymaps[] and replace a key with the QK_REPEAT_KEY:

Later, if you want to edit the key below the Repeat Key in Oryx:
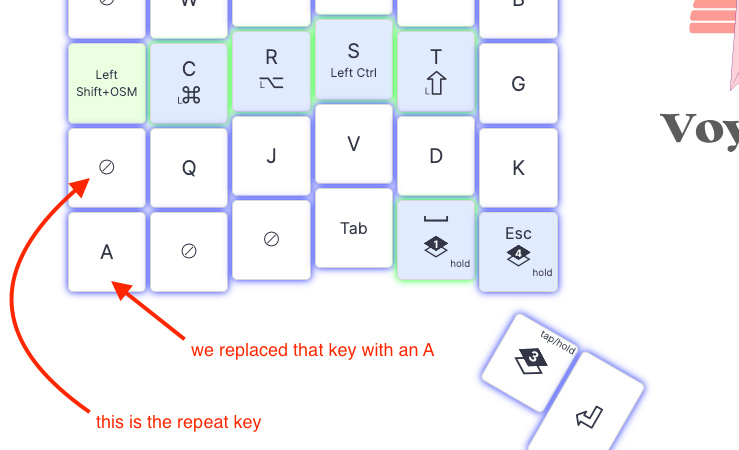
The Repeat Key appears blank here because Oryx is unaware of your code change.
Editor's note: You can use a custom label in Oryx even on a blank key to remind yourself what it does. Oryx still won't know how the key actually works, but it can be a helpful reminder for you so you don't overwrite it later.
After compiling and running the GitHub action, you will see a build error:

To fix this, you will need to merge the Oryx branch into the main branch manually. First, fetch the latest changes on the Oryx branch using:
git fetch
Then, merge the Oryx branch from origin:
git merge origin/oryx
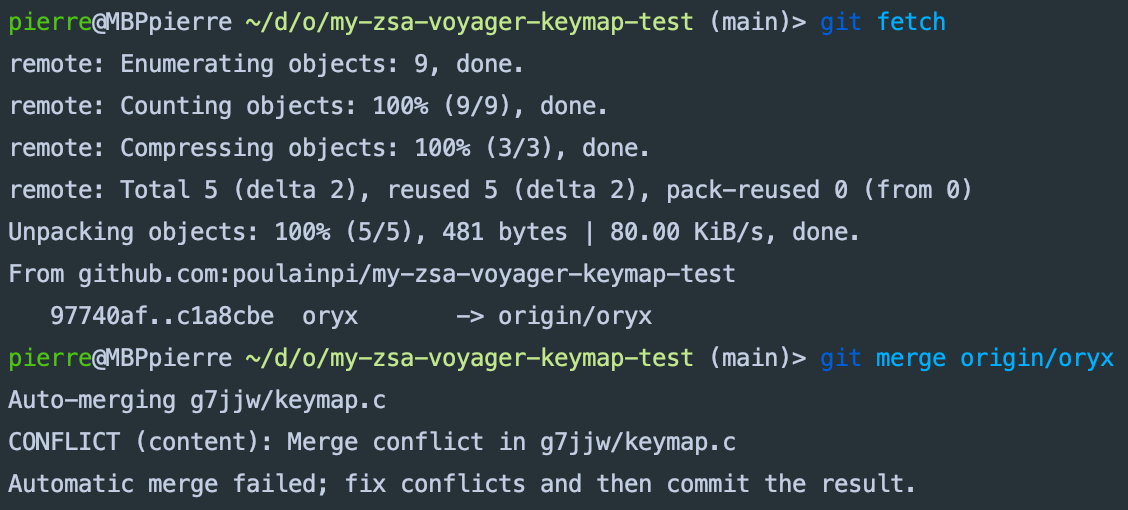
To resolve the conflict, use your preferred tool. Personally, I'm going to use IntelliJ:

Next, commit and push the resolution:
git add -A
git commit -m "solve merge conflict"
git push
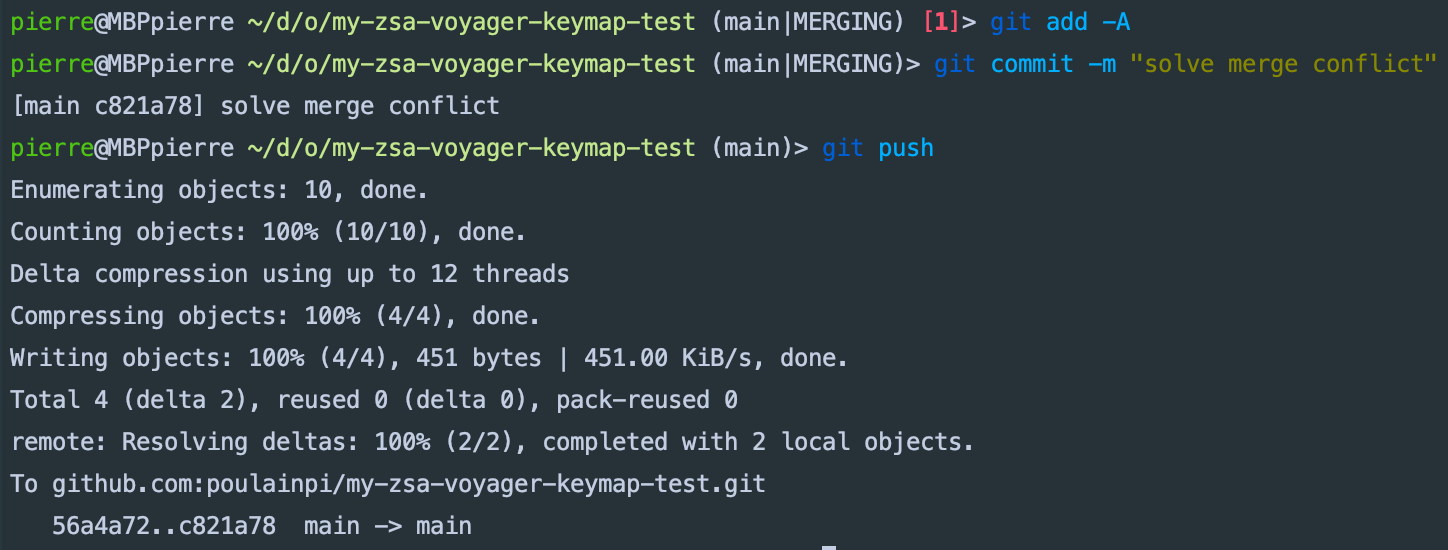
After rerunning the GitHub action, the build should succeed!

Conclusion
Congratulations! You've successfully customized your Oryx layout with powerful QMK features and learned how to integrate changes from both Oryx and QMK seamlessly. Whether it's adding advanced functionality or just tweaking your layout to perfection, you now have full control over your keyboard configuration.
The best way to support this project is by starring the GitHub repository. Your support will help spread the word and keep the development going strong.
Happy customizing, and thank you for using this workflow!

