One of the fun things about being a small business is that we get to talk to people and really listen to what they’re saying. Feedback is not filtered through endless layers of middle management or AI — it’s just us. So when something comes up over and over, or if someone writes a passionate, well-reasoned explanation for why we should add something, we take note, and if often ends up implemented.
This latest batch of Navigator features is exactly that: some great ideas from users that keep the Navigator trackball near the head of the pack feature for feature, and also make it easier to create custom 3D printable shells.
Aim and Turbo speed adjustments
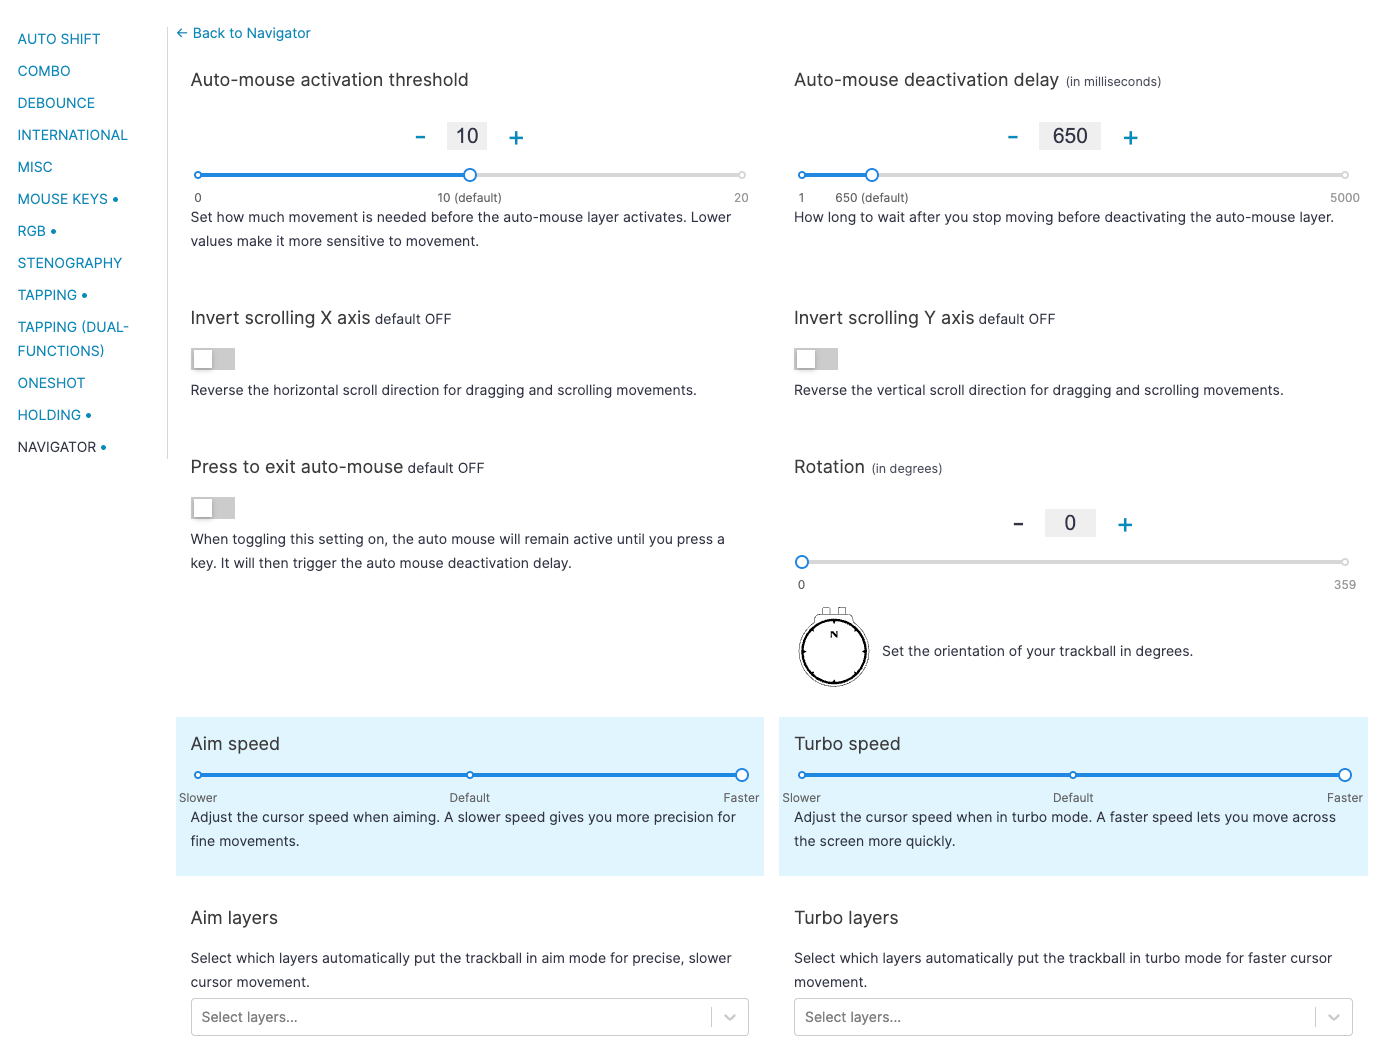
Now you can adjust the speed of your Aim and Turbo keys. If you want super-fine precision, try setting Aim to Slower. Or, if you want to have a controlled mousing experience but still want to be able to rocket across multiple screens when you need to move fast, set Turbo to Faster.
Automatic per-layer Aim and Turbo
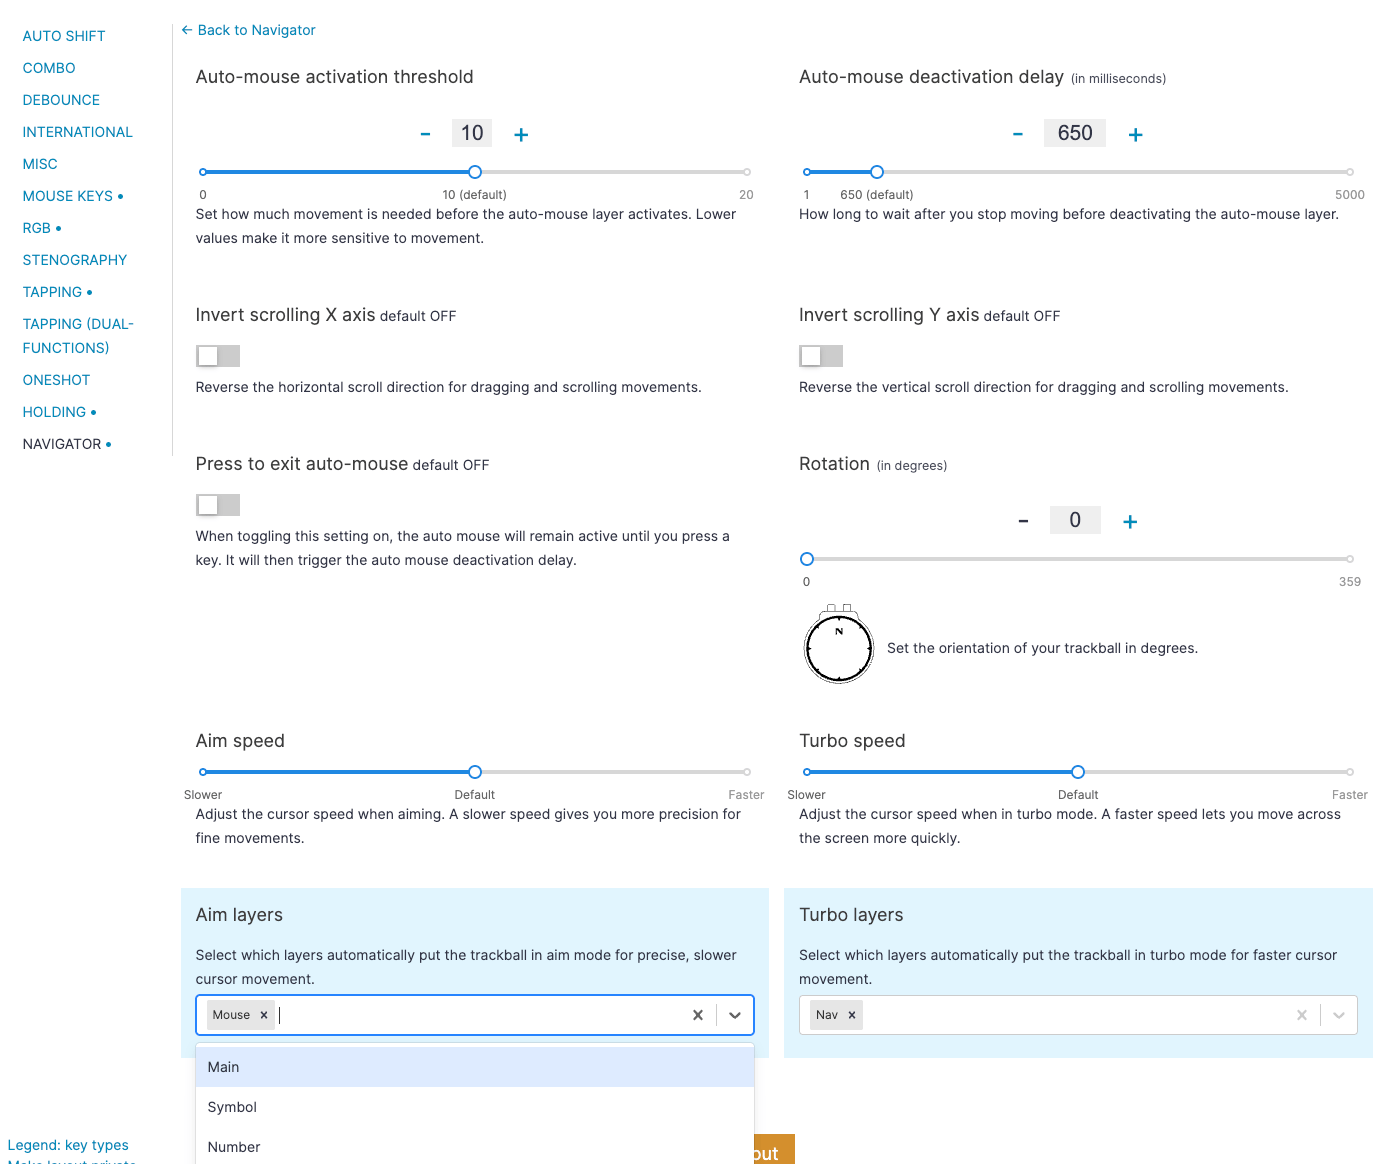
In conjunction with the speed adjustments, now you can activate Aim or Turbo automatically when you enter certain layers that you choose. This setting gets exciting with some examples:
- If you don’t want to use an automatic mouse layer, but you do want a mouse layer for clicks and such that you activate manually. Activating Aim while in your mouse layer can work nicely because it slows you down right before you’re about to click. Think of a plane opening its flaps to slow it down before landing.
- If you have a window management layer or something along those lines where you don’t need to click precisely, just make some big mouse movements to get your workspace set up for the day, you can activate Turbo by default to zoom around your screen when you enter that layer.
- If you like the idea of Aim or Turbo, but don’t want to switch to a mouse layer at all, now you don’t have to find a place in your layout for those keys. Just pick a layer you’ll remember to associate with Aim or Turbo, and then you get even more use out of a key you’re already using.
If your workflow is super-consistent, you may even be able to predict the best mouse speed for every one of your layers. I don’t know how much time that will really save, but it’s an option. :)
Navigator trackball rotation
For the 3D-printable shell enthusiasts out there, you can also now reorient the Navigator’s trackball core.

For example, I made this thumb shell for the Navigator. It puts the core about 35 degrees off axis. Before, that meant that to move the mouse up on your screen you had to move the trackball up at a slight diagonal angle; now, you can make it so your up is the trackball’s up, too.
This also opens up other possibilities for shells with the Navigator oriented in a different way, like snaking the cables underneath the board, or having them flow out the side at 90 degrees for some funky tenting setup.
You can even take advantage of this feature if you use the official shell. If you prefer to angle your board a little to work with your hand shape, you can make the Navigator match.
We remade the auto-mouse layer feature
And last but not least, we rewrote the auto-mouse layer feature from the ground up. This is one of those changes that, ideally, you won’t notice. The original auto-mouse layer feature was nice, but we wanted to do a lot more with it. The rewrite fixed many issues in one fell swoop, but of course, there may be some subtle changes and even bugs, so if you do notice something that seems like a problem, always feel free to write us about that or any other Navigator feedback.