Layout Buffet is a series about the many things your keyboard can do. Each post explains an Oryx feature or layout idea and how you can try it a little at a time. Just like a buffet, how much you grab is up to you. If you try a bite and love it, you can come back for more. If it’s not for you, there are other options. Sample, experiment, and figure out what you like and what you don’t.
Every Layout Buffet post is typed using the concept covered in that post, so you know it’s not just theory.
Let’s dig in!
For a long time, mousing was something you could do with our boards, but not really something we recommended. That changed with the Navigator. Now you really can mouse with just one device (the Voyager + Navigator combo). After some time with the Navigator Trackball and with the Trackpad right around the corner, it felt like a good time to talk about mousing in general. The obvious headline of keyboard mousing is the Navigator, but that’s not the only way your keyboard can help you mouse around.
Mouse keys, a history lesson
Before the Navigator, there was the mouse keys feature. Mouse keys are okay. They work — they do move your mouse cursor — but, they are not ideal. They are not great for precise or fluid mouse movements, so they won’t work as a full mouse replacement for most people. One point in favor of mouse keys is that their behavior (things like speed and acceleration) is super-customizable, but this also requires a lot of experimentation to dial in.
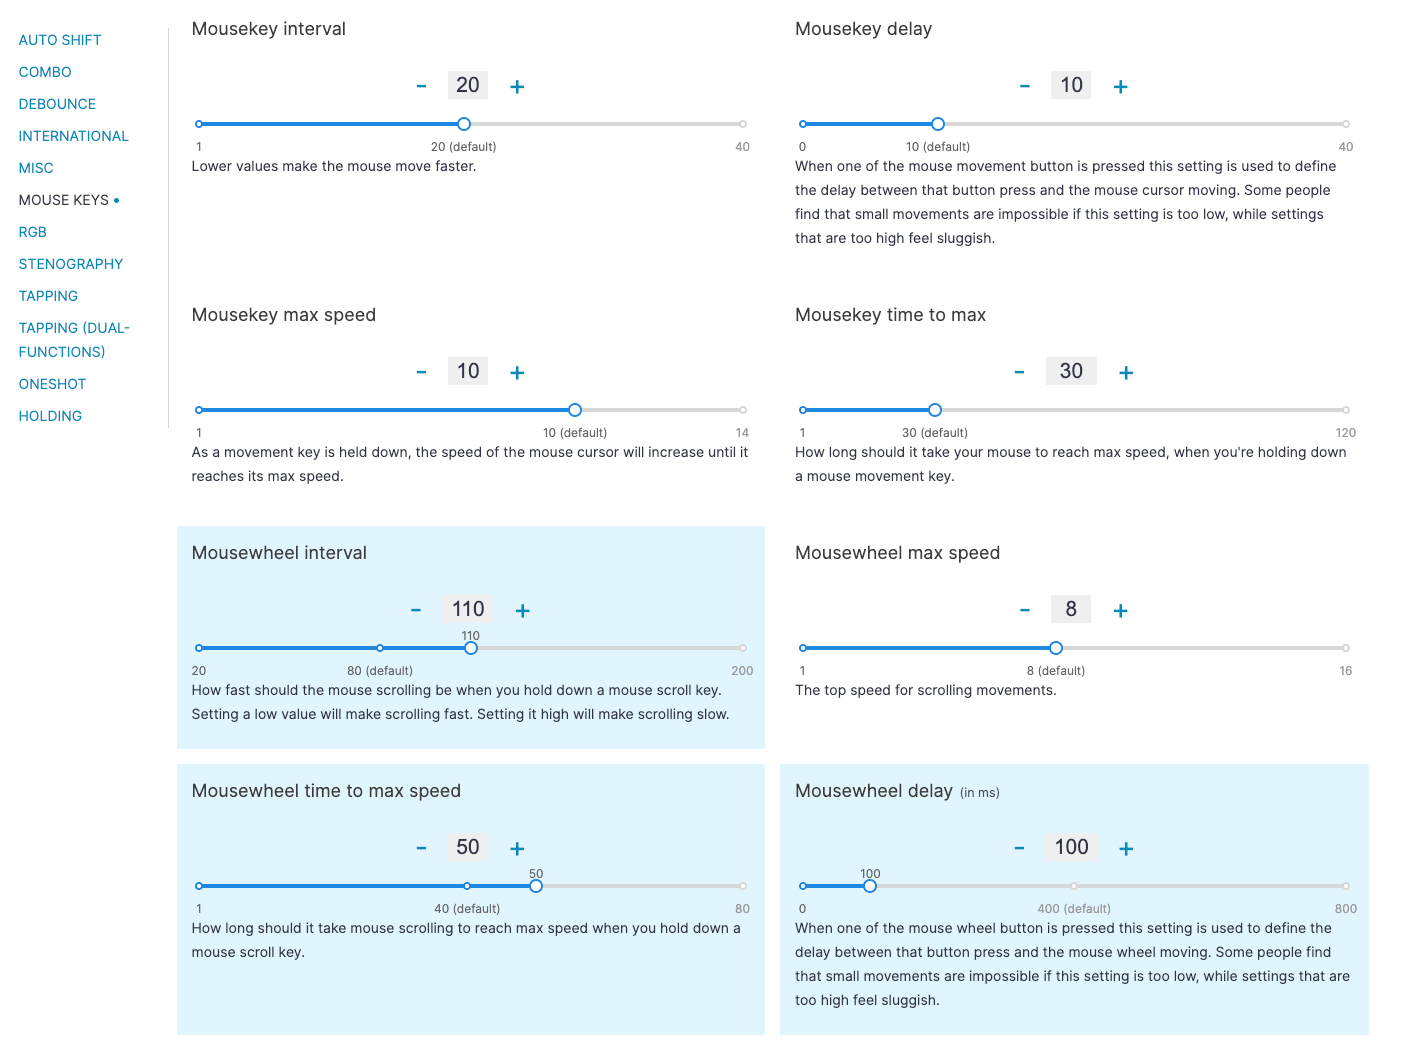
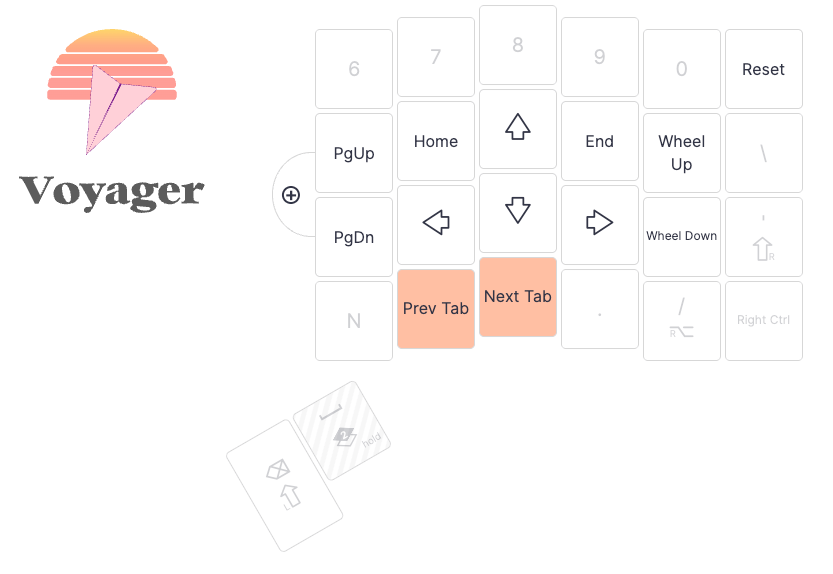
The one mouse thing I actually used in my layout before the Navigator was mousewheel keys. Even if you don’t have a Navigator, being able to scroll with keys can be convenient. If you tend to work in apps that have good support for keyboard shortcuts, you may be able to cut out a lot of reaching for your mouse by just adding the mousewheel keys somewhere in your layout.
The Navigator Trackball and auto-mouse layers
Since mouse keys were just okay, we set out to make something better, a real all-in-one solution: the Navigator. I'm going to focus on the Navigator Trackball here since that's the one that uses auto-mouse layers. The Trackpad supports gestures for most of the things you need a pointing device for.
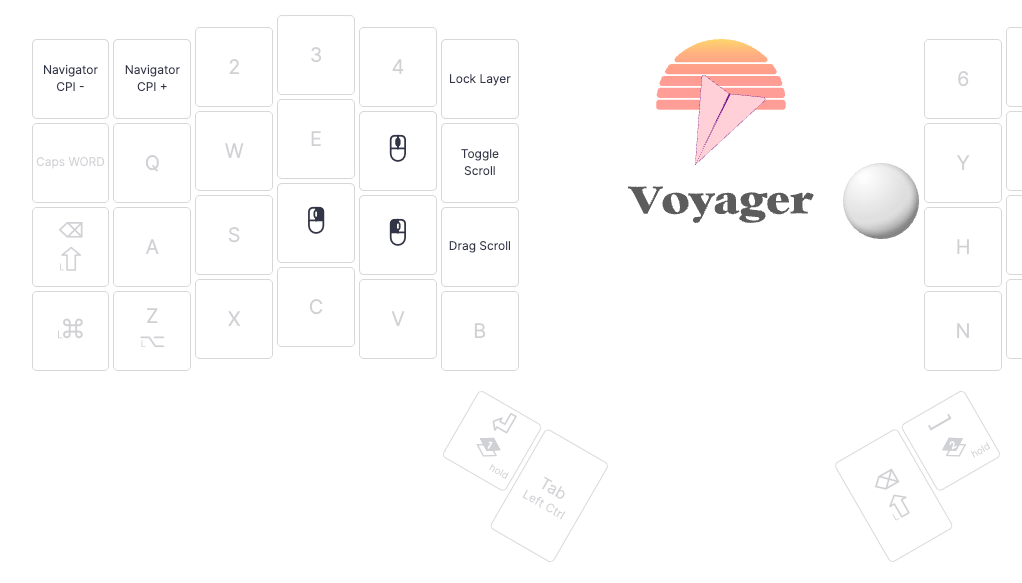
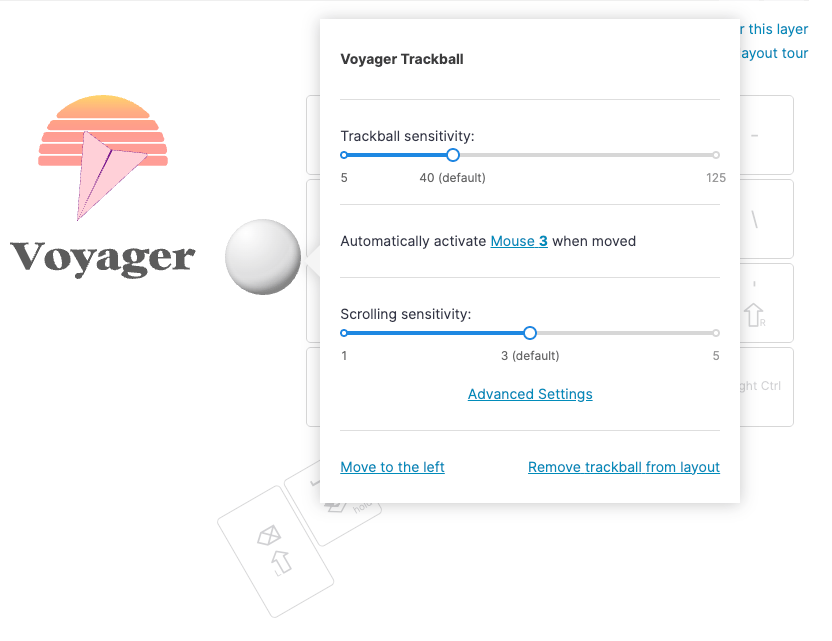
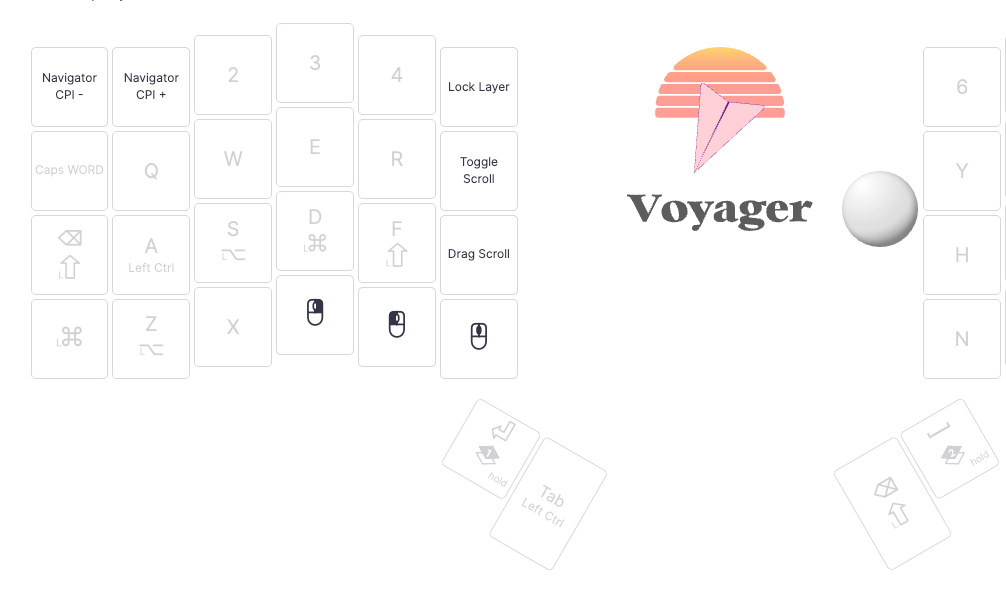
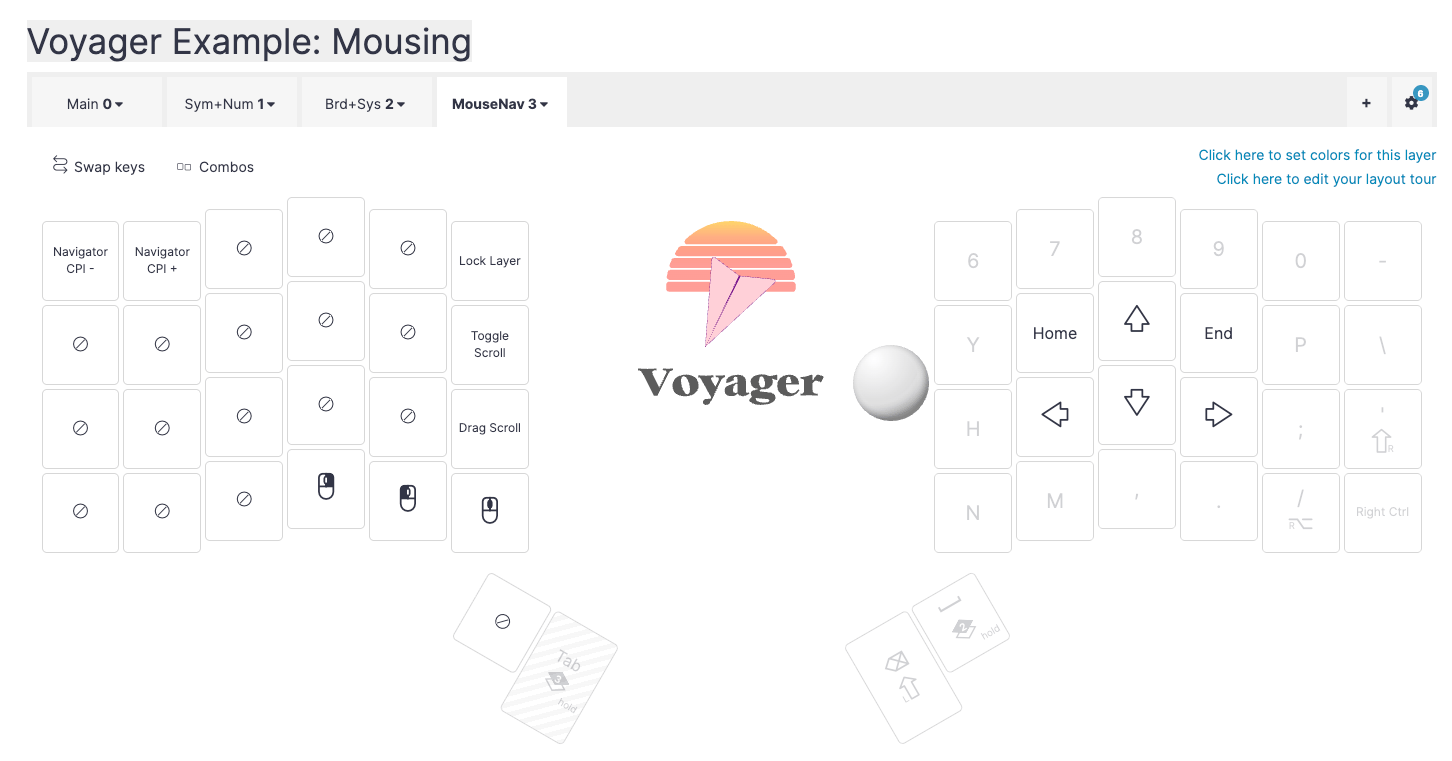
Once you add the Navigator trackball to your layout, you’ll also automatically get a Mouse layer. This layer will activate when you move the trackball around, and it will deactivate after a set time (you can change how long this is). Like all our default layouts, the default auto-mouse layer is a balance between usability and discoverability. It’s fine to use it as is, but it’s really just a starting point for you to customize for your particular style. Here are some things I would consider when setting up a mouse layer.
Additional Navigator settings
The most important setting to decide on first is how you want to activate your mouse layer (if you want to use one). The main options here are the default time-based approach, “Press to exit”, or a manual layer switch (more on that below).
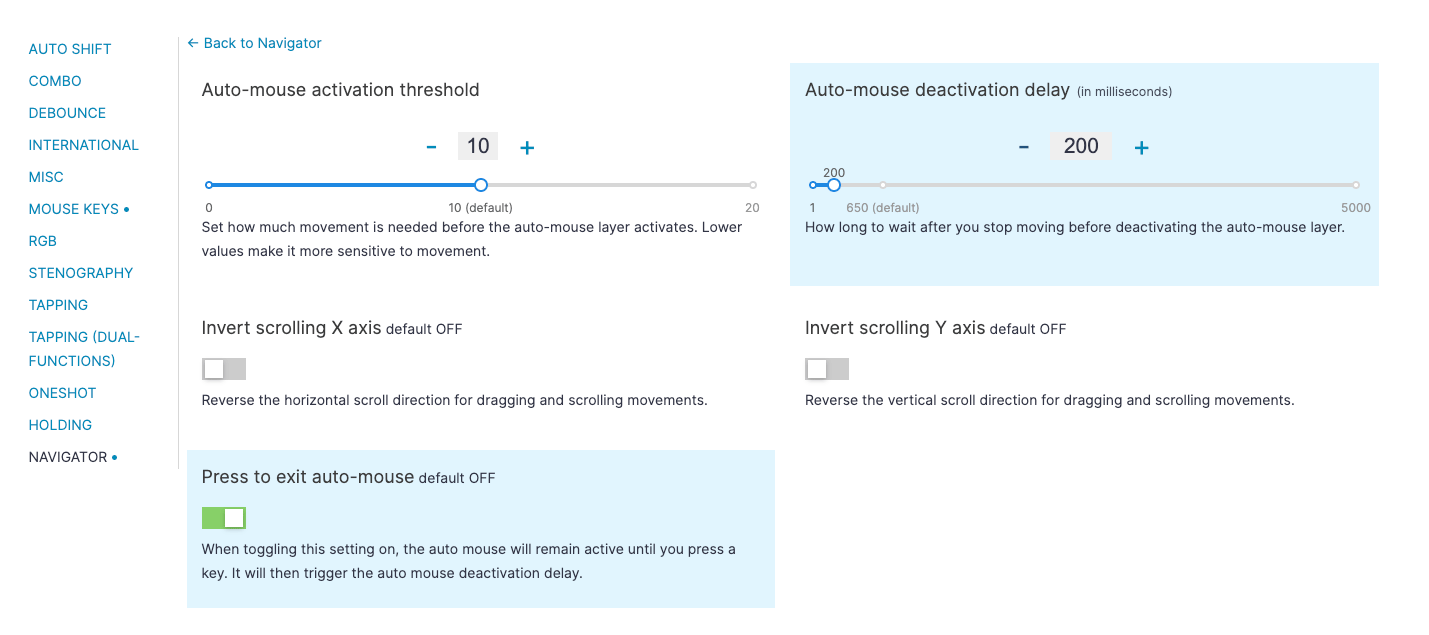
“Press to exit auto-mouse” is an optional Navigator setting that will make your mouse layer stay on until you hit a key, then the deactivation delay will begin. Everyone has different preferences when it comes to this, so if you aren’t really sure what you want, I’d highly suggest giving this setting a try. When you have this setting on, I’d suggest turning your activation delay pretty low: 200ms or lower.
There are also some other settings to try that will affect your overall Navigator experience, like the cursor’s sensitivity. Notably the CPI + and CPI - keys also change the sensitivity by 5 each press, but adjusting them via the keys will reset when you unplug your keyboard, so they are for on-the-fly experiments to figure out what value you want. Setting the default value is done by clicking on the trackball in your layout. Of course your operating system’s cursor sensitivity will affect this as well.
And on the topic of sensitivity, there are also the Aim and Turbo keys, which lower or raise your sensitivity respectively while you hold them down for more precise or faster mouse movements. You can also adjust how big of a change in speed these keys are, and you can even set these to activate automatically on certain layers.

Which fingers do what
When figuring out which keys should go where in your actual mouse layer, a fun yet slightly brain-bending part of the process is deciding what fingers do what. Because the mouse layer makes the most sense on the opposite hand as the Voyager, you’ll probably be using fingers that haven’t normally clicked a mouse, so you have free reign to decide what makes sense. No muscle memory to get in the way.

Does left click make more sense on your pointer or middle finger? (If you’re a lefty clicking with your right hand, this actually ends up making sense anyway.) Do you want to scroll by holding down your middle finger, similar to a traditional mouse, or would it be better on your pinky finger? These are the kinds of questions you can ask to come up with a layout that feels good.
What keys are underneath your mouse keys
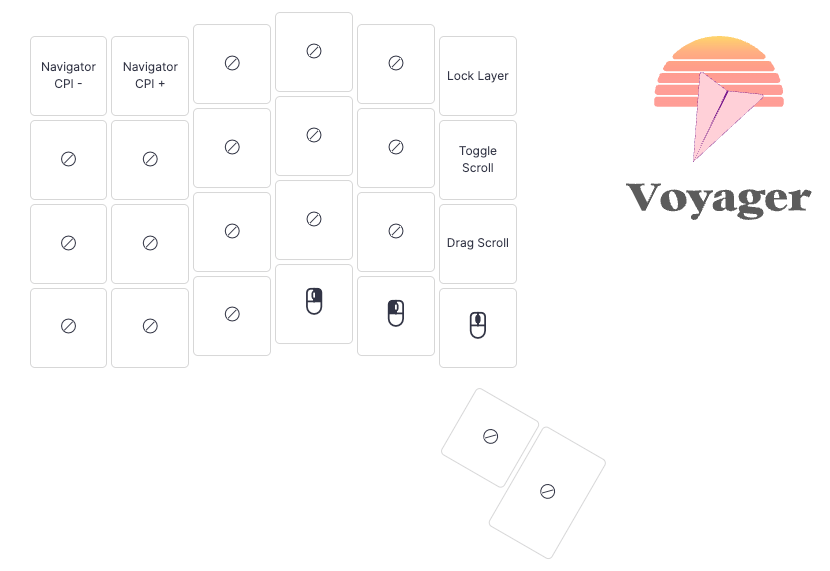
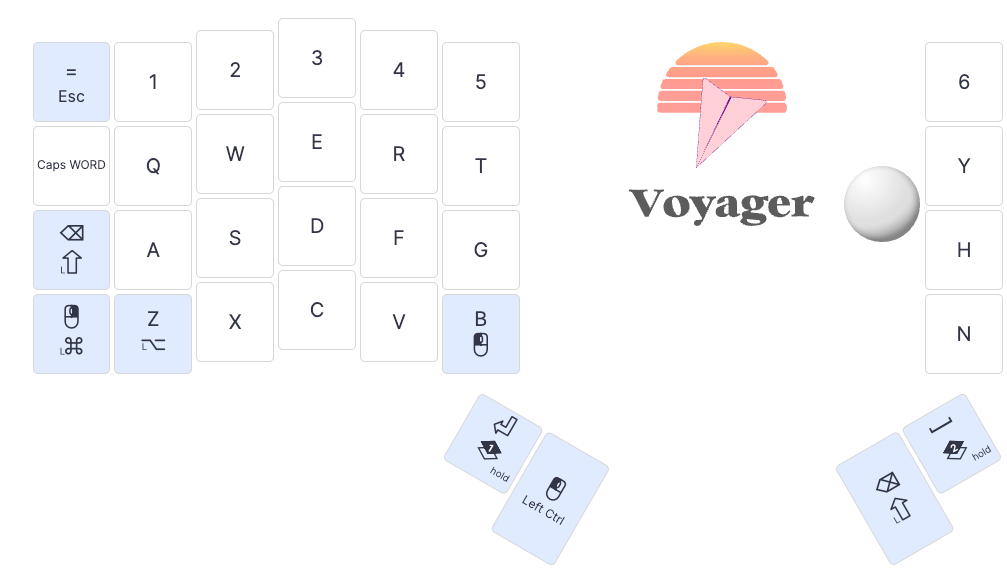
Another thing worth keeping in mind is what keys are underneath your mouse keys in the layer stack and what keys are transparent in your mouse layer. This is especially relevant if you’re using the default time-based mouse layer exit. While you can definitely get a feel for the timing with practice, you may still get the occasional typo from time to time. It’s ideal if your mouse keys aren’t in the same place as keys you would commonly hit after clicking.
For example, I use home-row mods, and a very common pattern for me is “click > hold Shift > letter” because I am clicking somewhere to start typing a sentence. Since my Shift is is on my F and J keys, the default left click position doesn’t work well for me. I get too many clicks when I want to capitalize a letter. I solved that by moving mouse keys down a row.
It’s also important that your transparent keys aren’t destructive if you accidentally hit one. For a relatively mild example, maybe I want to make sure I can’t hit a Ctrl + C shortcut key while I’m mousing because I might copy the wrong thing. To help with this, I can assign a None key, then copy that everywhere I want it to go.
It’s okay to have a manual mouse layer (or no layer at all)
It’s also worth mentioning that just because you’ll get an auto-mouse layer when you enable a Navigator trackball, that doesn’t mean you have to use this feature. It’s intuitive for a lot of people (especially with the Press to exit setting), but some people prefer more precise control over the mouse layer activation, and that’s okay, too.
If that sounds like you, all my standard advice about layers applies. Unless you have a good reason not to, I’d make your mouse layer the highest layer so it can be accessed from anywhere else in your layout. You could either hold a key to activate it, tap a key, or both. Don’t forget as well that your mouse keys tend to feel the best on the opposite side of the Navigator, so you can still use the other half of a mouse layer for something else. This works well if you want to put the mouse layer switch on one of your thumb keys, which tend to be a premium spot in your layout.
If you set up your mouse-layer like this, consider also raising your base Navigator sensitivity and setting Aim to activate automatically on your mouse layer. This makes mouse movement quick most of the time and slows it down when you’re preparing to click on something, so you’ll have a little more control.
If your mousing needs are pretty straightforward, or you already use a compact layout, you can even decide to not use a mouse layer at all and incorporate the mouse keys right in your base layer.

The clicks make good dual-function keys, too. They can be tap actions, or a left-click “hold” action will act as a “click and drag” key, for example.
Controlling your mouse with text
If we’re talking about mousing with a keyboard, I have to have a brief aside about text-based mousing. This is actually something you can do with any keyboard, not just ours. The idea is you hit a hotkey and then you direct your mouse by typing text. Different apps do this in different ways. Some assign short strings of text to clickable points, some have you search based on your onscreen text, and some divide your screen into sections that correspond to letters.
Text-based mousing is my favorite way to do day-to-day mousing in theory, but no app has quite nailed the experience for me yet. My personal favorite so far is Shortcat, but other good ones that might work better depending on your workflow are Superkey (from the popular Rectangle app dev), Mouseless, and Homerow.
The thing I would love to see from this type of mousing is some way for the app to learn what things I usually click on in common contexts and only show me those (with the option to toggle everything if needed). Even after using these apps for a while, seeing the sheer number of options pop up feels a little overwhelming — my screen is absolutely coated in letters or graphics.
Still though, this style of mousing is so interesting and worth exploring. I still use Shortcat from time to time depending on what I’m doing. It’s just not quite a full mouse replacement.
Reducing your need for a mouse
Even if you don’t want to go down the text-controlled mouse route above, it’s still work thinking about ways you can reduce your need to reach for a mouse in general. It’s unlikely that you’ll never need to use a mouse, but you can get surprisingly far without one by using shortcuts. Here are a few of the main ones to try out:
- Switch windows using your operating system’s window switcher (
Alt + Tab,Cmd + Tab, etc.) rather than clicking. Your browser also probably has a variety of shortcuts to jump from tab to tab. - Use
Tabto advance to the next text field (orShift + Tabto go back) on a page rather than clicking. This isn’t always perfect depending on how the fields are implemented, but it often works. - Learn the shortcuts for your most common actions in your most common apps. For example, when editing text, I’m a big fan of incorporating
Alt/Ctrl + arrow keys(depending on your OS and software) to jump from word to word rather than just holding arrow keys to go one character at a time. Or in Excel, F2 will put you in a cell at the end of the current contents so you can continue editing it, something that ordinarily takes at least a few clicks. Lots of common apps have quite deep shortcut rabbit holes you can dive into. Like when learning to use a ZSA keyboard, I’d pick just a few shortcuts to start to use first, then add more once you’re feeling good about the first batch.
Using a mouse is still fine, of course, but there are real benefits to using it less. Training for a faster WPM is nice, but a few extra words per minute are nothing compared to saving 10 seconds from reaching over for a mouse, clicking something, putting your hand back on your keyboard, reorienting yourself, and typing again. That’s one of the things that can really break you out of a flow.
A mouse is a powerful tool, but so is your keyboard. It’s a fun challenge to see what you can do without reaching for a mouse, and you may even find better ways to do some things.