Layout Buffet is a series about the many things your keyboard can do. Each post explains an Oryx feature or layout idea and how you can try it a little at a time. Just like a buffet, how much you grab is up to you. If you try a bite and love it, you can come back for more. If it’s not for you, there are other options. Sample, experiment, and figure out what you like and what you don’t.
Every Layout Buffet post is typed using the concept covered in that post, so you know it’s not just theory.
Let’s dig in!
When you boot up one of our boards with backlighting, you’ll see all the LEDs flowing through a colorful gradient. Dazzling, but a bit much to leave on all the time. You can always turn off the lighting with the Toggle Lighting key, but that’s just the tip of the lighting iceberg. Here are a few ideas for different ways to use the backlighting.
Assign colors to lots of keys
Briefly, before we dive into how to use the lighting, here is how to set it up. Oryx lets you define custom lighting colors for each key on a per-layer basis. You can do this from each key’s assignment box.
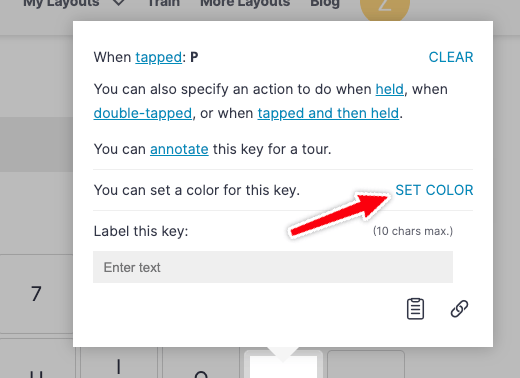
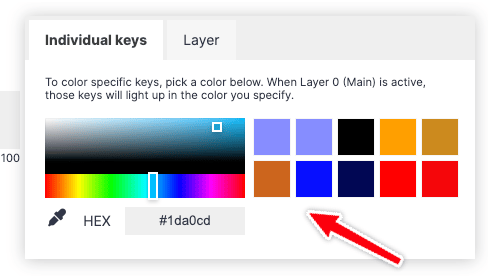
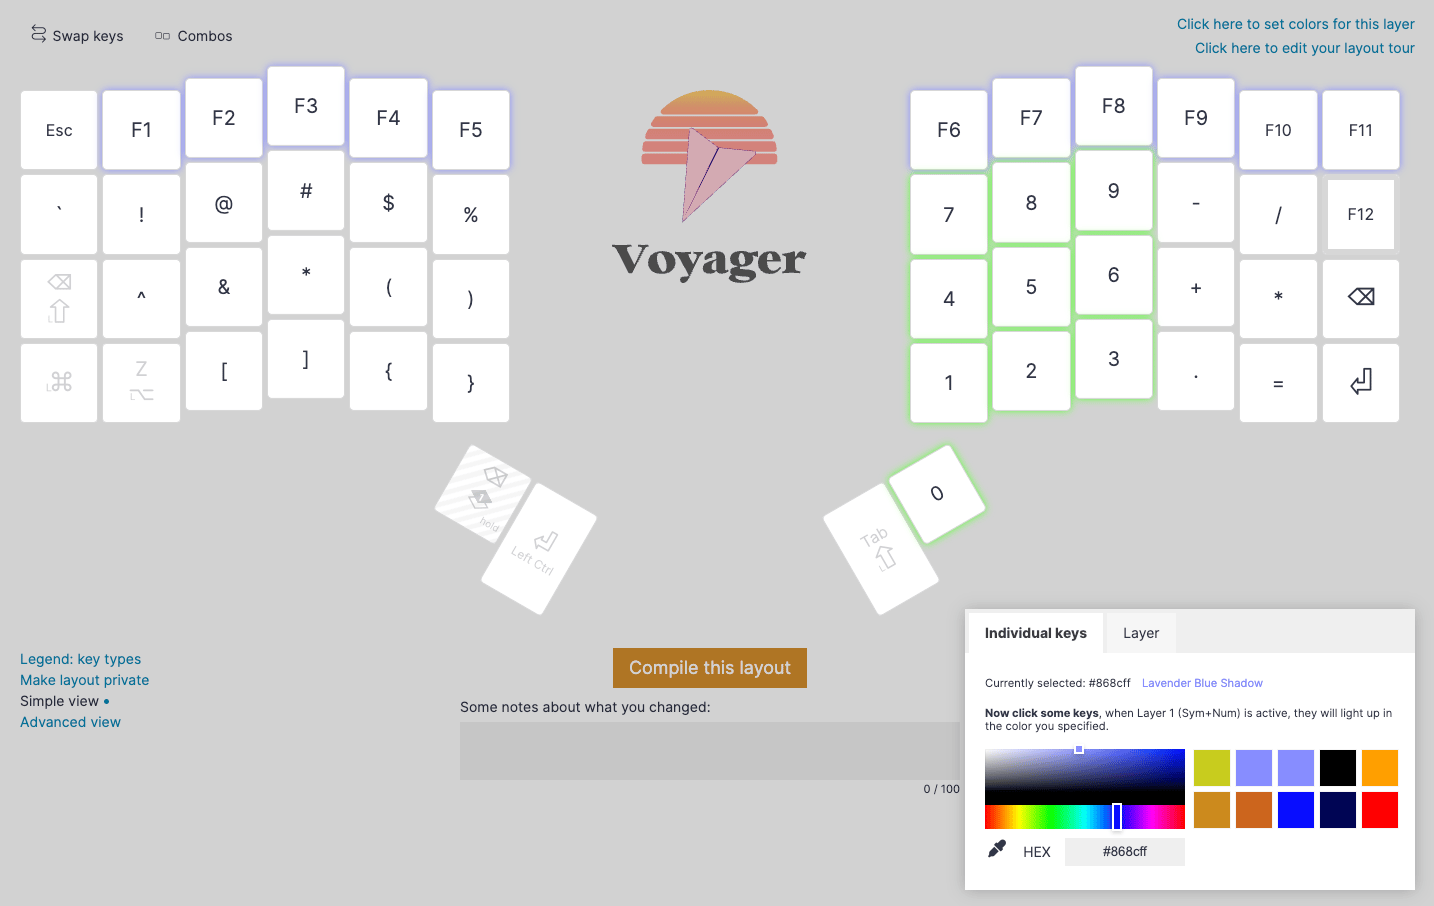
But, if you want to set the same color for a few keys at a time or an entire layer, there’s an easier way. “Click here to set colors for this layer” at the top right gives you two options. Selecting a color in the “Individual Keys” tab gives you a drop icon that lets you assign the same color to many keys at once.
Selecting the “Layer” tab lets you assign one color to all the keys on your current layer.
Your recently used colors get saved to the swatch selection, so if you want to use the same color later, you can grab it from here.
Animating certain layers
If you like the initial rainbow animation (or any of the other animations), but just don't want to see them all the time, you can still make the animations show up on specific layers.
Our boards with backlighting have two modes: Core and Custom. Core Lighting is set entirely on the board (animations fall into this category) while Custom Lighting is set through Oryx.
Custom Lighting will always take precedence over Core Lighting, so if you set up even one key of Custom Lighting on a layer, you won't see the animations on that layer anymore — it's not possible to mix these two lighting styles because of technical limitations of QMK.
You can use this hierarchy to have multiple lighting styles across layers in a single layout. For example, say you want a subdued work layer and a gaming layer with a fun animation. The way you would do this is set up Custom Lighting for your work layer (you can even make this black if you want it to appear totally off) but leave your gaming layer alone, which would allow it to play whichever animation you choose at runtime.

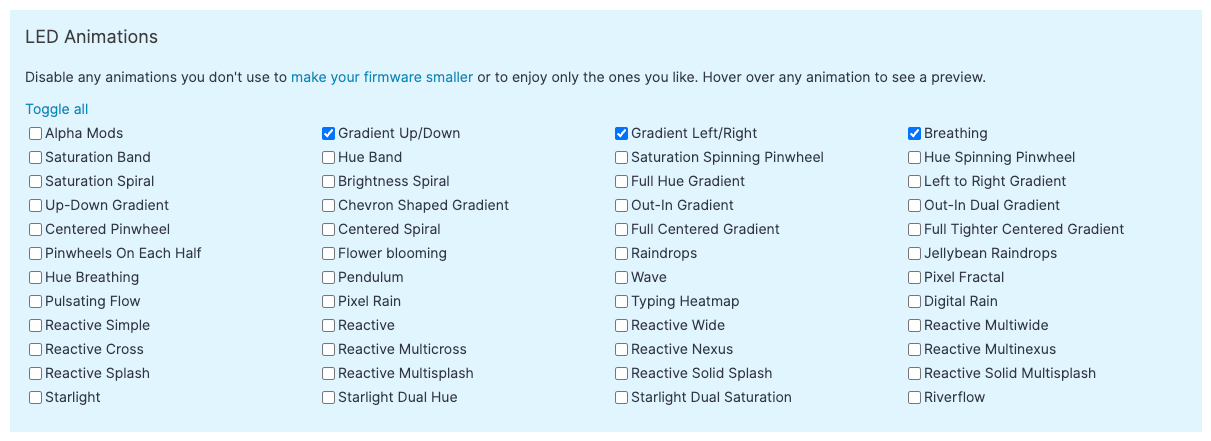
Animations are cycled with the “Switch animation” key. You can disable animations you don’t use in Oryx to make this quicker.
You won't see the animation while you’re trying to get work done, but the board knows to play it when you switch to your gaming layer or any other upper layer you didn't assign custom lighting to. Cool!
Custom Lighting only
If you’d prefer to leave all Core Lighting and animations off, but you still want to use Custom Lighting you set up Oryx, that’s possible as well.
The way to do this is simply hitting the Toggle Lighting key but leaving the Toggle Layer Colors key alone. Toggle Lighting turns off the Core Lighting like animations while Toggle Layer Colors turns off the Custom Lighting you set up in Oryx. So, if Toggle Lighting is off but Toggle Layer Colors is on, your board won't light up until you hit a layer with lighting that you've specifically configured. Of course, if you want all lighting to be off, you can hit both keys.
Using lighting to indicate layers
Our boards come with some small LEDs specifically for indicating layer changes, but what if you want something more noticeable? You can set a specific color per layer with the “Click here to set colors for this layer” as above.
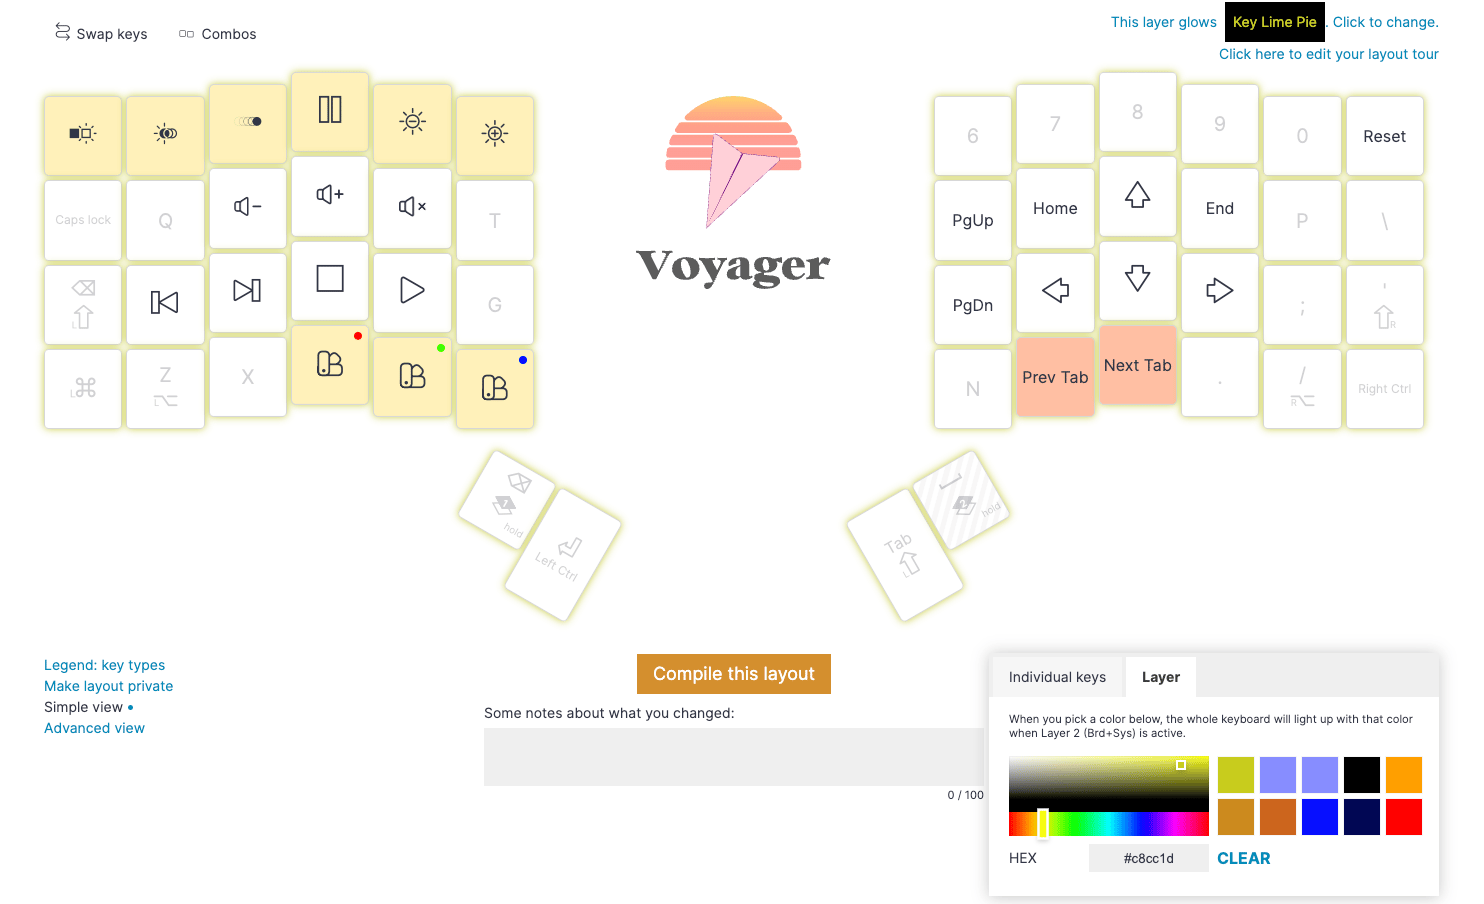
If you set a different color for each layer, you only need to glance down to know if you’re in the layer you want to be in. Simple and helpful!
Using lighting to indicate keys
Finally, we can also take the idea of color-coded layers a little farther with color-coded keys. You can either set the color for an individual key by clicking on it or paint one color across many keys with the same “Click here to set colors for this layer” button.
This gives you the previous benefits of indicating a layer change while reminding you what keys do within the layer. For example, you if you have a numpad-like layer, you can color the number keys a certain way to make them stand out.
Then, when you switch to that layer, not only will it be obvious what layer you’re in, you’ll be able to see which keys are which.
This can also be used to differentiate which keys do which things on a layer. I use this myself in my board’s Control layer, where I keep all the keys that reset the board and control the lighting. I color the reset keys red both to remind myself where they are and that I don’t want to hit them unless I mean do.
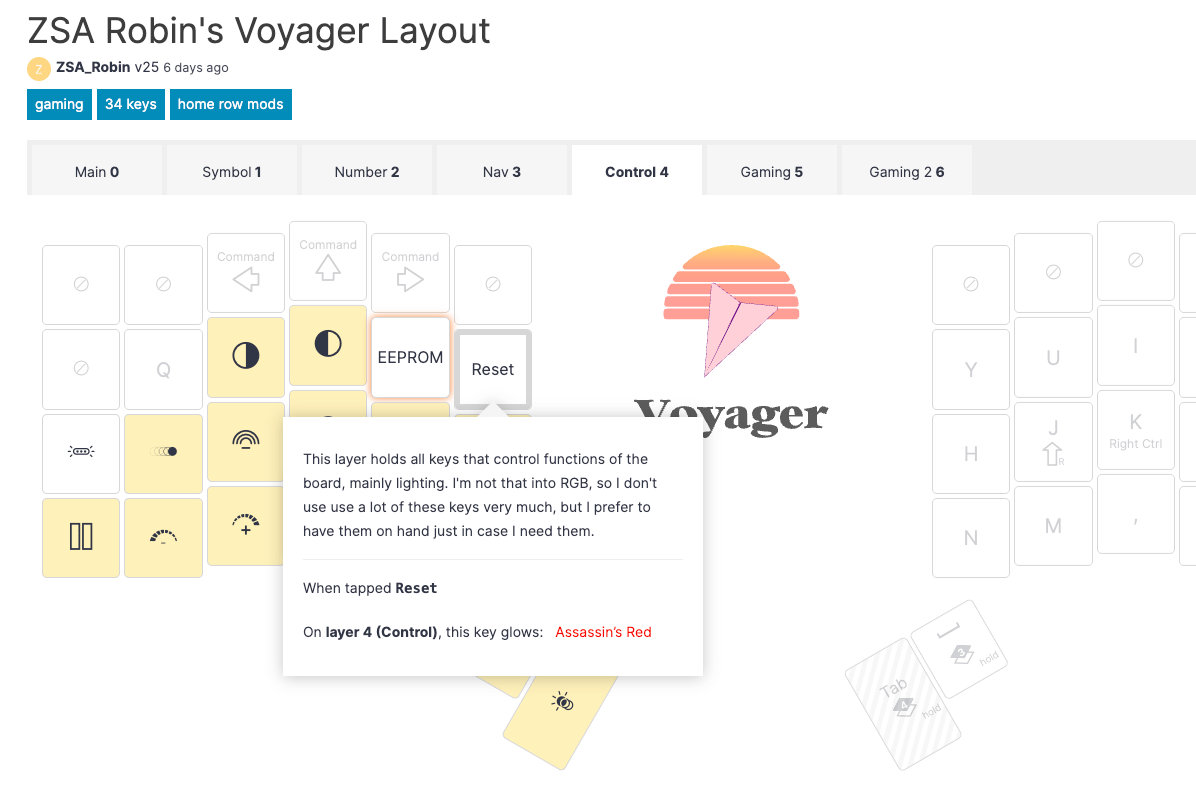
It’s handy for me because I’m rarely in my Control layer, so I don’t always remember exactly where everything is, but the lighting helps jog my memory when I do need to do something with that layer.
Yet another way you can use the lighting is to indicate when a “lock” key is turned on. Caps Lock, Scroll Lock, and Num Lock are all supported.
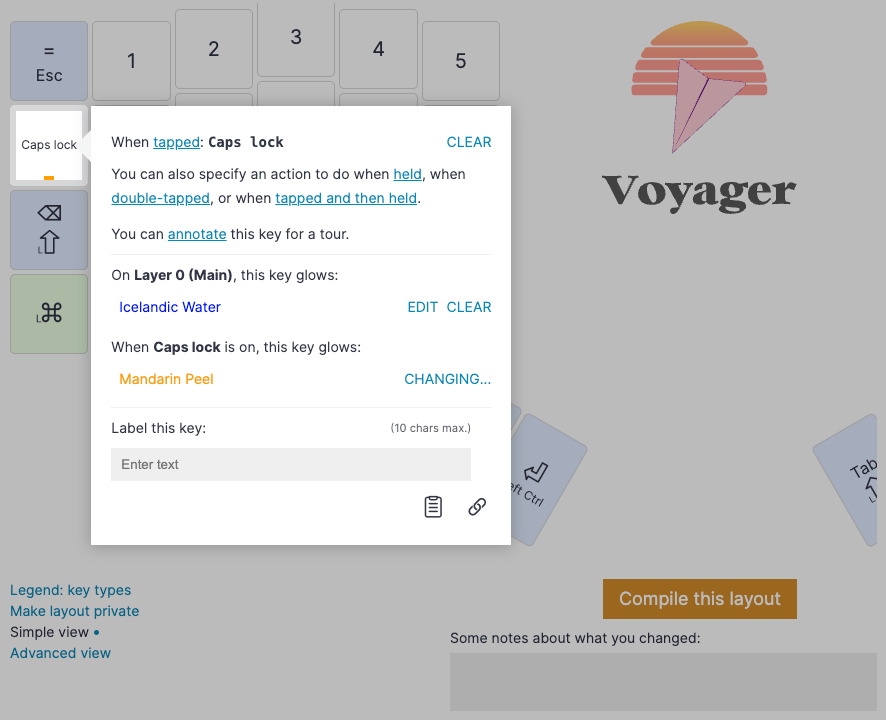
You can read more about this in the dedicated post, but in short, when you add one of these keys to your layout, you’ll get the option to assign an additional color that shows up when the key is on, and that will turn off when the key is off.
Practical and pretty!