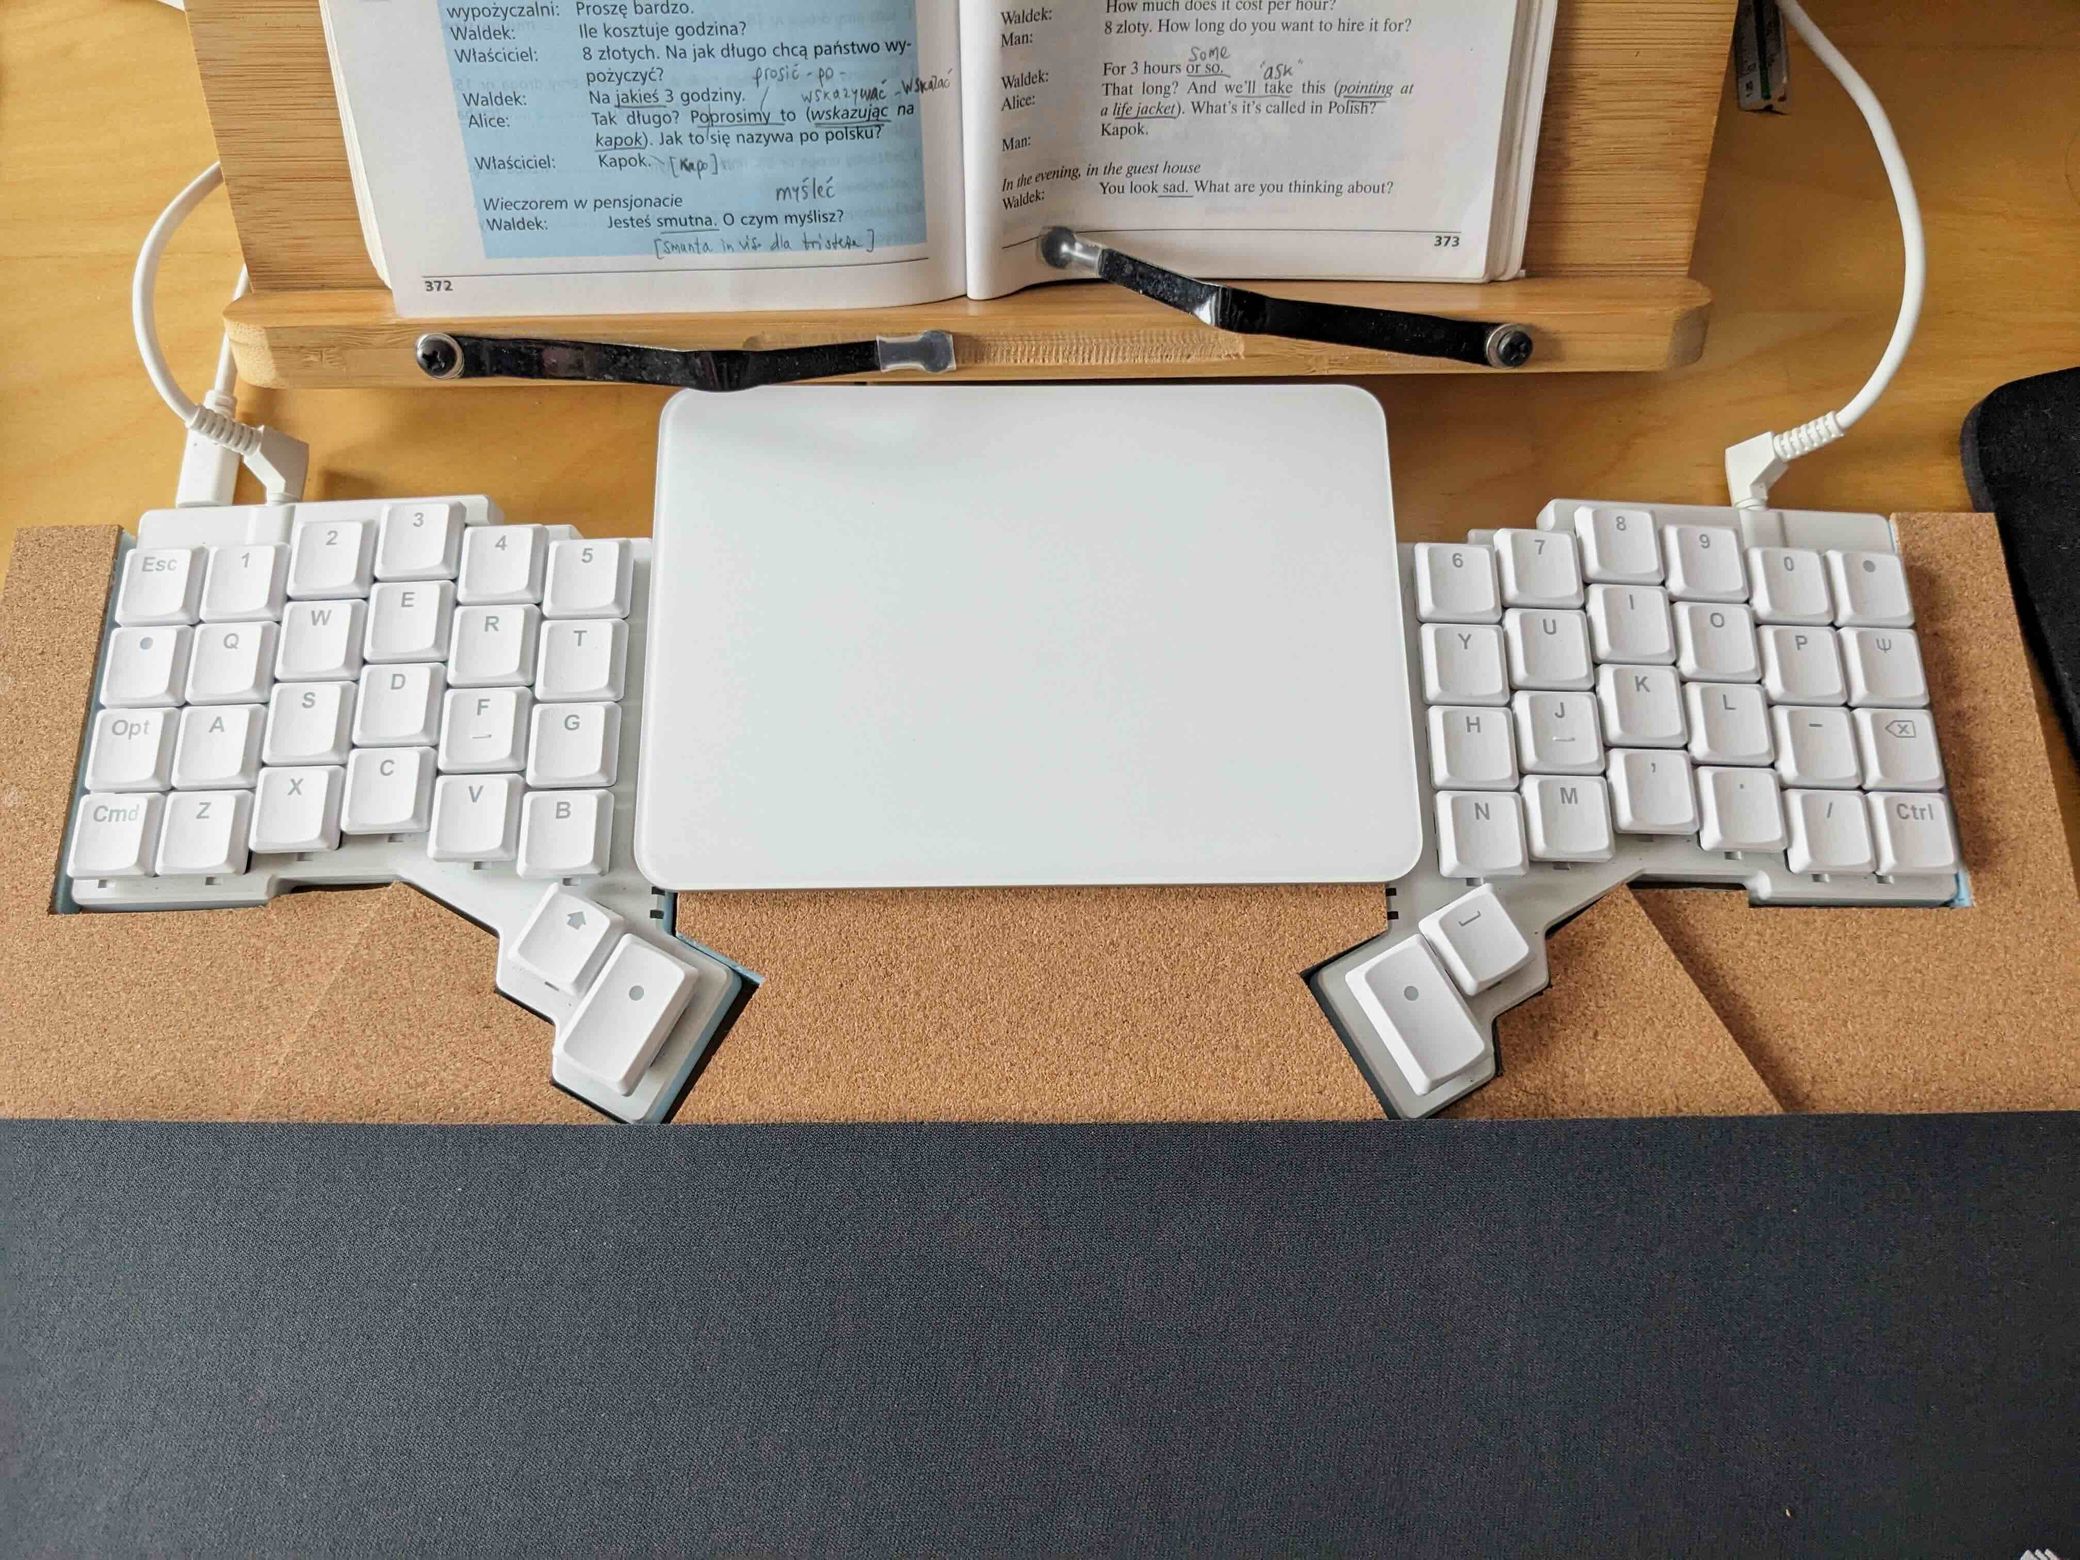
After enjoying my Voyager keyboard for two months, I realized I wanted a sturdy support to keep the two halves positioned exactly where I wanted them. This is what the final build looks like:
Here is how I put it together.
I've used a mouse for many years, but recently I found that using a trackpad is easier, especially since most actions only require a light tap instead of a click, which is gentler on my fingers. I still keep a Magic Mouse on one side for extensive scrolling, but it’s now optional in my setup.
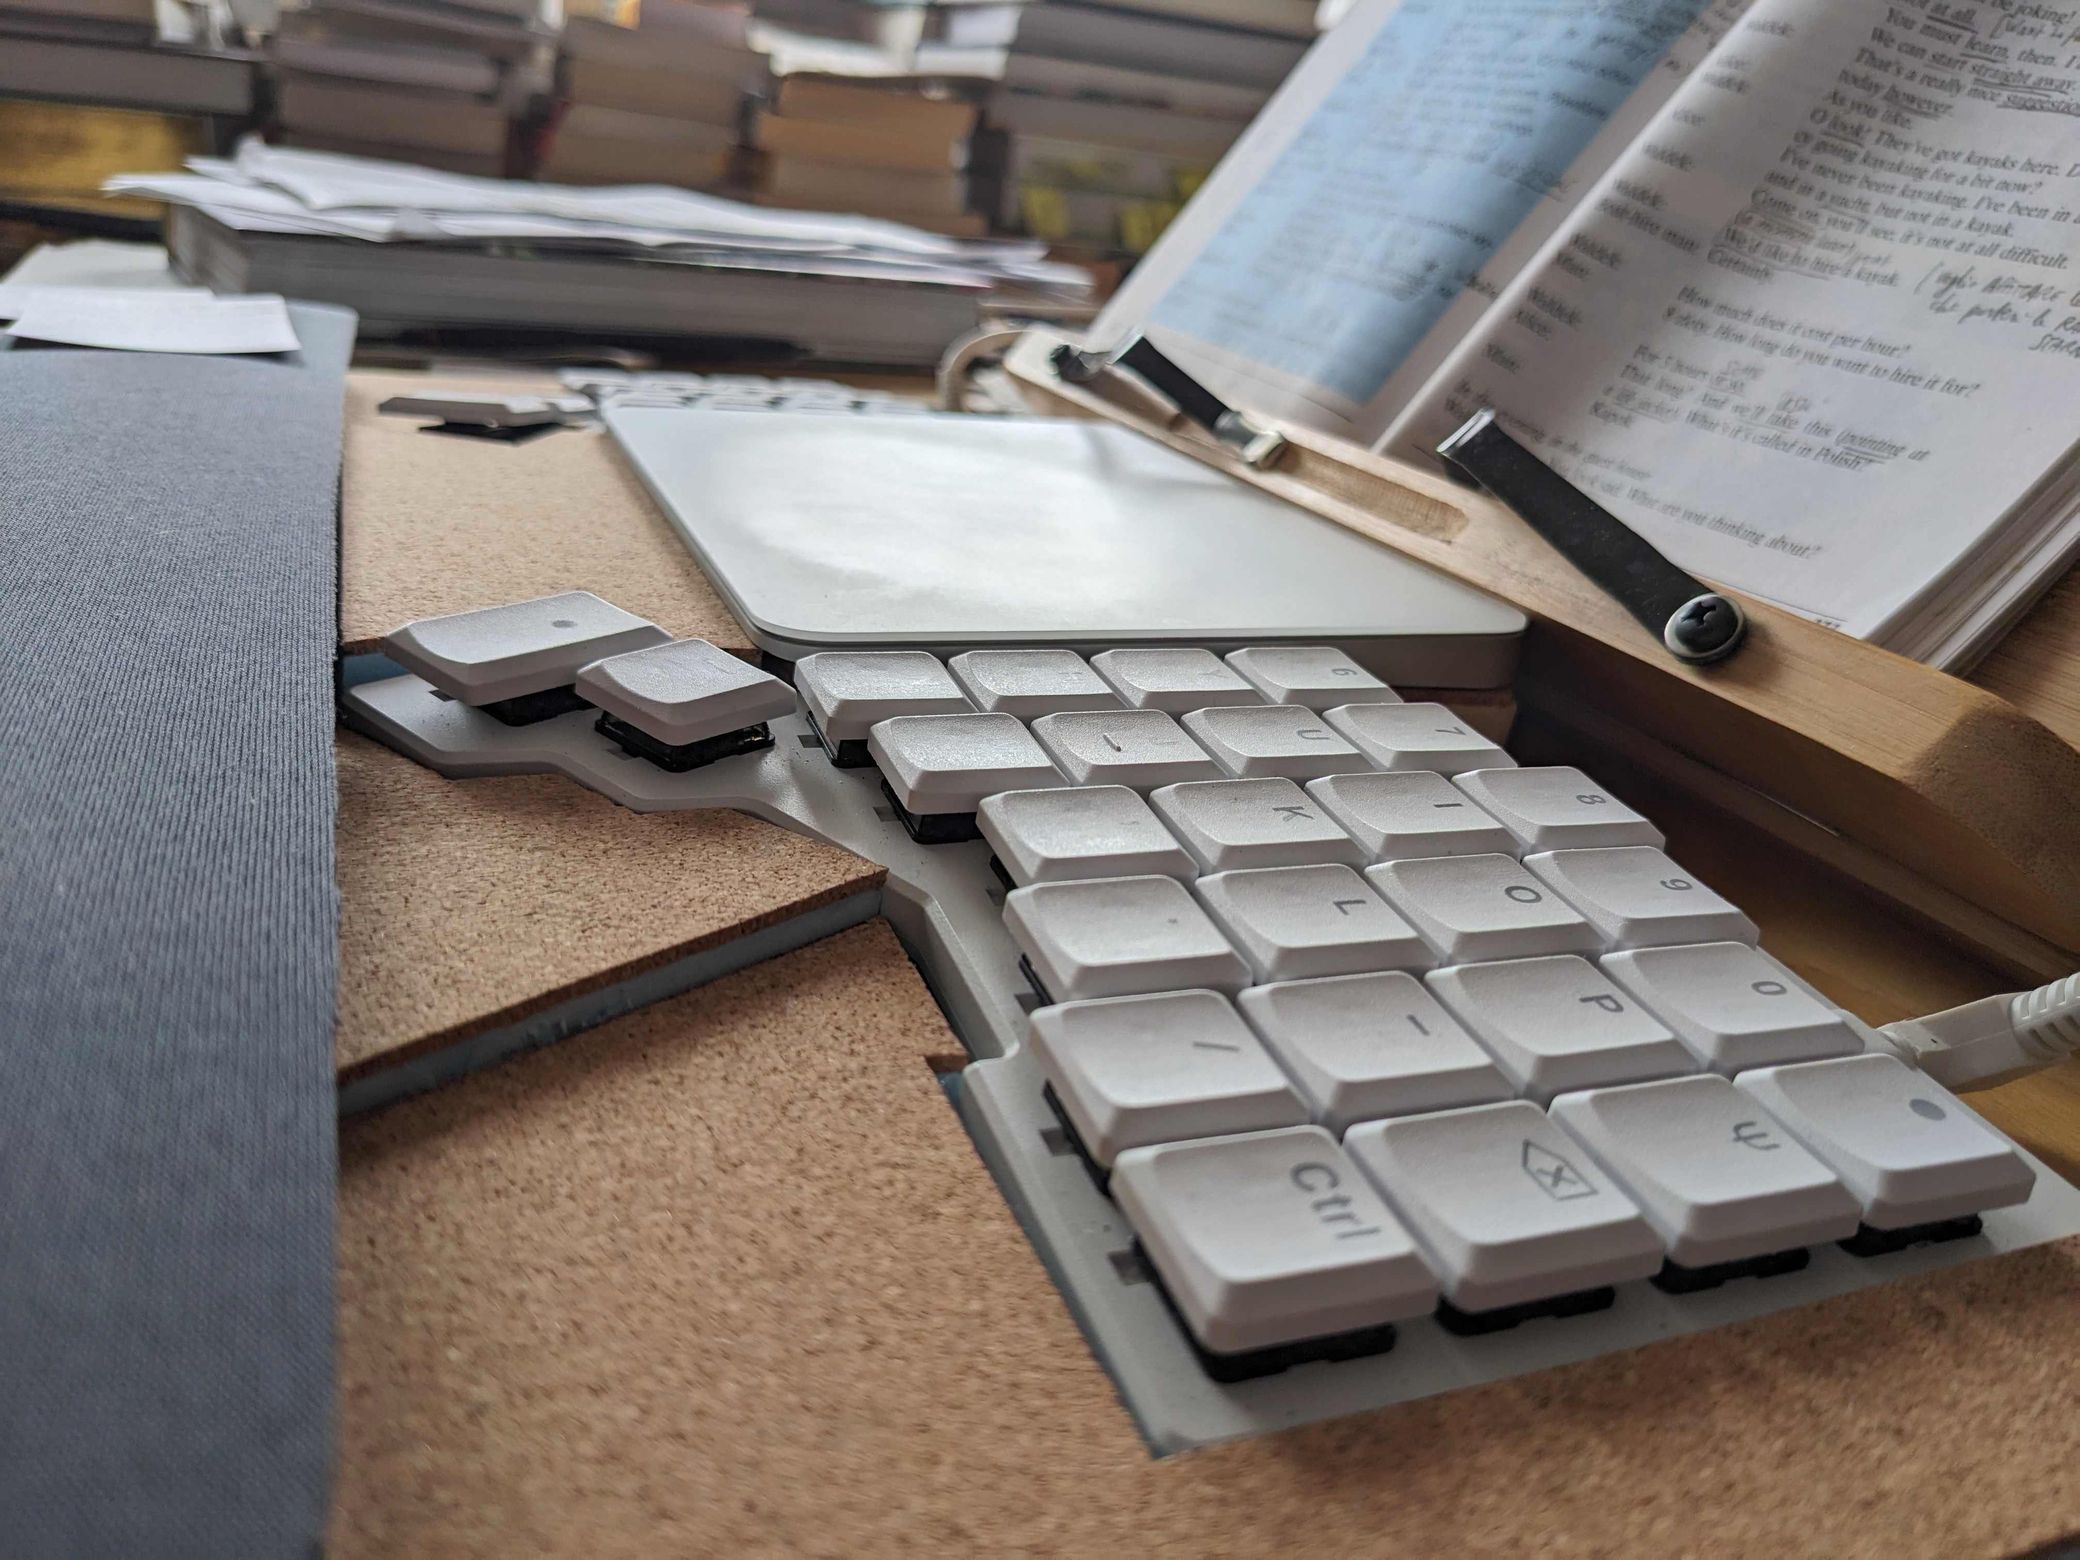
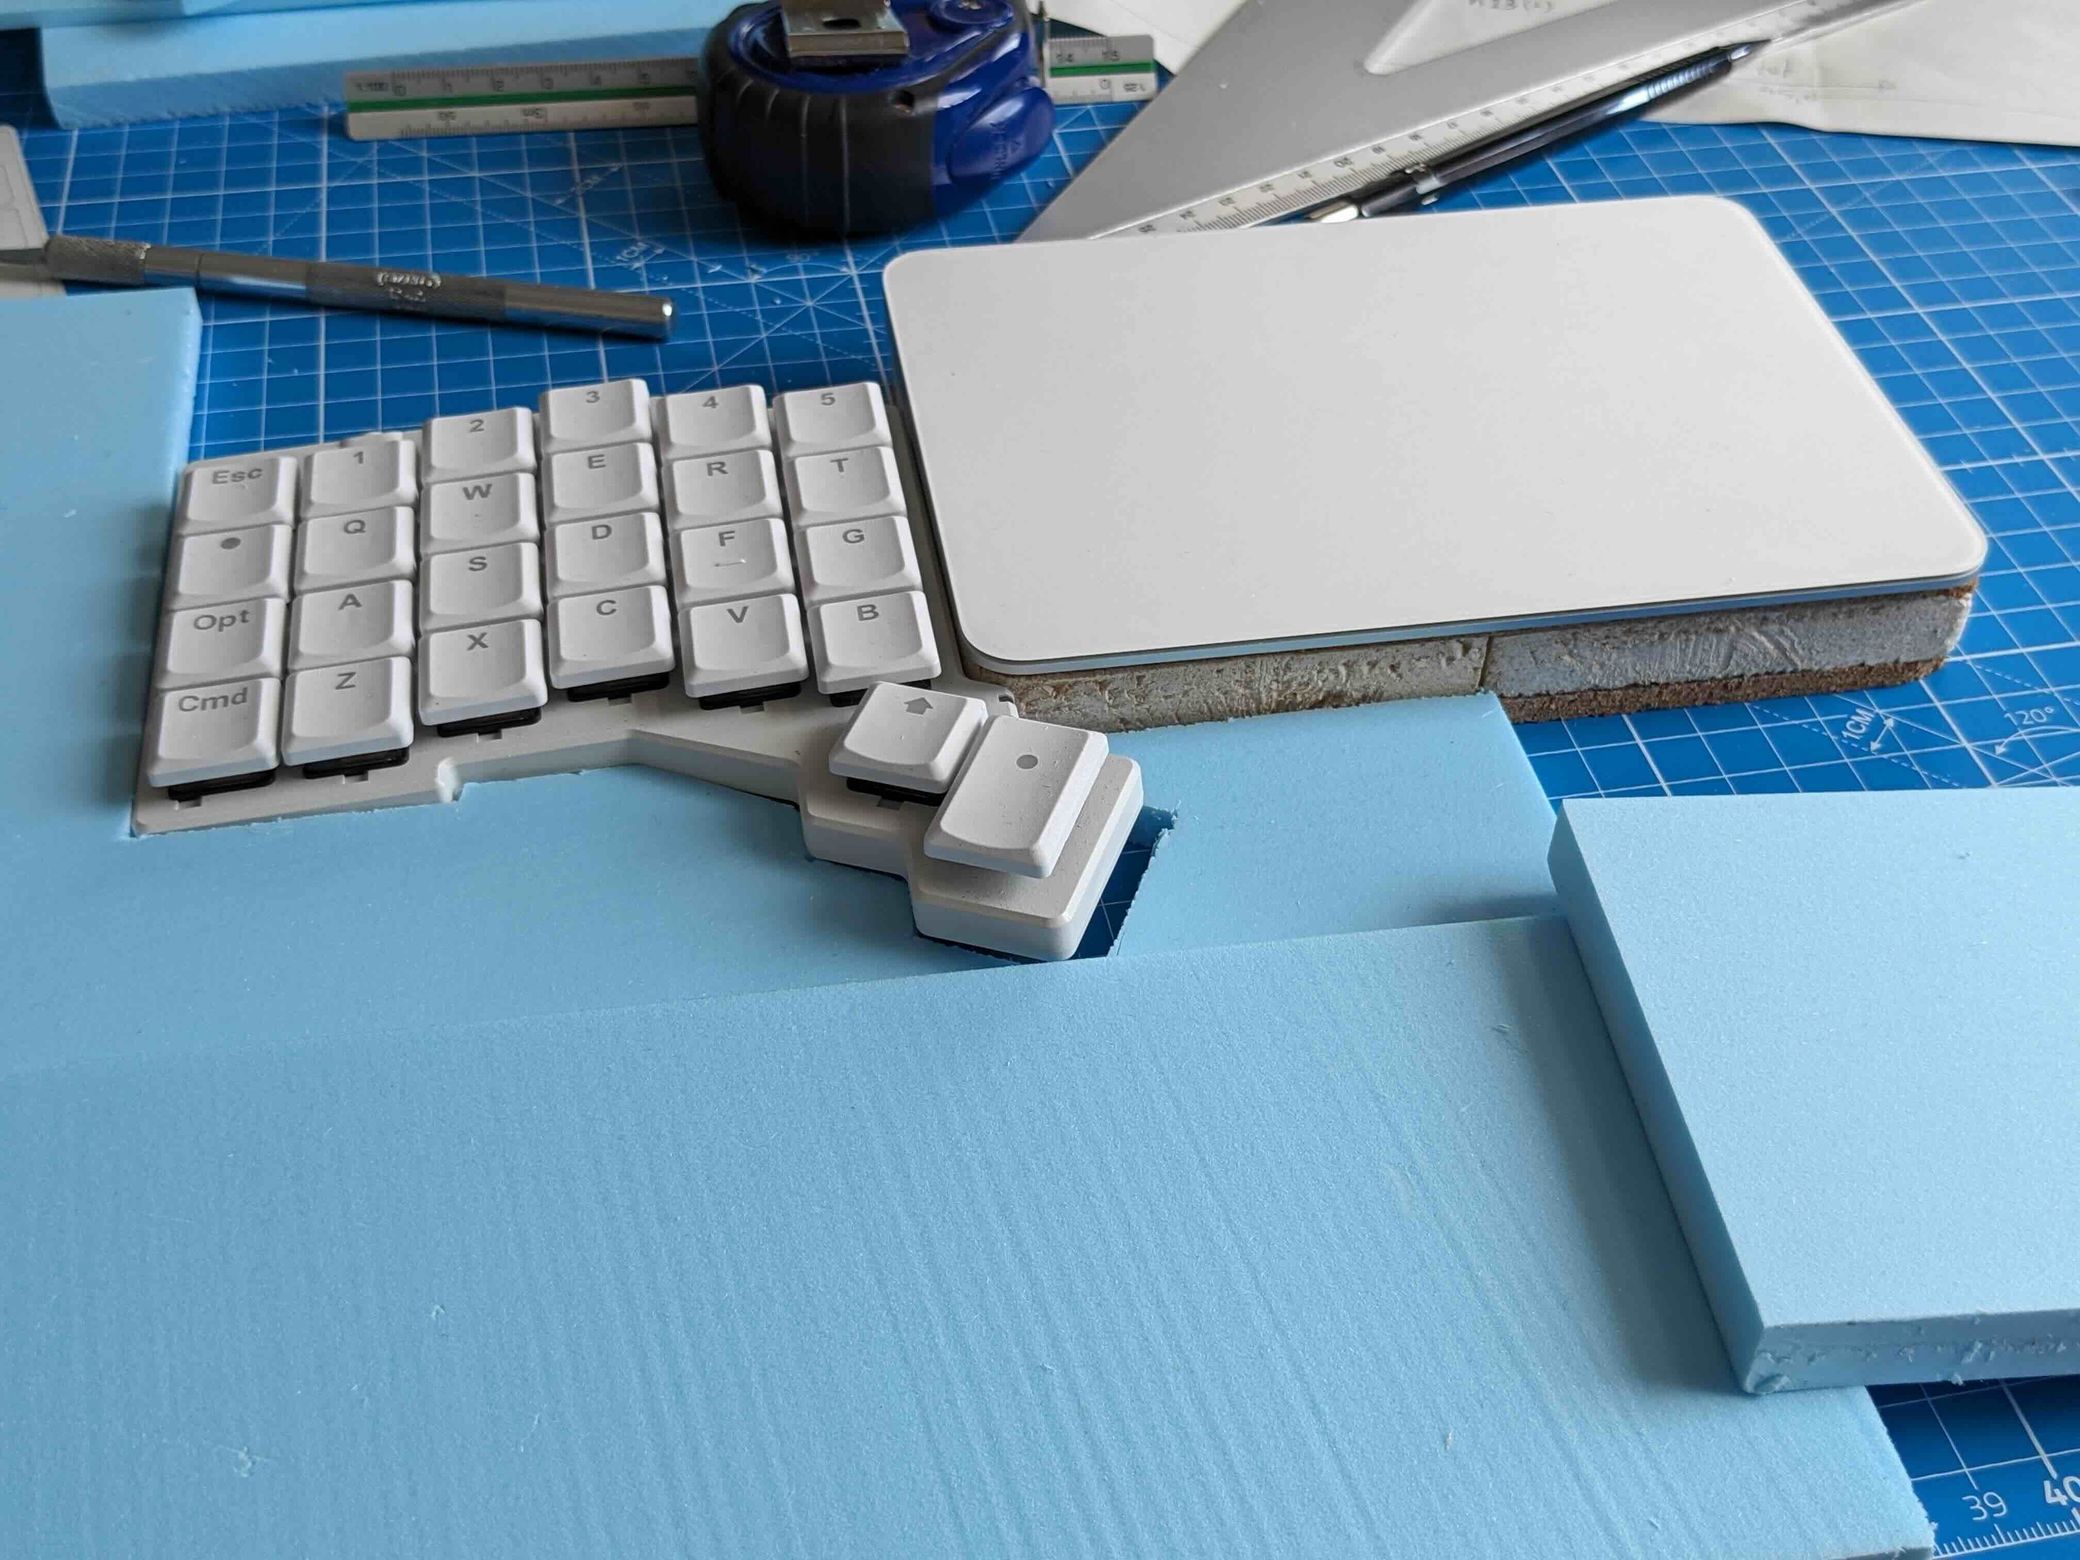
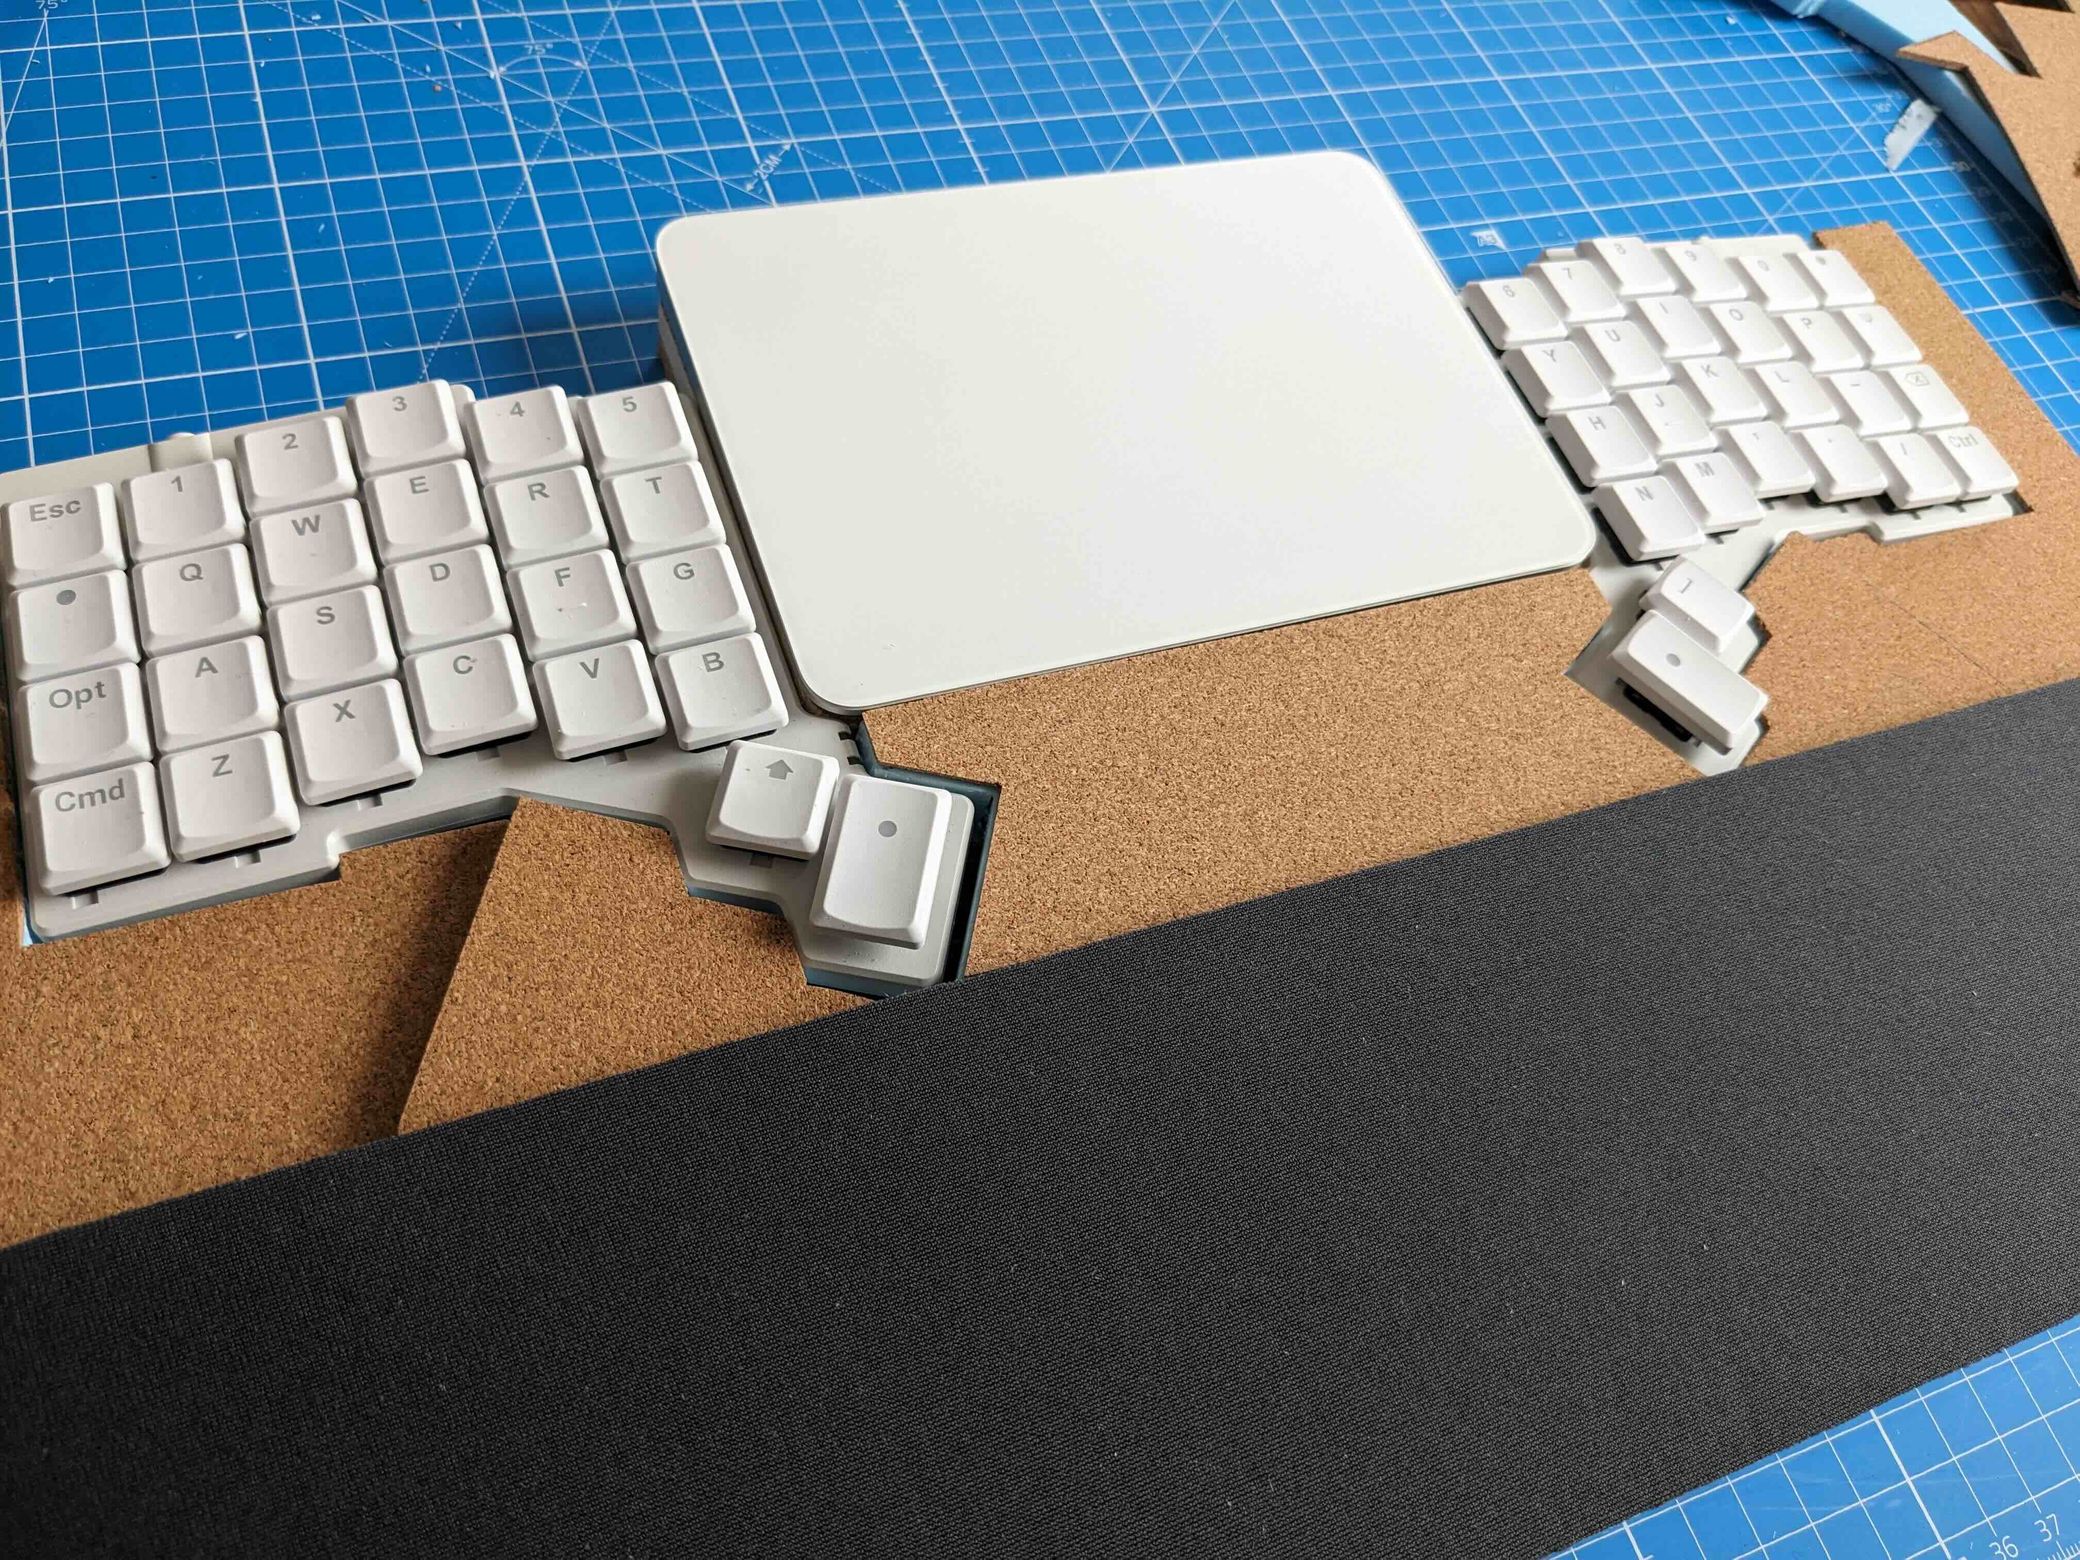
Having tried a few solutions, I concluded that the optimal configuration involved tilting the keyboards using their native legs and positioning an Apple Magic Trackpad between them. This symmetric setup allowed me to easily reach the trackpad with both hands. The trackpad needed to be level with the keyboard surface to minimize vertical movement, ensuring ergonomic comfort.
To achieve this, I needed materials that were durable, aesthetically pleasing, and tactile. They also had to be modular and lightweight for easy transport. I initially considered 3D printing, but it would have required relying on someone else, likely been time-consuming, and the structure would need to be hollow to reduce weight. Additionally, plastic lacks the desired grip and aesthetic appeal.
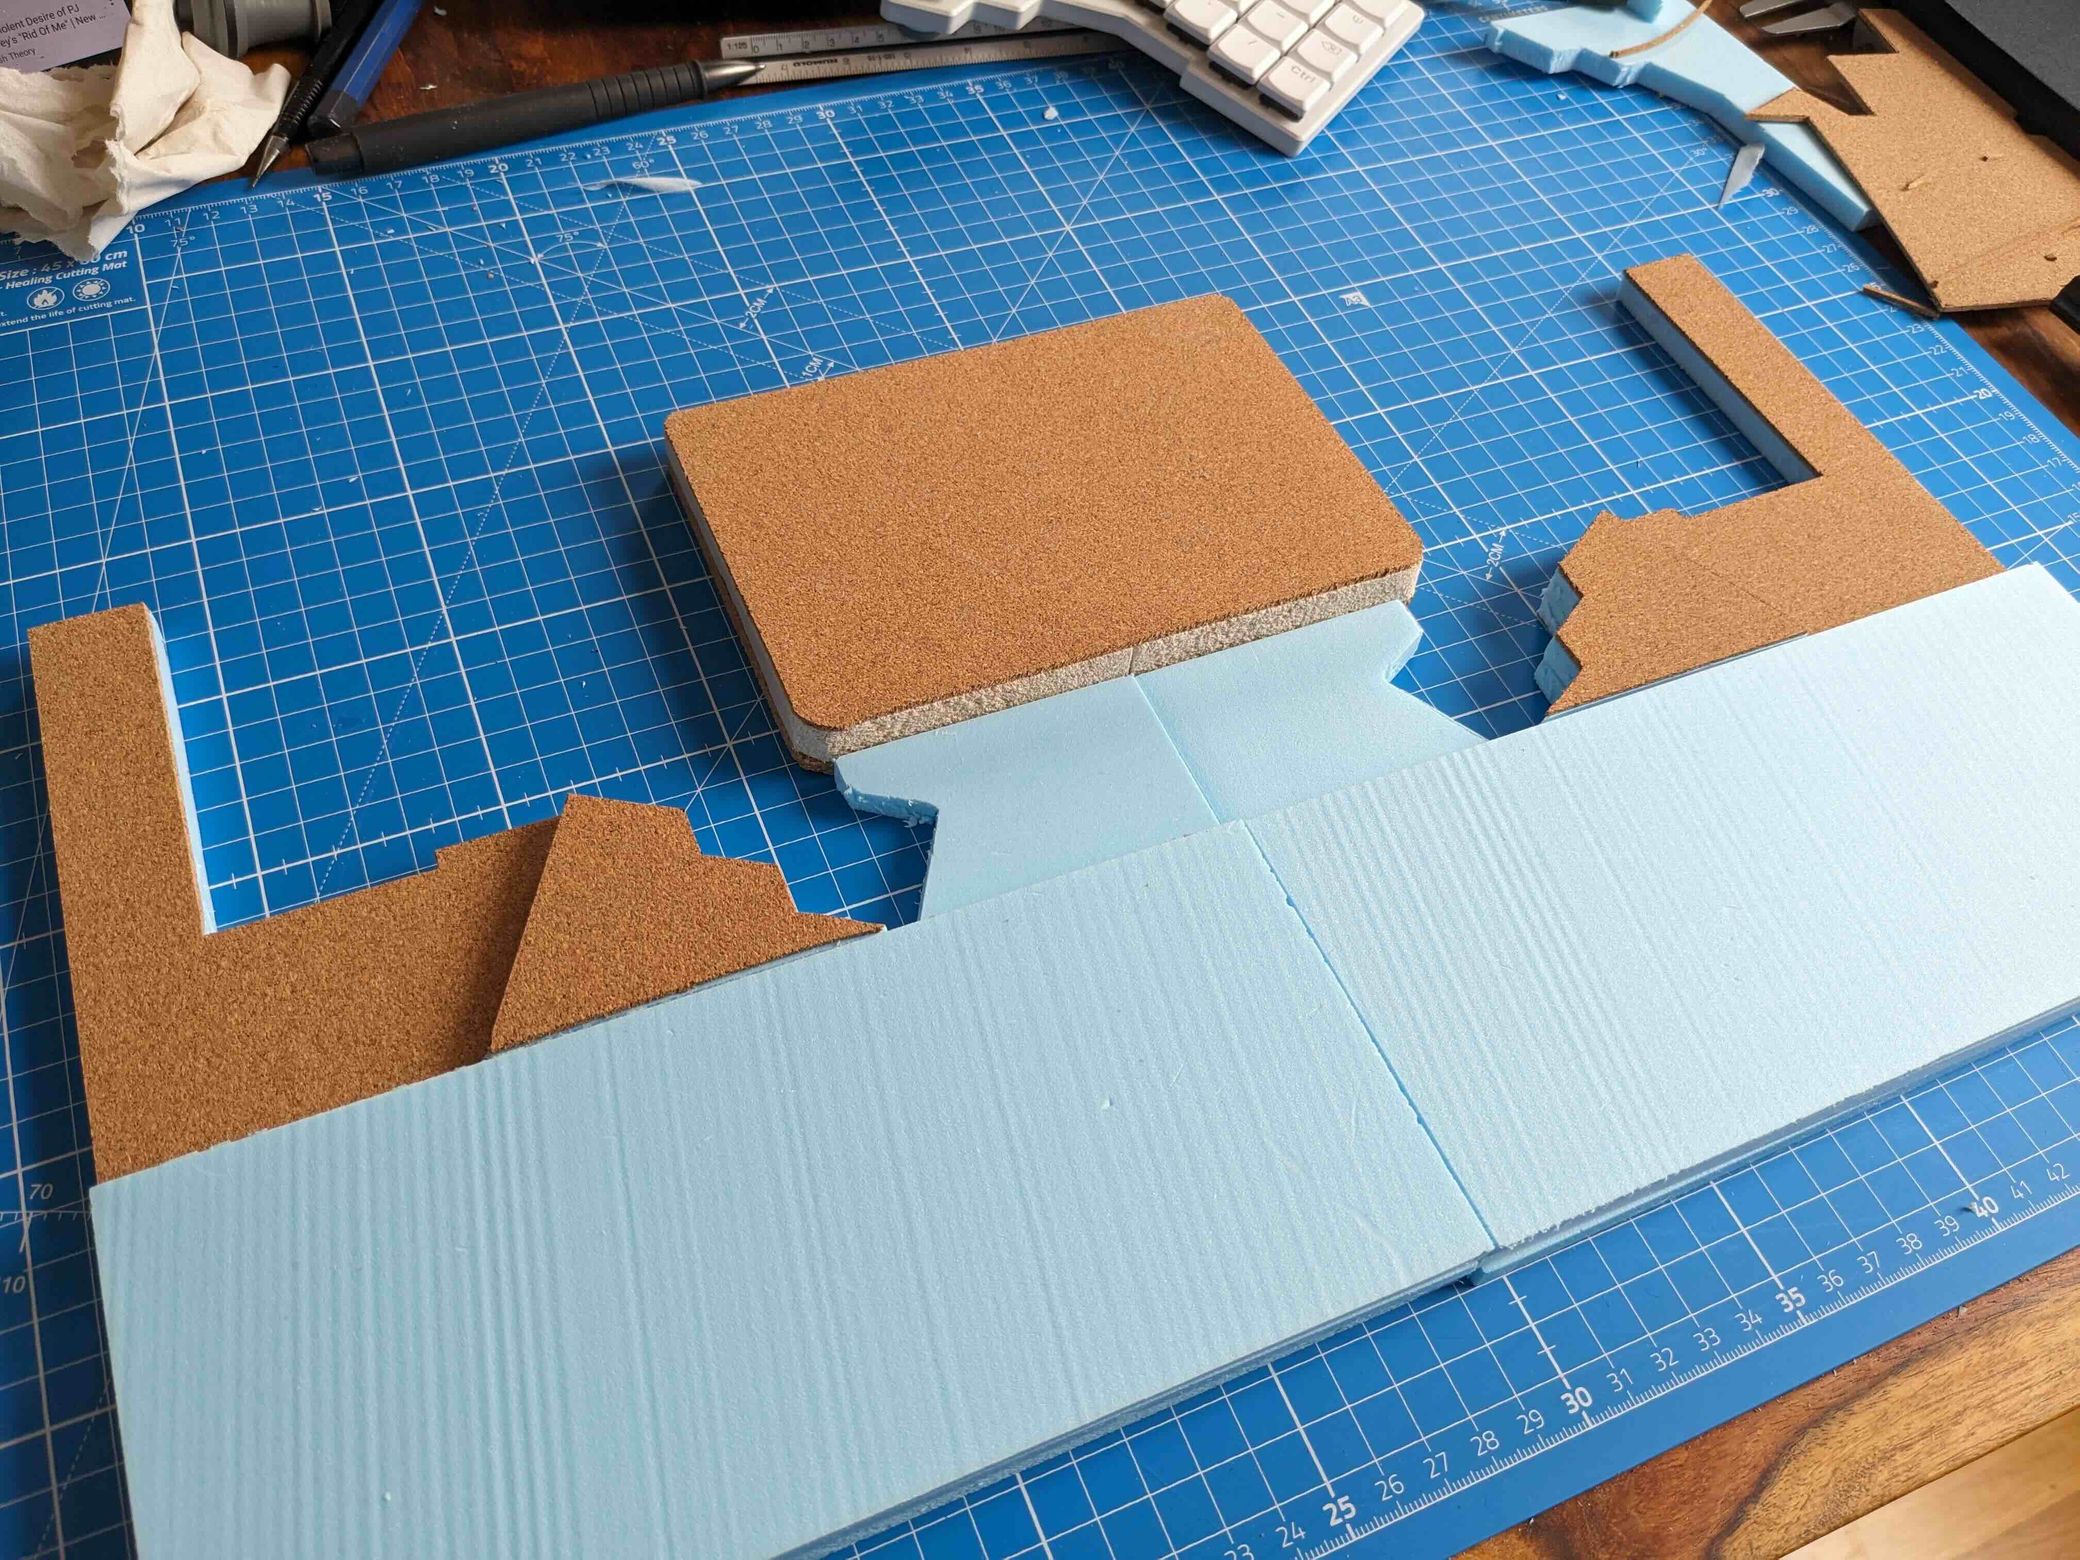
After visiting a local art supply store, I chose balsa wood, a cork sheet, and several polystyrene foam boards. The polystyrene was a particularly convenient choice since it is sold at different thicknesses, which meant I could combine them to create layers of different heights. Since the polystyrene doesn’t look very appealing, I used a light cork layer on the top and bottom.
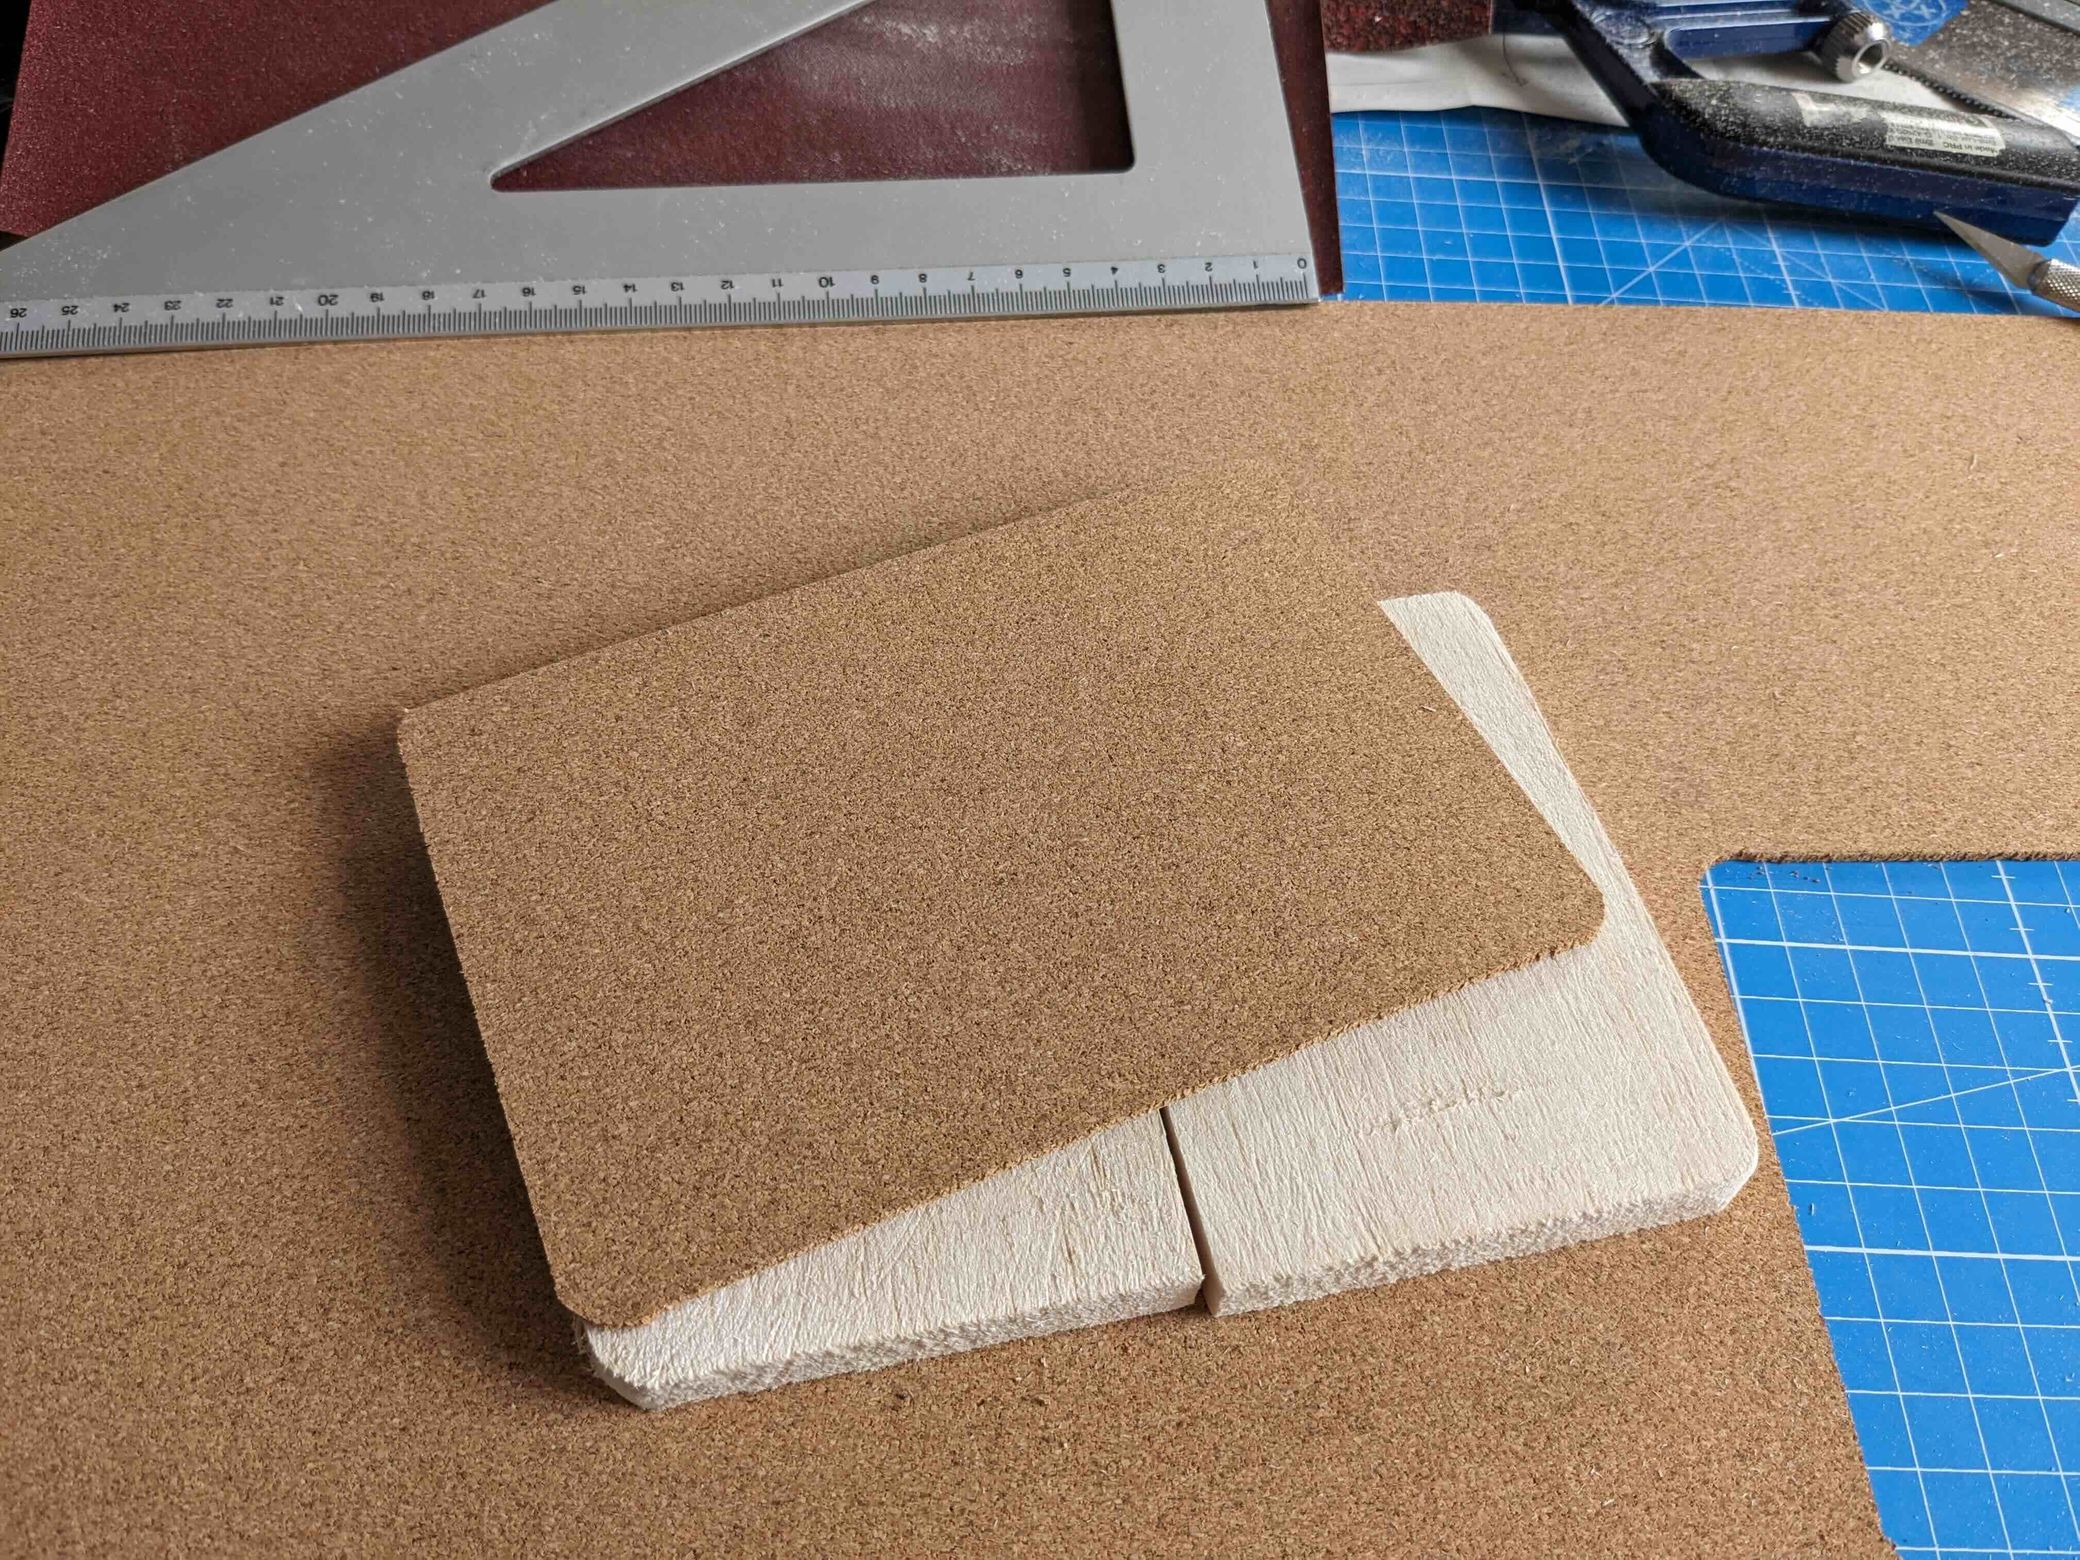
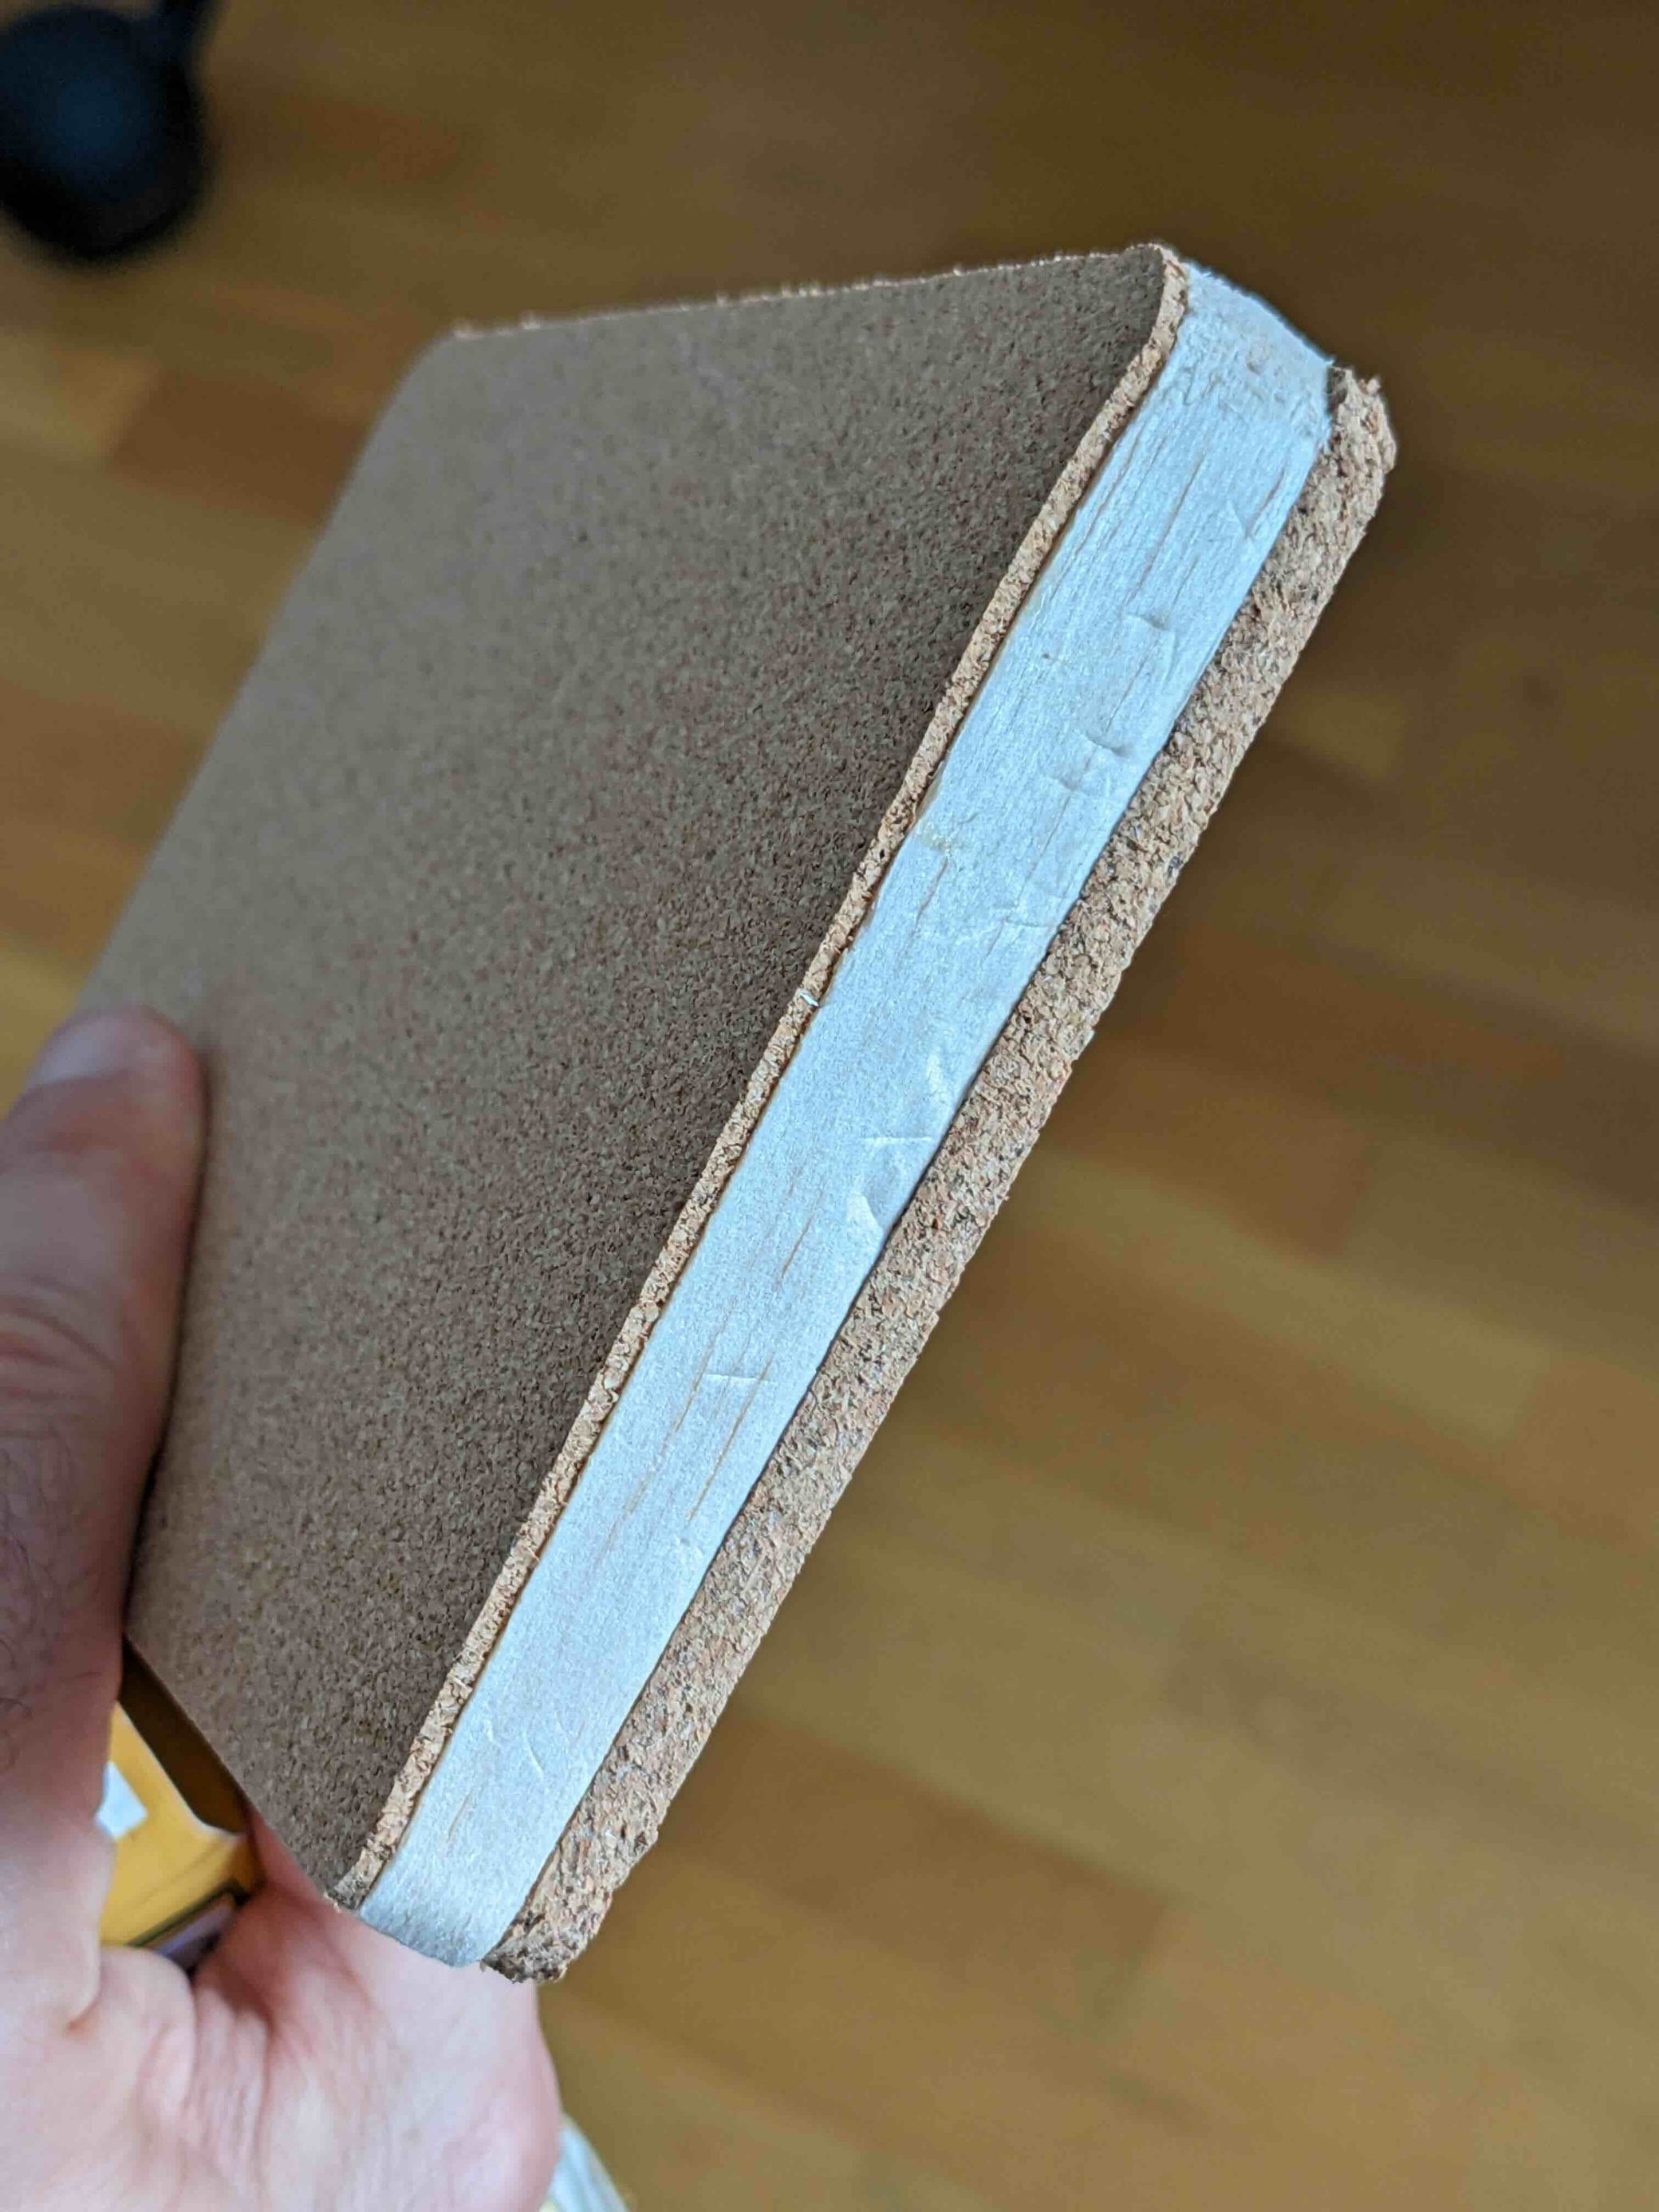
The balsa wood was ideal for the central trackpad support, as it required a slight bend to ensure the trackpad lay flat. The material can be easily sanded to achieve the necessary smooth surface and precise thickness that I was not sure I could obtain from the polystyrene, at least not without a hot wire cutter. I then sandwiched the balsa wood block with two cork layers.

I then proceeded to cut the polystyrene boards. I used a life-size model from ZSA’s website to trim them so they would nicely fit the shape of the keyboards.

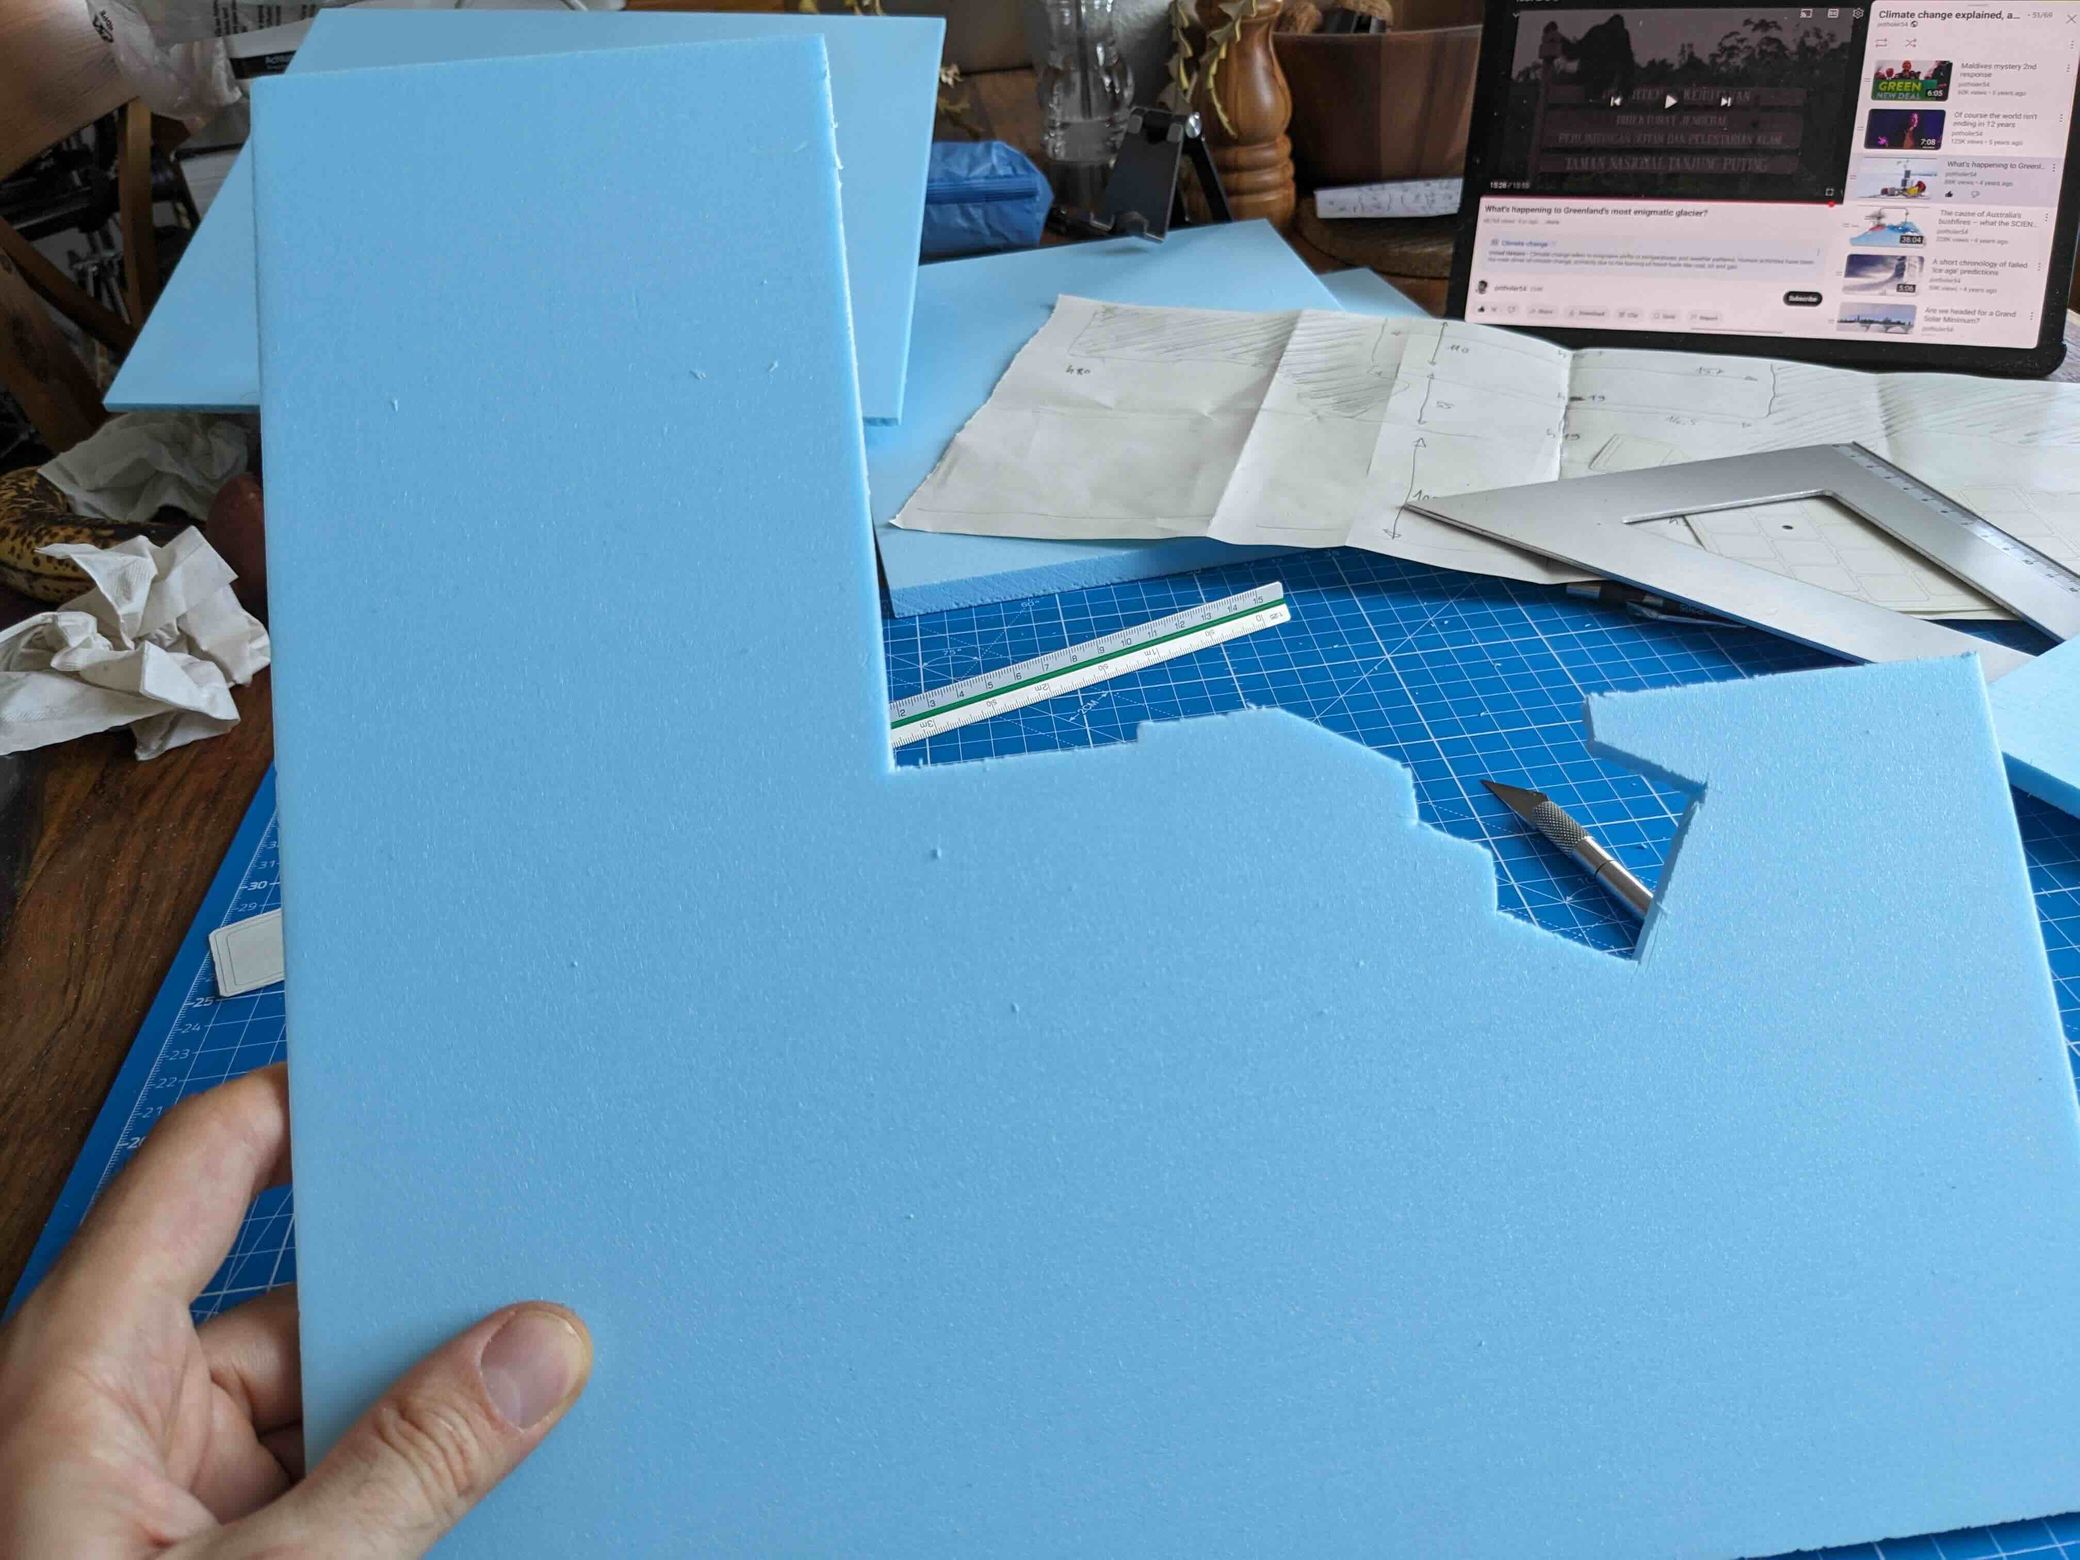
I aimed for precision when cutting the components, but not obsessively so. Adequate accuracy is all that is needed to ensure minimal unwanted movement. As the pieces fit together, the structure is solid and stable, keeping the keyboards and trackpad securely in place.
The base support consists of two halves, secured together underneath by high-strength adhesive tape, allowing them to bend and pack easily.


The central part needed additional thickness to match the tilted keyboards, so I glued two extra layers on each side, and added a removable third layer for the area between the thumb keys.
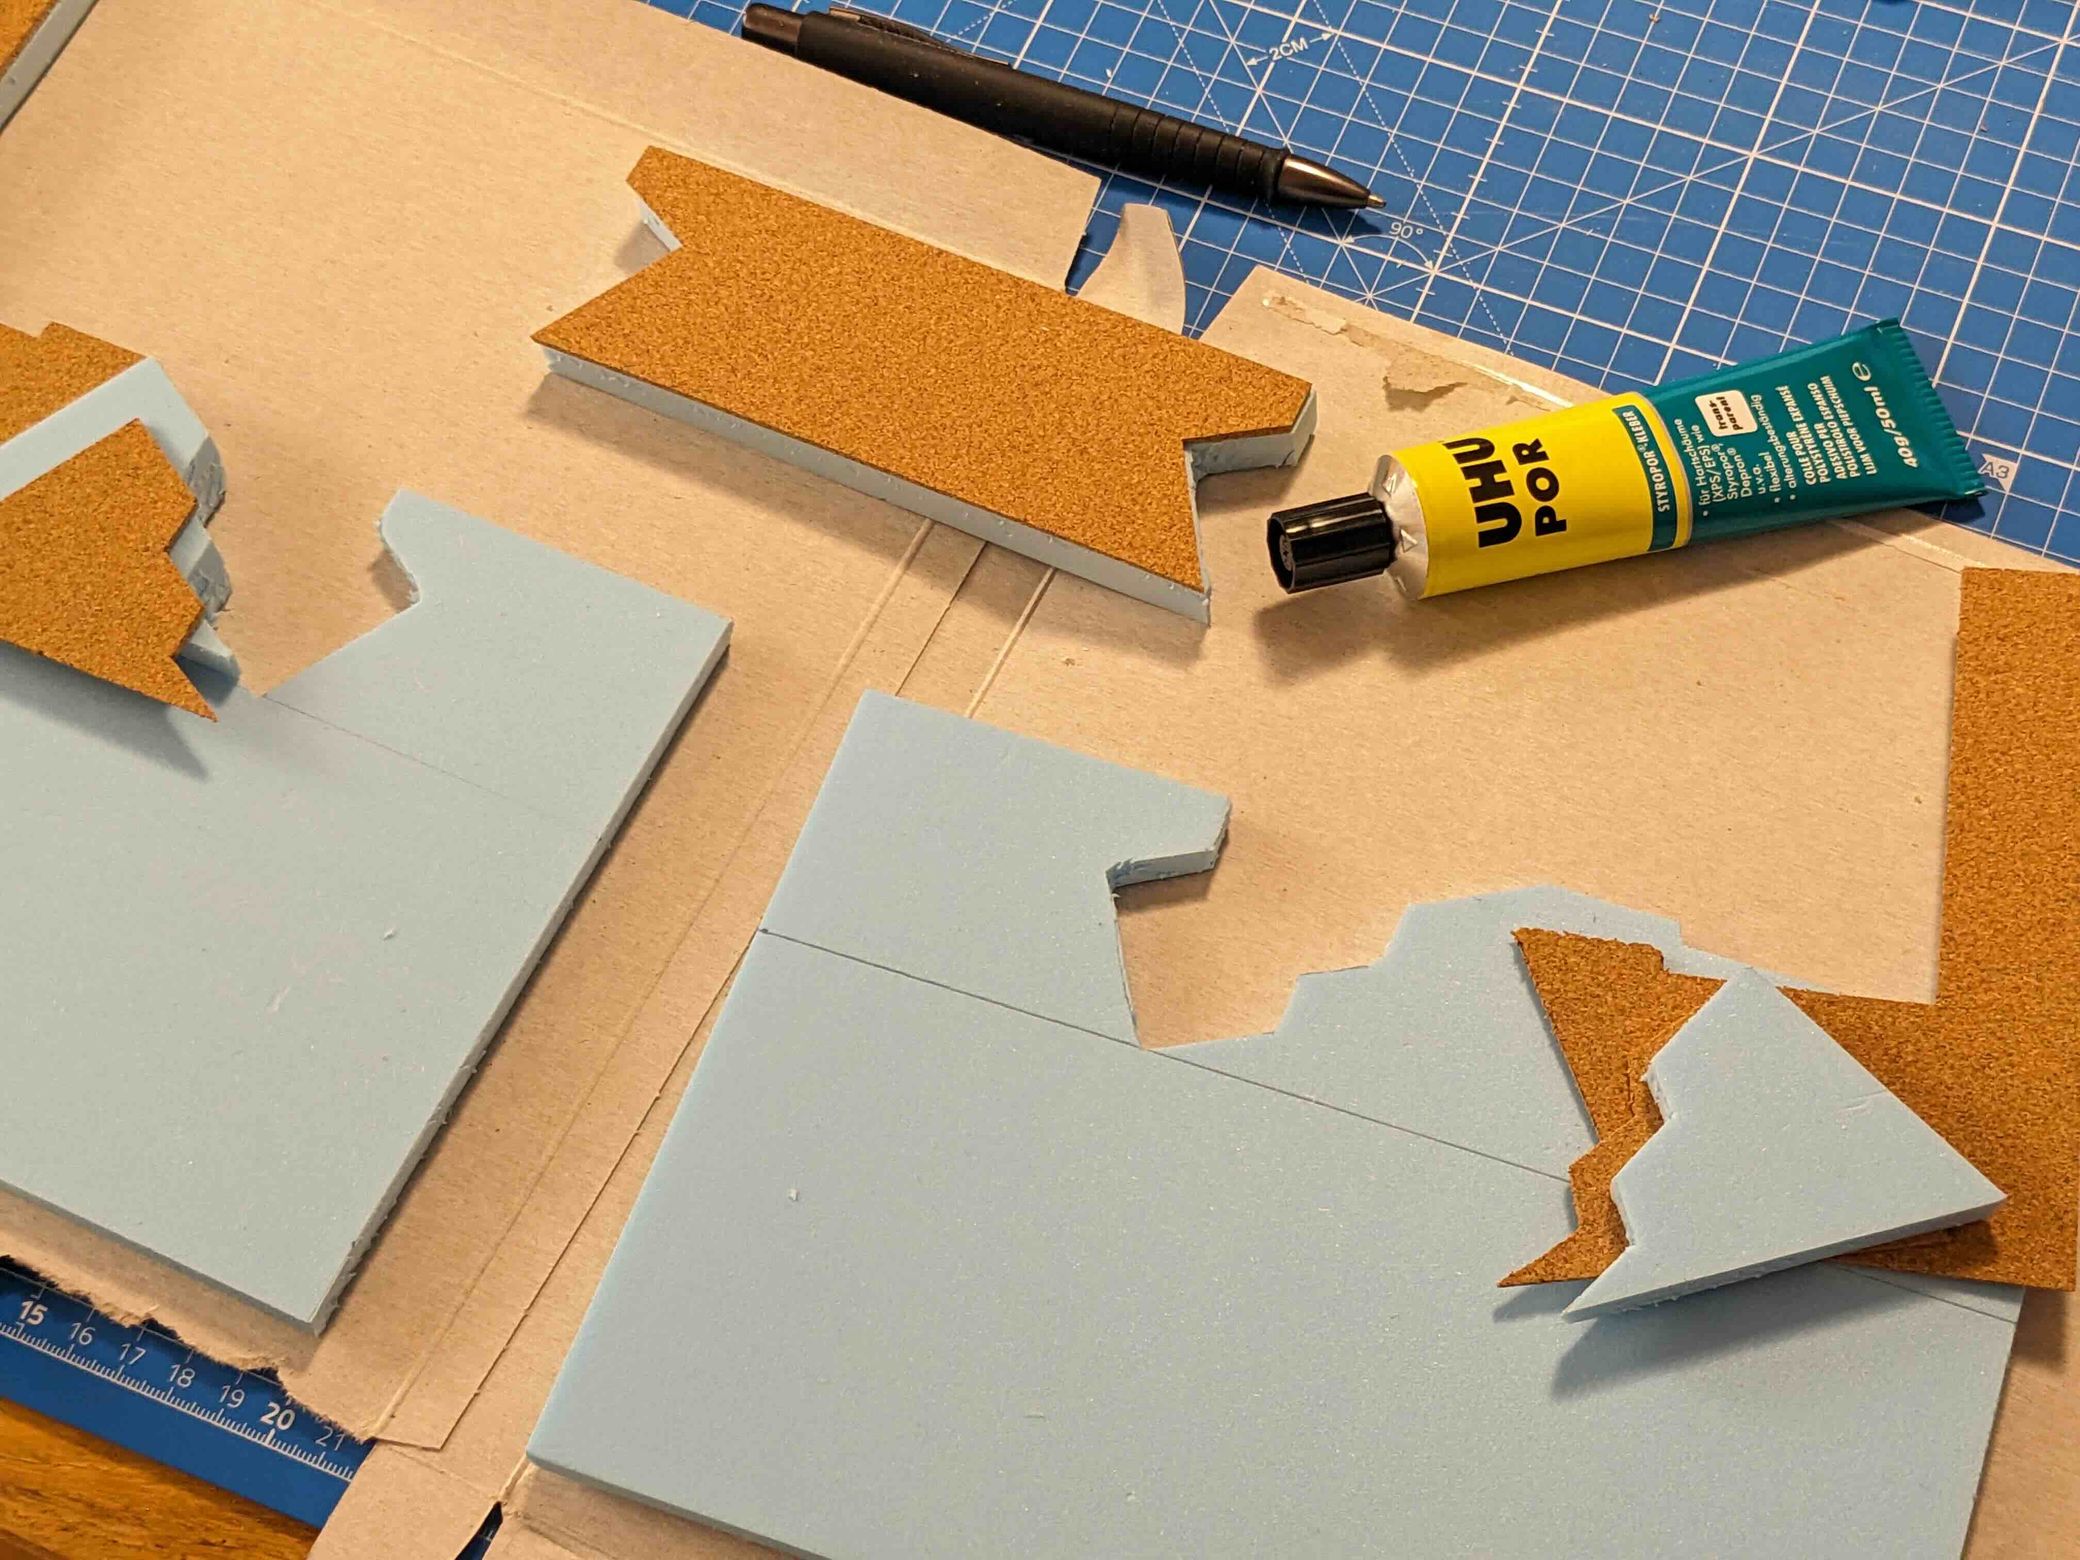
When gluing pieces together, use a special adhesive for polystyrene to achieve the best possible results and ensure long-term durability
Measurements and thicknesses are detailed below.
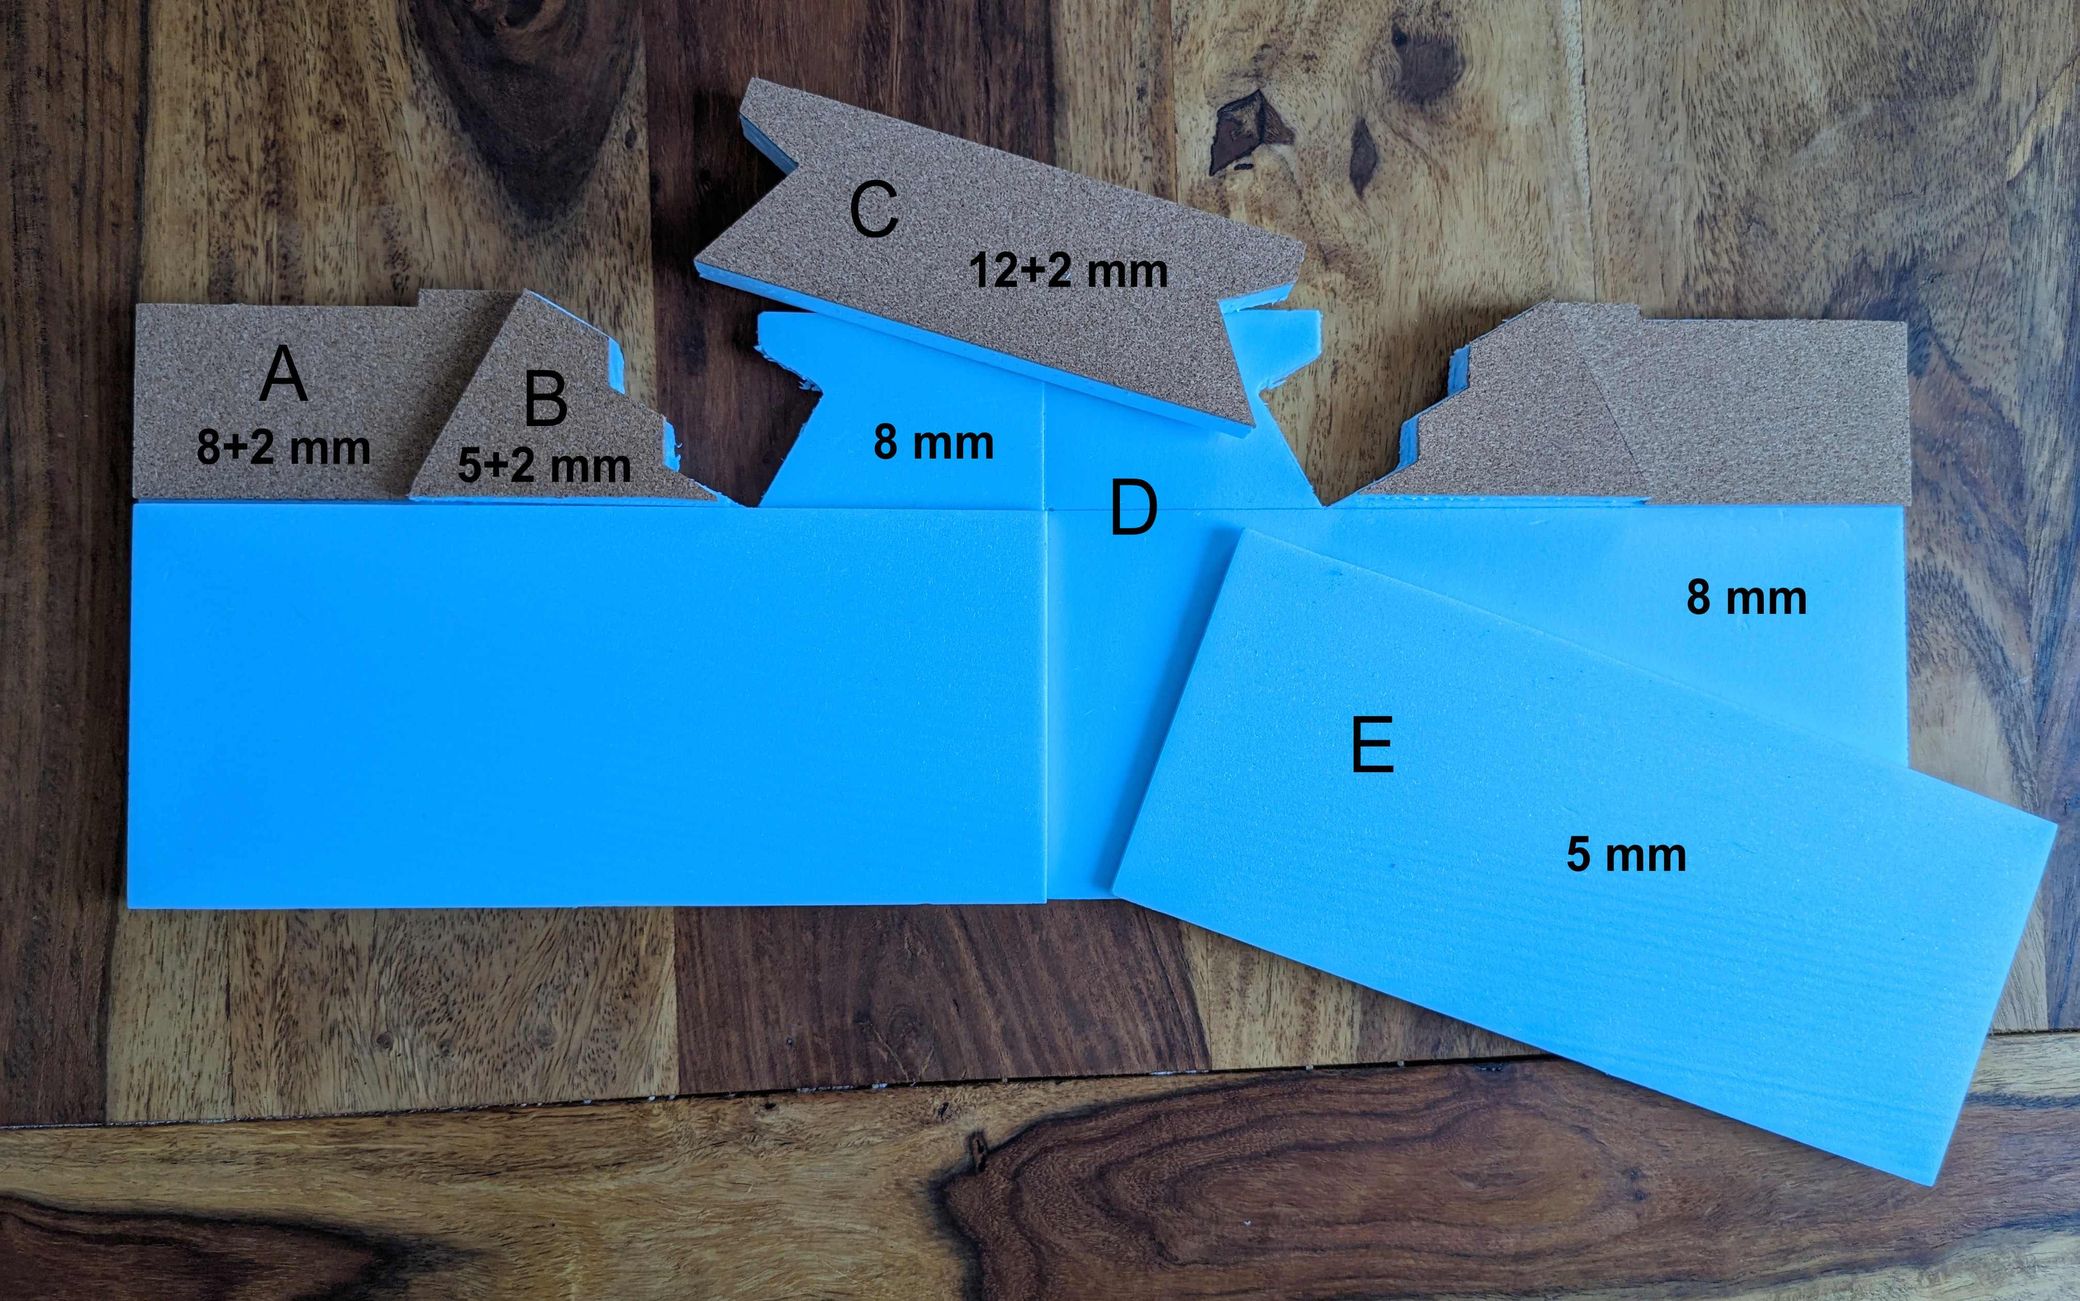
The base (D) is made of two symmetrical halves, and there is no actual separation at the location of letter D, just a line traced in pencil. The portion of D that is going to be exposed (A) has a 2 mm-thick cork layer glued on top. B is an added layer that is obtained from a 5 mm-thick foam board, then glued on top of D, with an added 2 mm of cork cover. C is a movable component obtained from an 12 mm-thick board, with cork glued on top. The overall elevation of the components is as follows: D (8 mm), A (10 mm), B (15 mm), C (22 mm), E (13 mm).
The wrist rest area matches the support's thickness but can accommodate additional layers, if needed. I am currently using a 5 mm-thick layer under the pad (indicated above with the letter E), which provides the ideal positioning of the hands. I purposely chose to not glue this layer to the base, so I can always take it out if I want to experiment with a different wrist elevation. When traveling, I may take a few extra layers with me, to account for different desk configurations. Note that the pictures above show two slightly different variations: one for home use and one for travel, where the outermost, thin strips of base D have been cut off, to fit the travel case.
Here’s the dismantled support, ready for the next trip.
I am also going to carry a Roost laptop stand and a more compact support pad than the wrist rest by Durable that I use at home.
And finally, why not do something creative with the leftover pieces?!