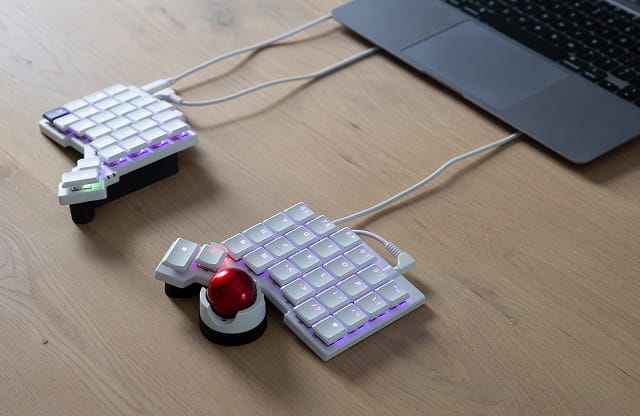
One of the most exciting parts of the Navigator is not as obvious as the premium hardware or continually improving firmware support for it; we designed it to be a system.
The groundwork for this is clear because the trackball and upcoming trackpad can fit in the exact same shells, but that's just the beginning.
The potential for custom shells and cores means incredible flexibility in getting the Navigator exactly where you need it, working exactly how you want it.
A 3D-printable thumb shell for the Voyager

This 3D-printable thumb shell is the first of what I hope will be a number of alternate designs from us, and maybe even more from the ZSA community. It moves the trackball from the side of your Voyager to your thumb, and comes with some built-in tenting.
There are a number of different files included that you can pick from depending on your desired setup. You'll find a 3MF file with multiple plates, each with a common configuration you can choose from, or you can use the individual STL files if you want something more specific.
All plates include one shell for mounting the Navigator Core (the trackball and cradle), and a reverse shell for the other half of the board (a "wedge") that does not include a Navigator mount, but gives you the same level of tenting, so your boards will be symmetrical.
You can choose the variant of the design that does not use any magnets at all if you'd like maximum simplicity, but for most people, I recommend trying the design with magnets — it's a little more reliable if you bump your desk, for example, and magnets are fun. The Makerworld listing has a little more information on the specific configurations you can choose.
The Setup
If you're using the magnet versions, here's how to set that up.
The Navigator magnet is actually two pieces: a steel back plate, and the magnet.
Begin by unscrewing the two small screws from the top. Since you're unscrewing them from a magnet, they'll keep sticking, but once they feel loose, you can pull them away from the sockets and slide them off the magnet, or you can even just leave them sitting in the sockets. Then, move the Navigator to the Voyager like you're about to attach it. The top magnet will come out (it'll stick to the metal back of the Voyager), which lets the bottom piece of steel fall out.
To assemble the printable, slide the steel bar in the back first. Once you have that in position, make sure you're holding the magnet with the chamfered holes (the larger, angled holes) face up, and lay the magnet down from one long end to the other, kind of like a playing card. Just dropping the magnet straight in will usually end up with the magnet on its side.
Shift the magnet and steel bar around a little if you need to to make sure the holes are aligned, then screw the small screws back in. The screw heads should sit flush or slightly below the top of the magnet. If they're higher, they're not tightened, and the magnet will probably detach when you try to put the Voyager on it.
Since a Navigator only comes with one of these bar magnets, the wedge-side uses the magnets from the default Voyager legs instead. Take two of the Voyager legs and unscrew the small screws in the middle of them. Similar to the bar magnet above, the screws will stick to the magnet, so you can pull them apart when things are loose, or just leave them stuck.
Then, just drop the magnets in the print (chamfered side up again) and screw them back in. The holes in the print are small enough that the screws will self-tap, but you will have to push a little harder to screw these in all the way.
With that, you're done! You've got built-in tenting and a thumb trackball, all connected by strong magnets. Enjoy!

