Last month, I said that we want the Navigator to be a system. This month, the system expands for all the Moonlander users out there.

Here you’ll find two different trackball shell options: a side shell, like the official Navigator shell, and a thumb shell, like last month’s printable for the Voyager. All options come with some built-in tenting, so you’re free to angle the Moonlander’s thumb cluster while still maintaining some height.
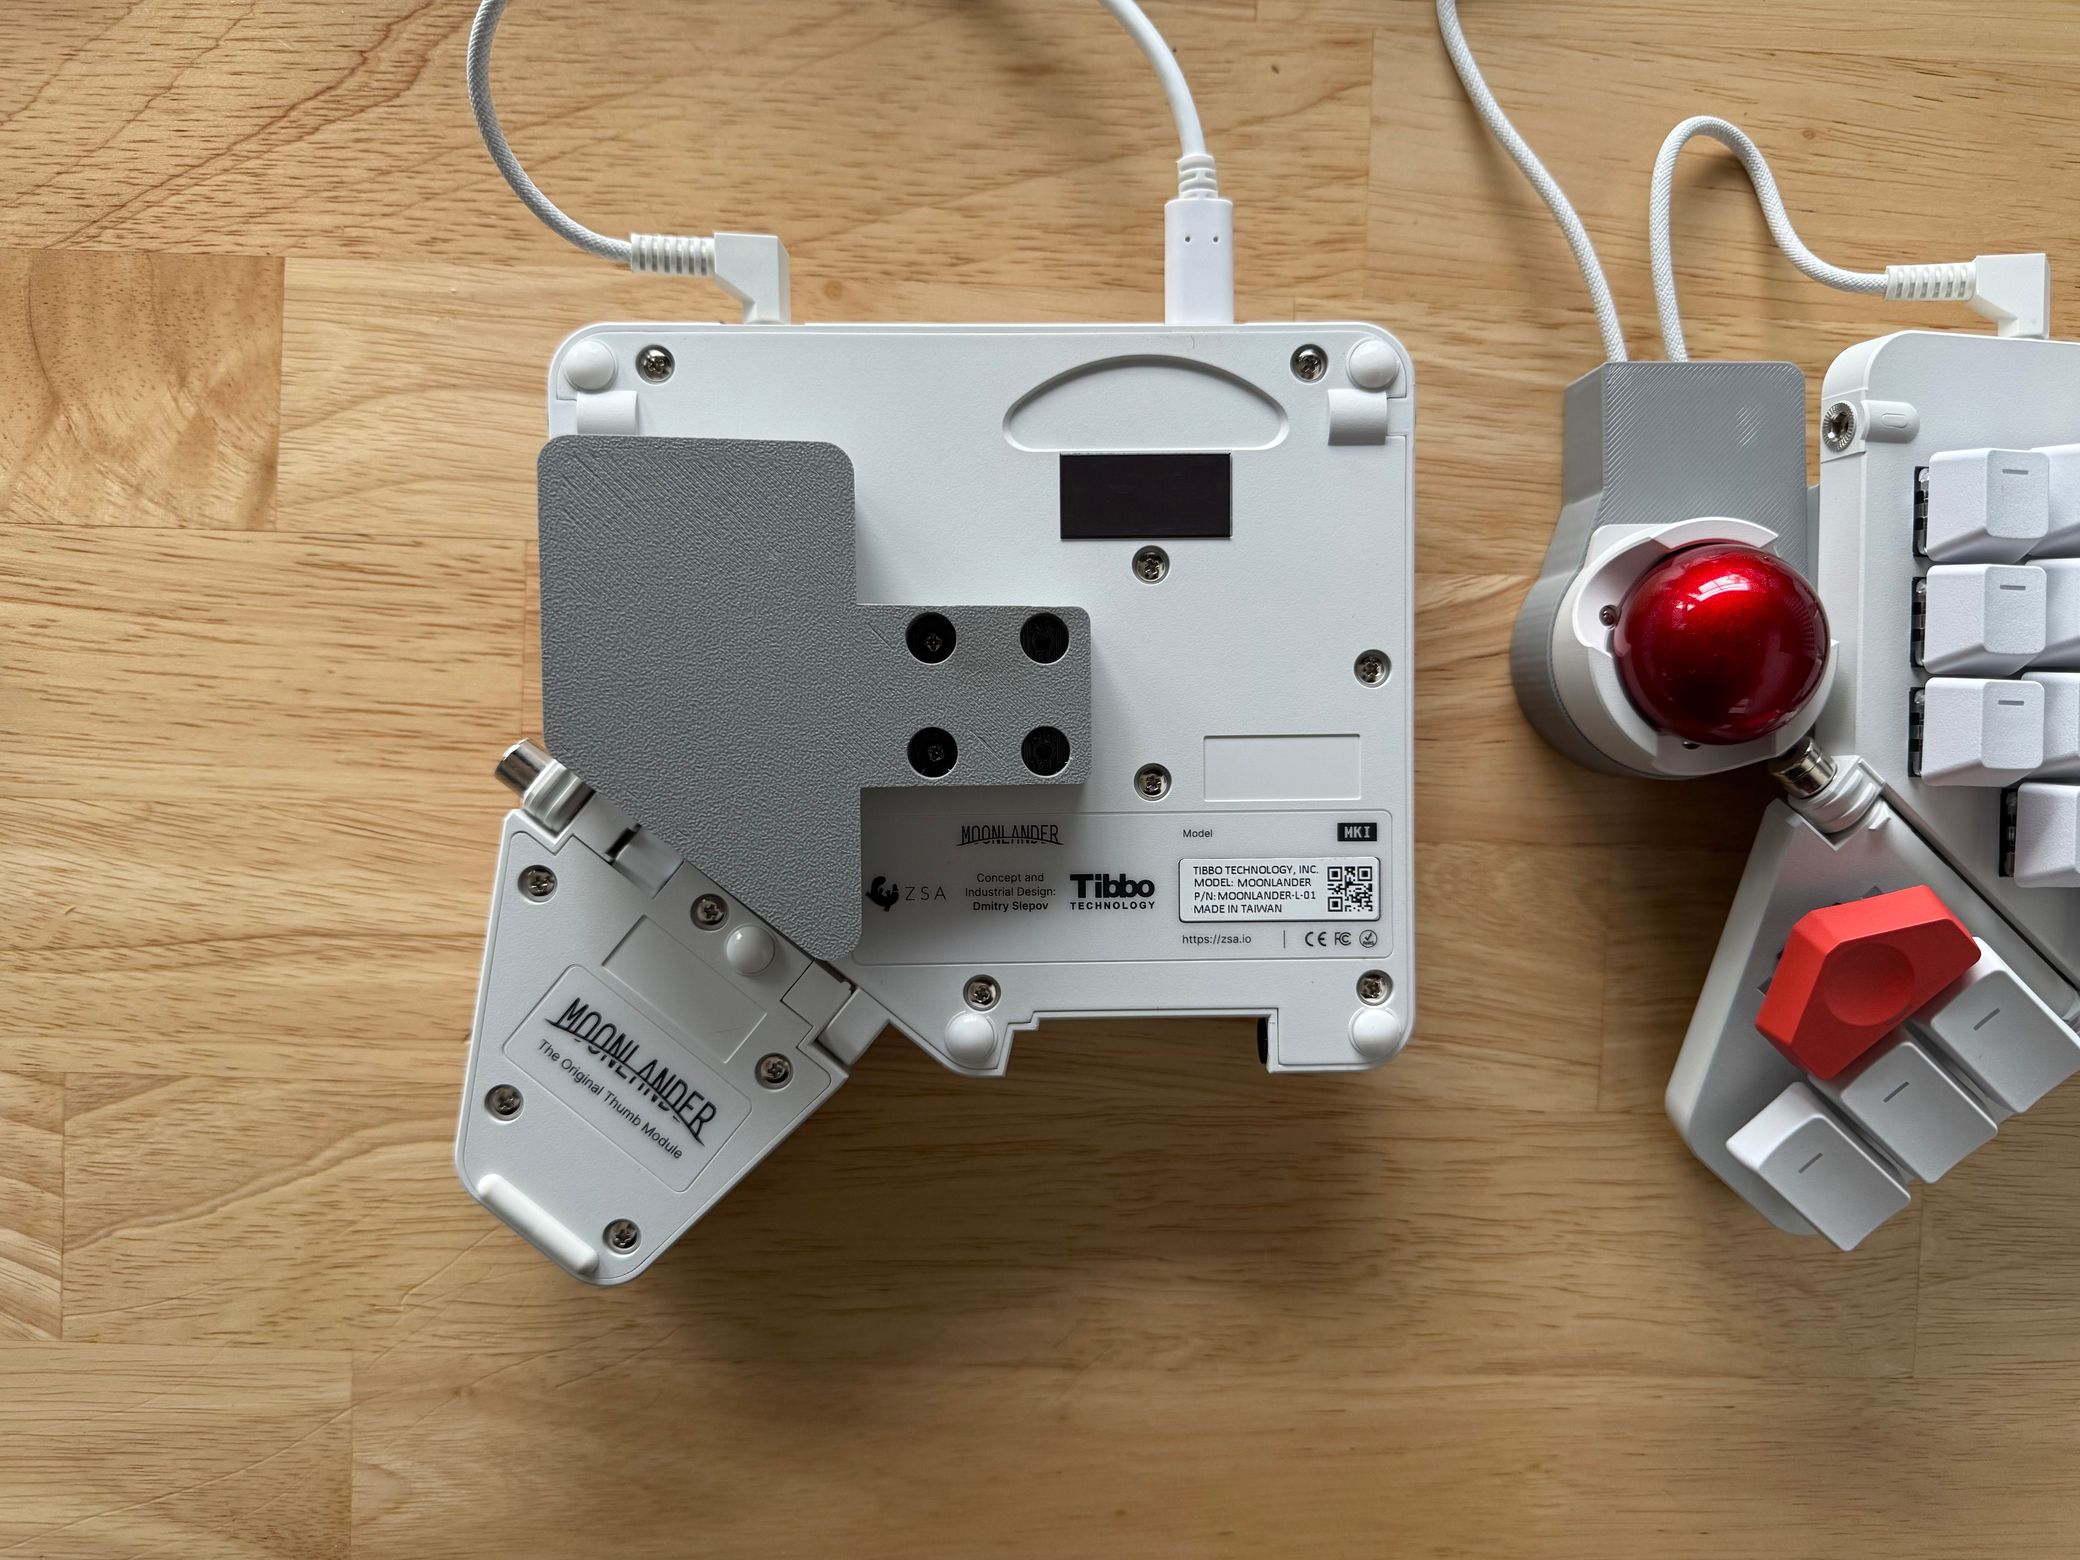
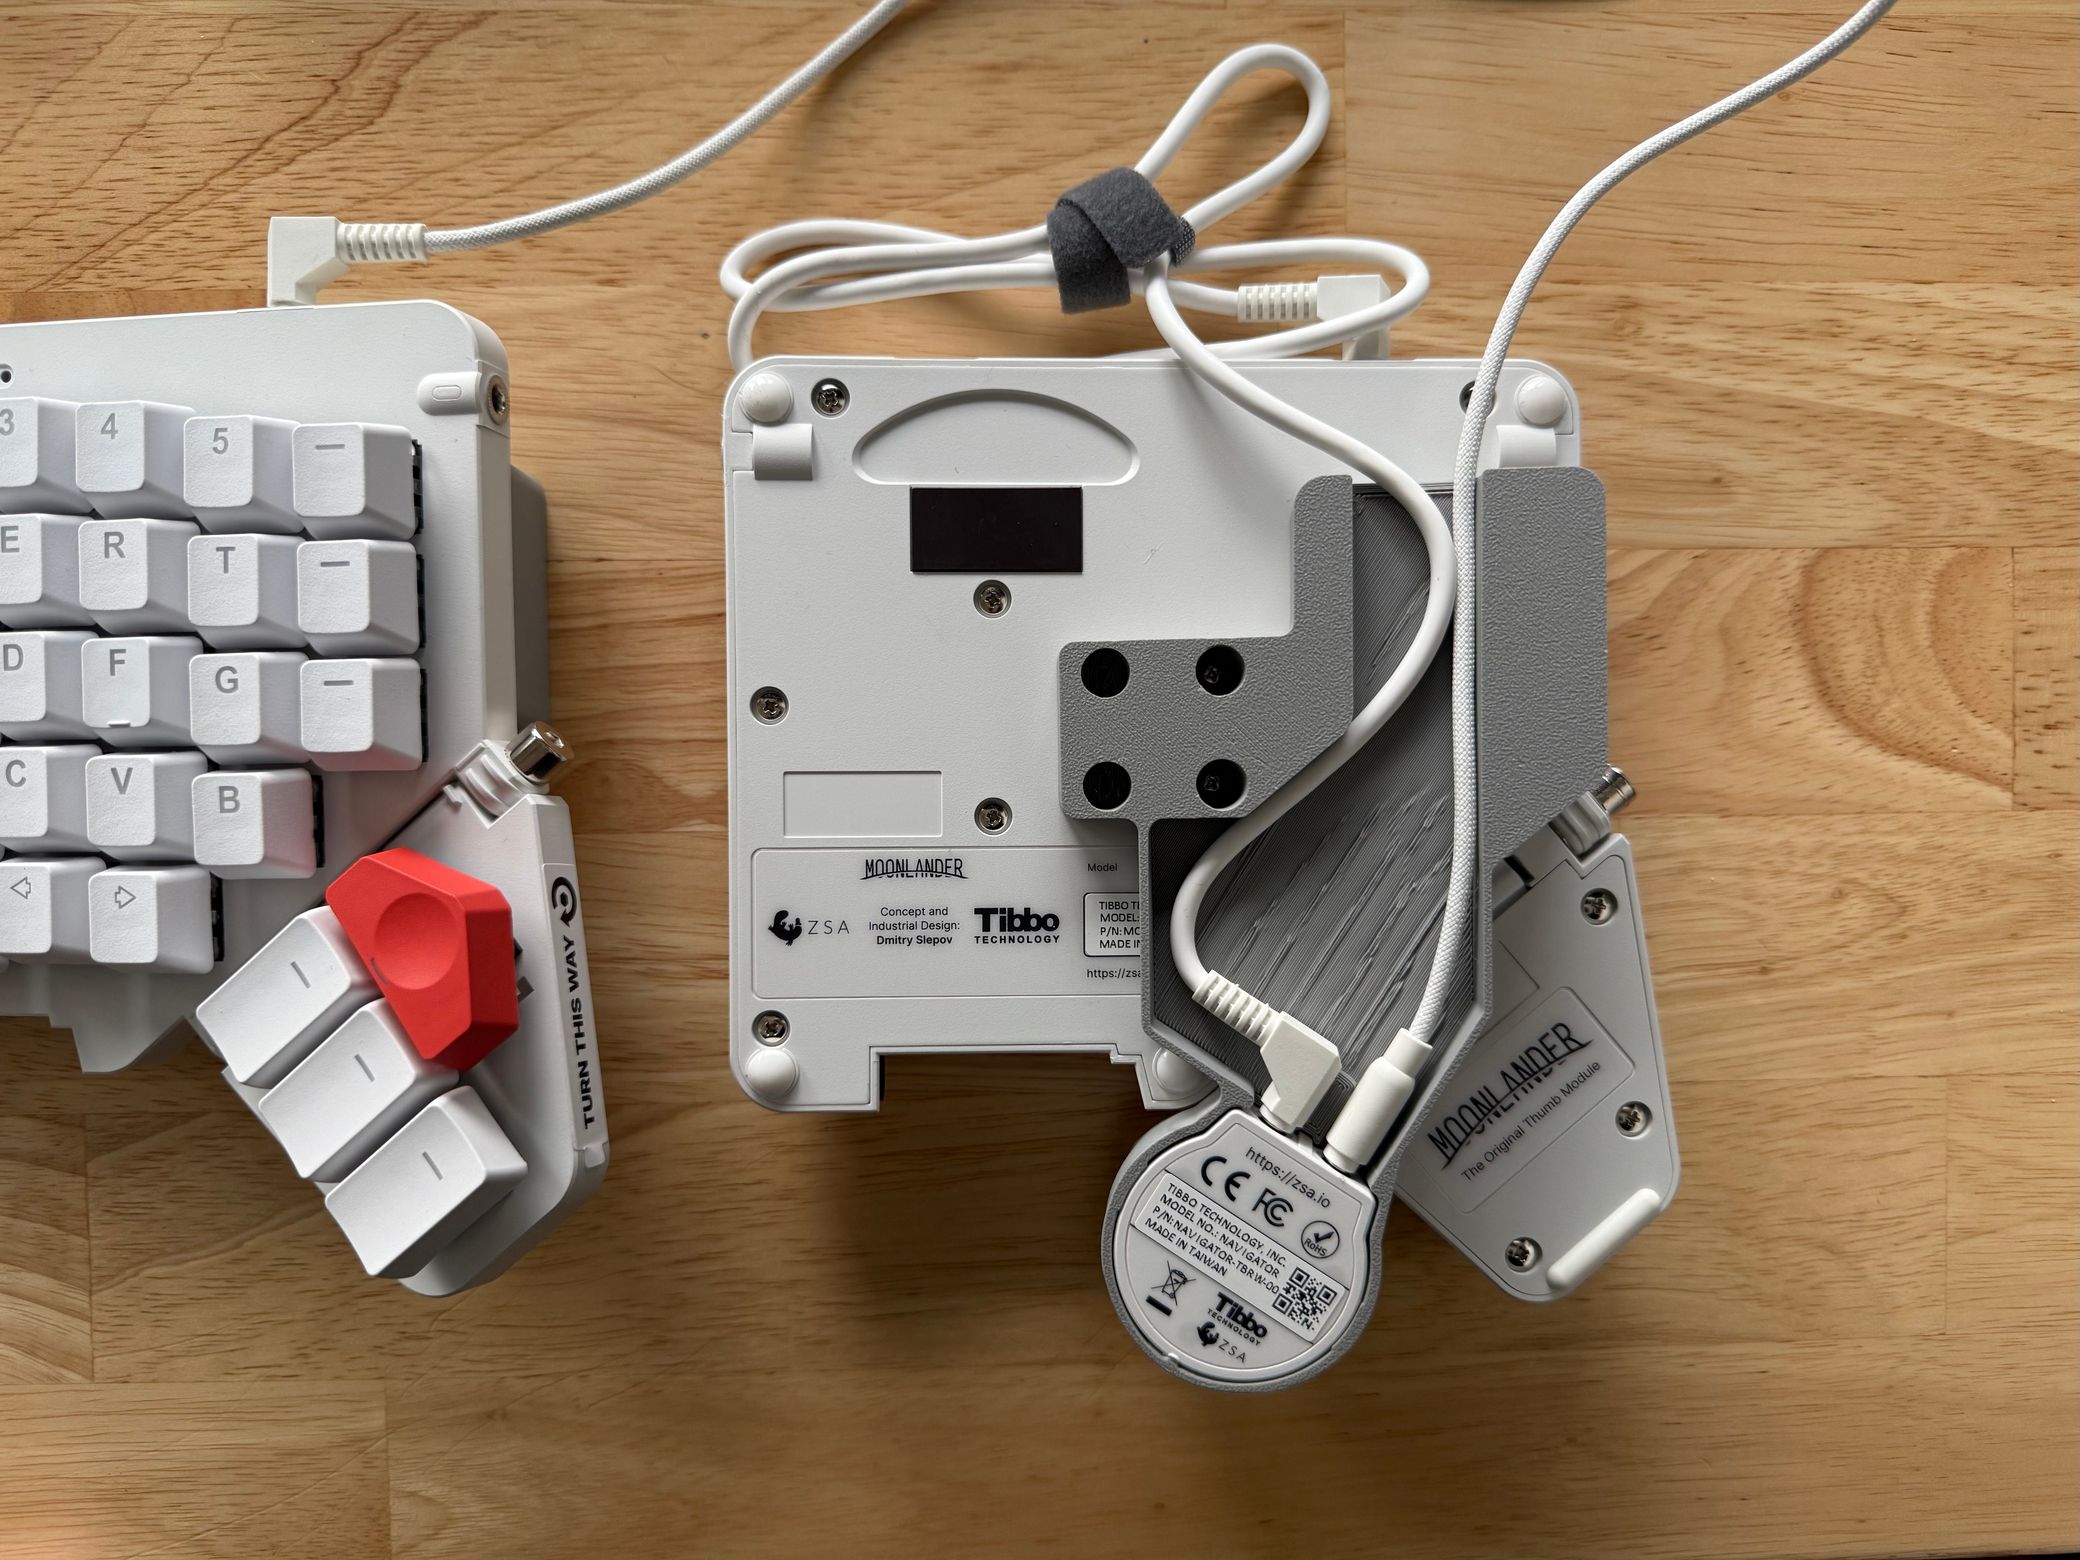
All the options also come with a wedge print for the opposite side of the board, so you can mirror the tenting angle no matter which side you prefer the Navigator on. Every piece can be securely mounted to the back of the board using the Moonlander’s four screw mounts (so you’ll want 4 M2.5 screws, about 5mm long).
Side Shell
This one is like the default Navigator shell, but with some built-in tenting. The trackball is also a little lower relative to the MX keycaps, so the top of the ball is just about the same height as the keys. With a little flick of your wrist, you're mousing with the Navigator.
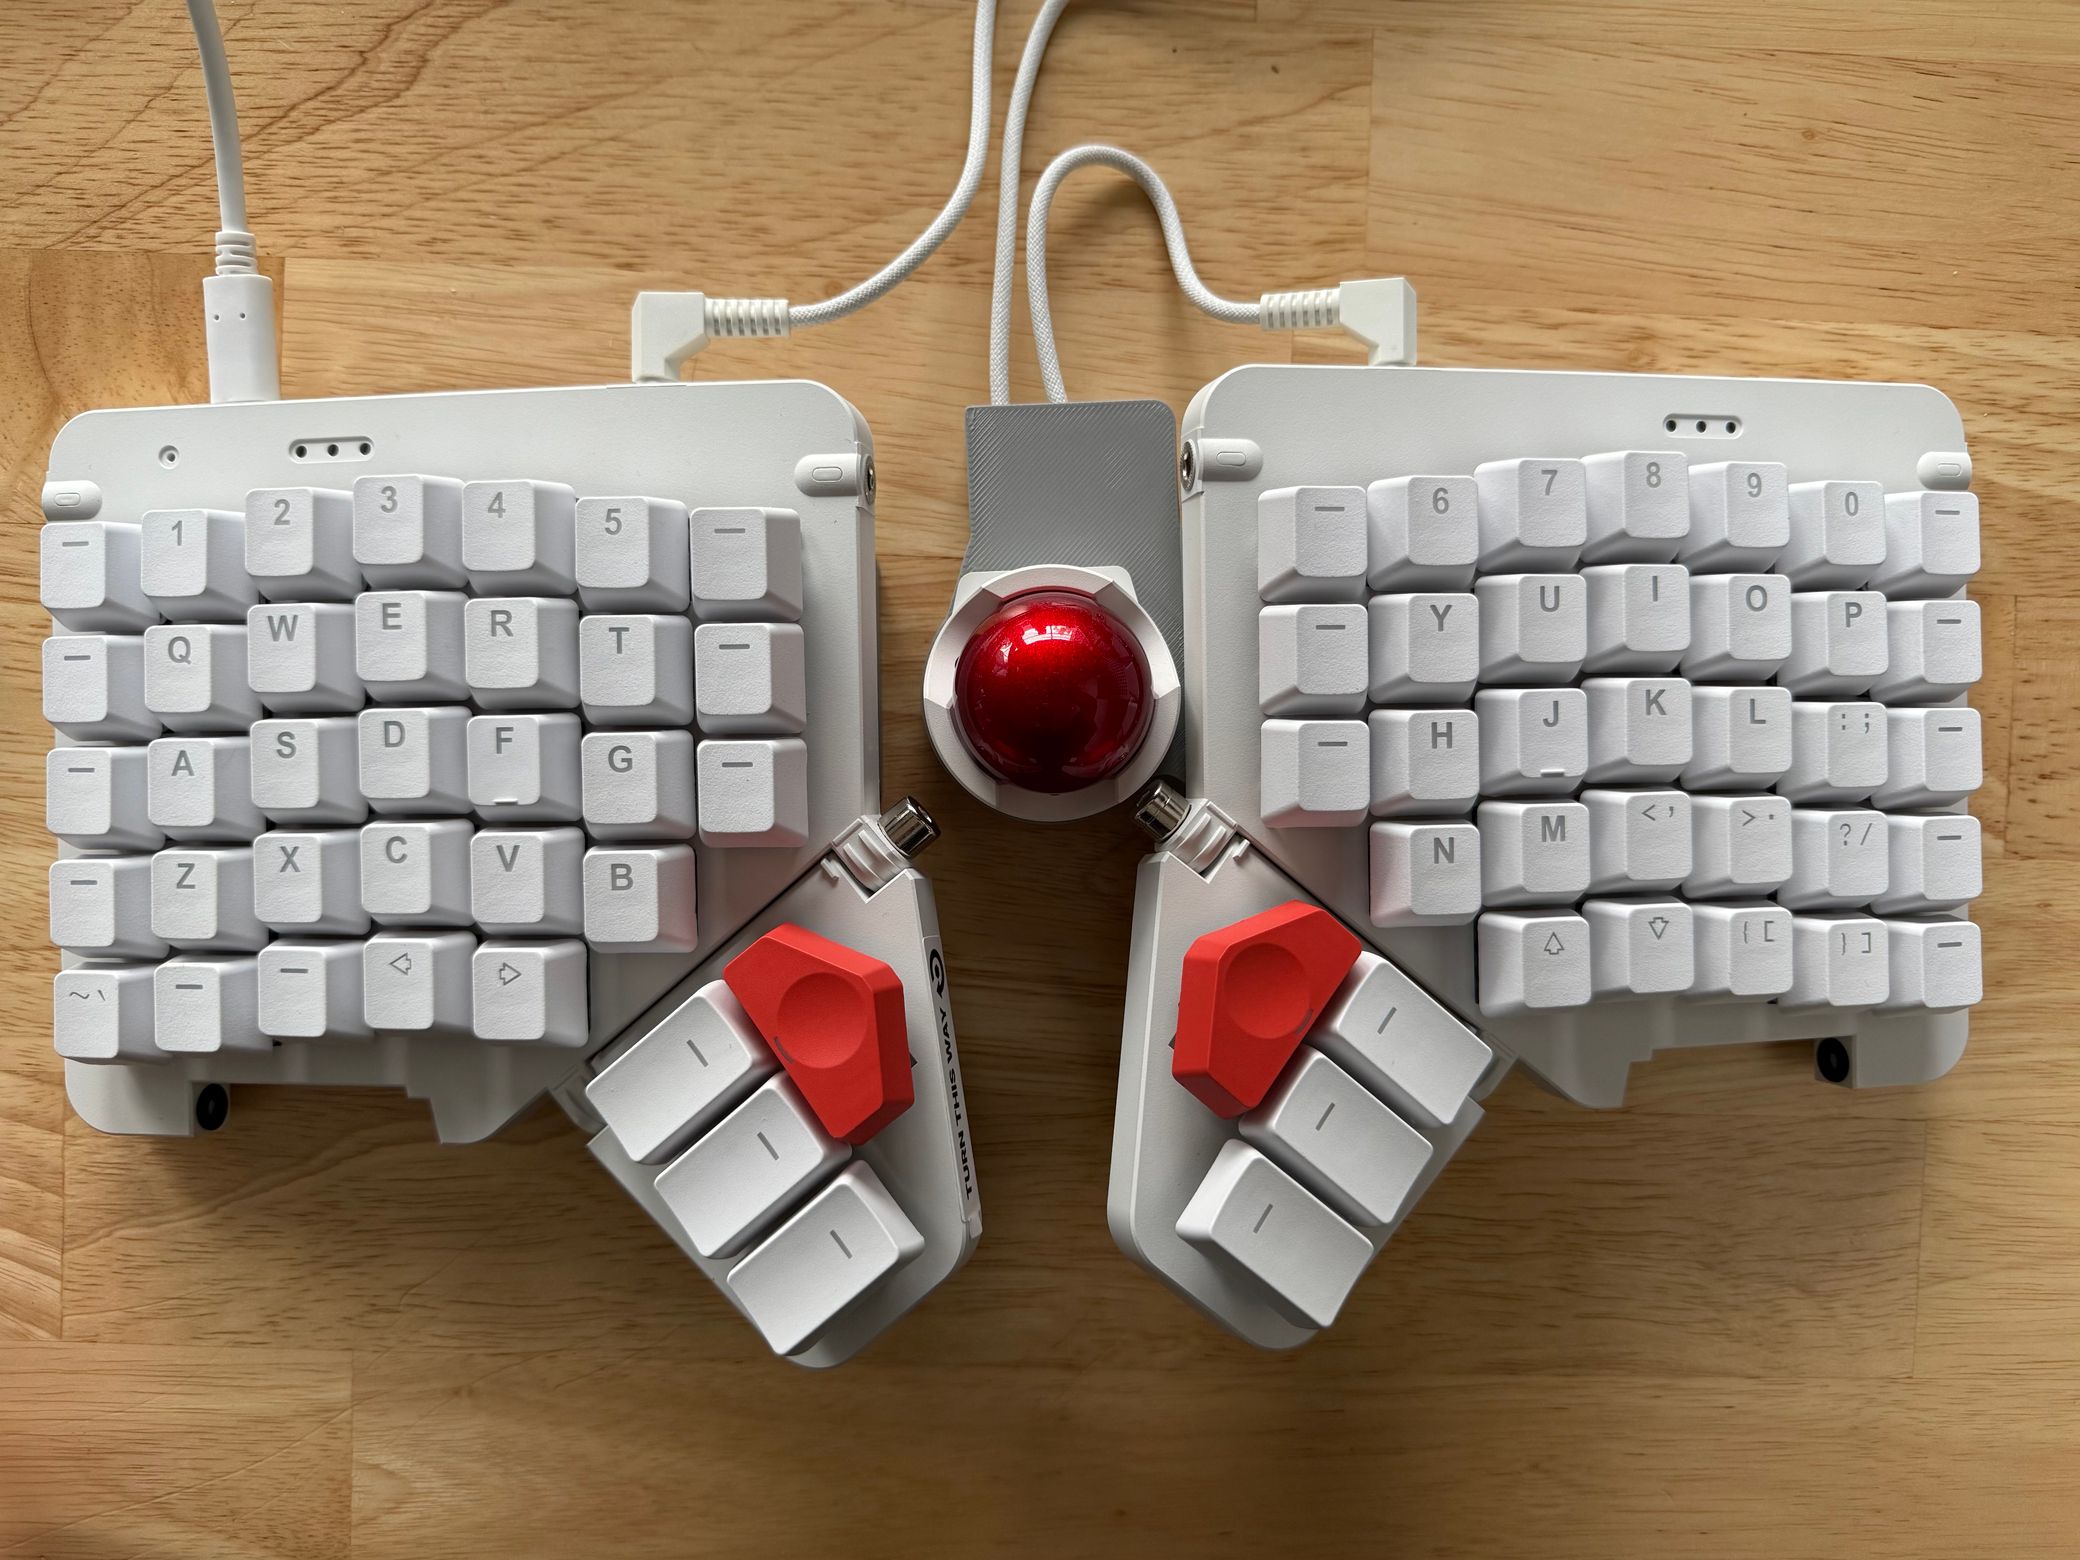
Thumb shell
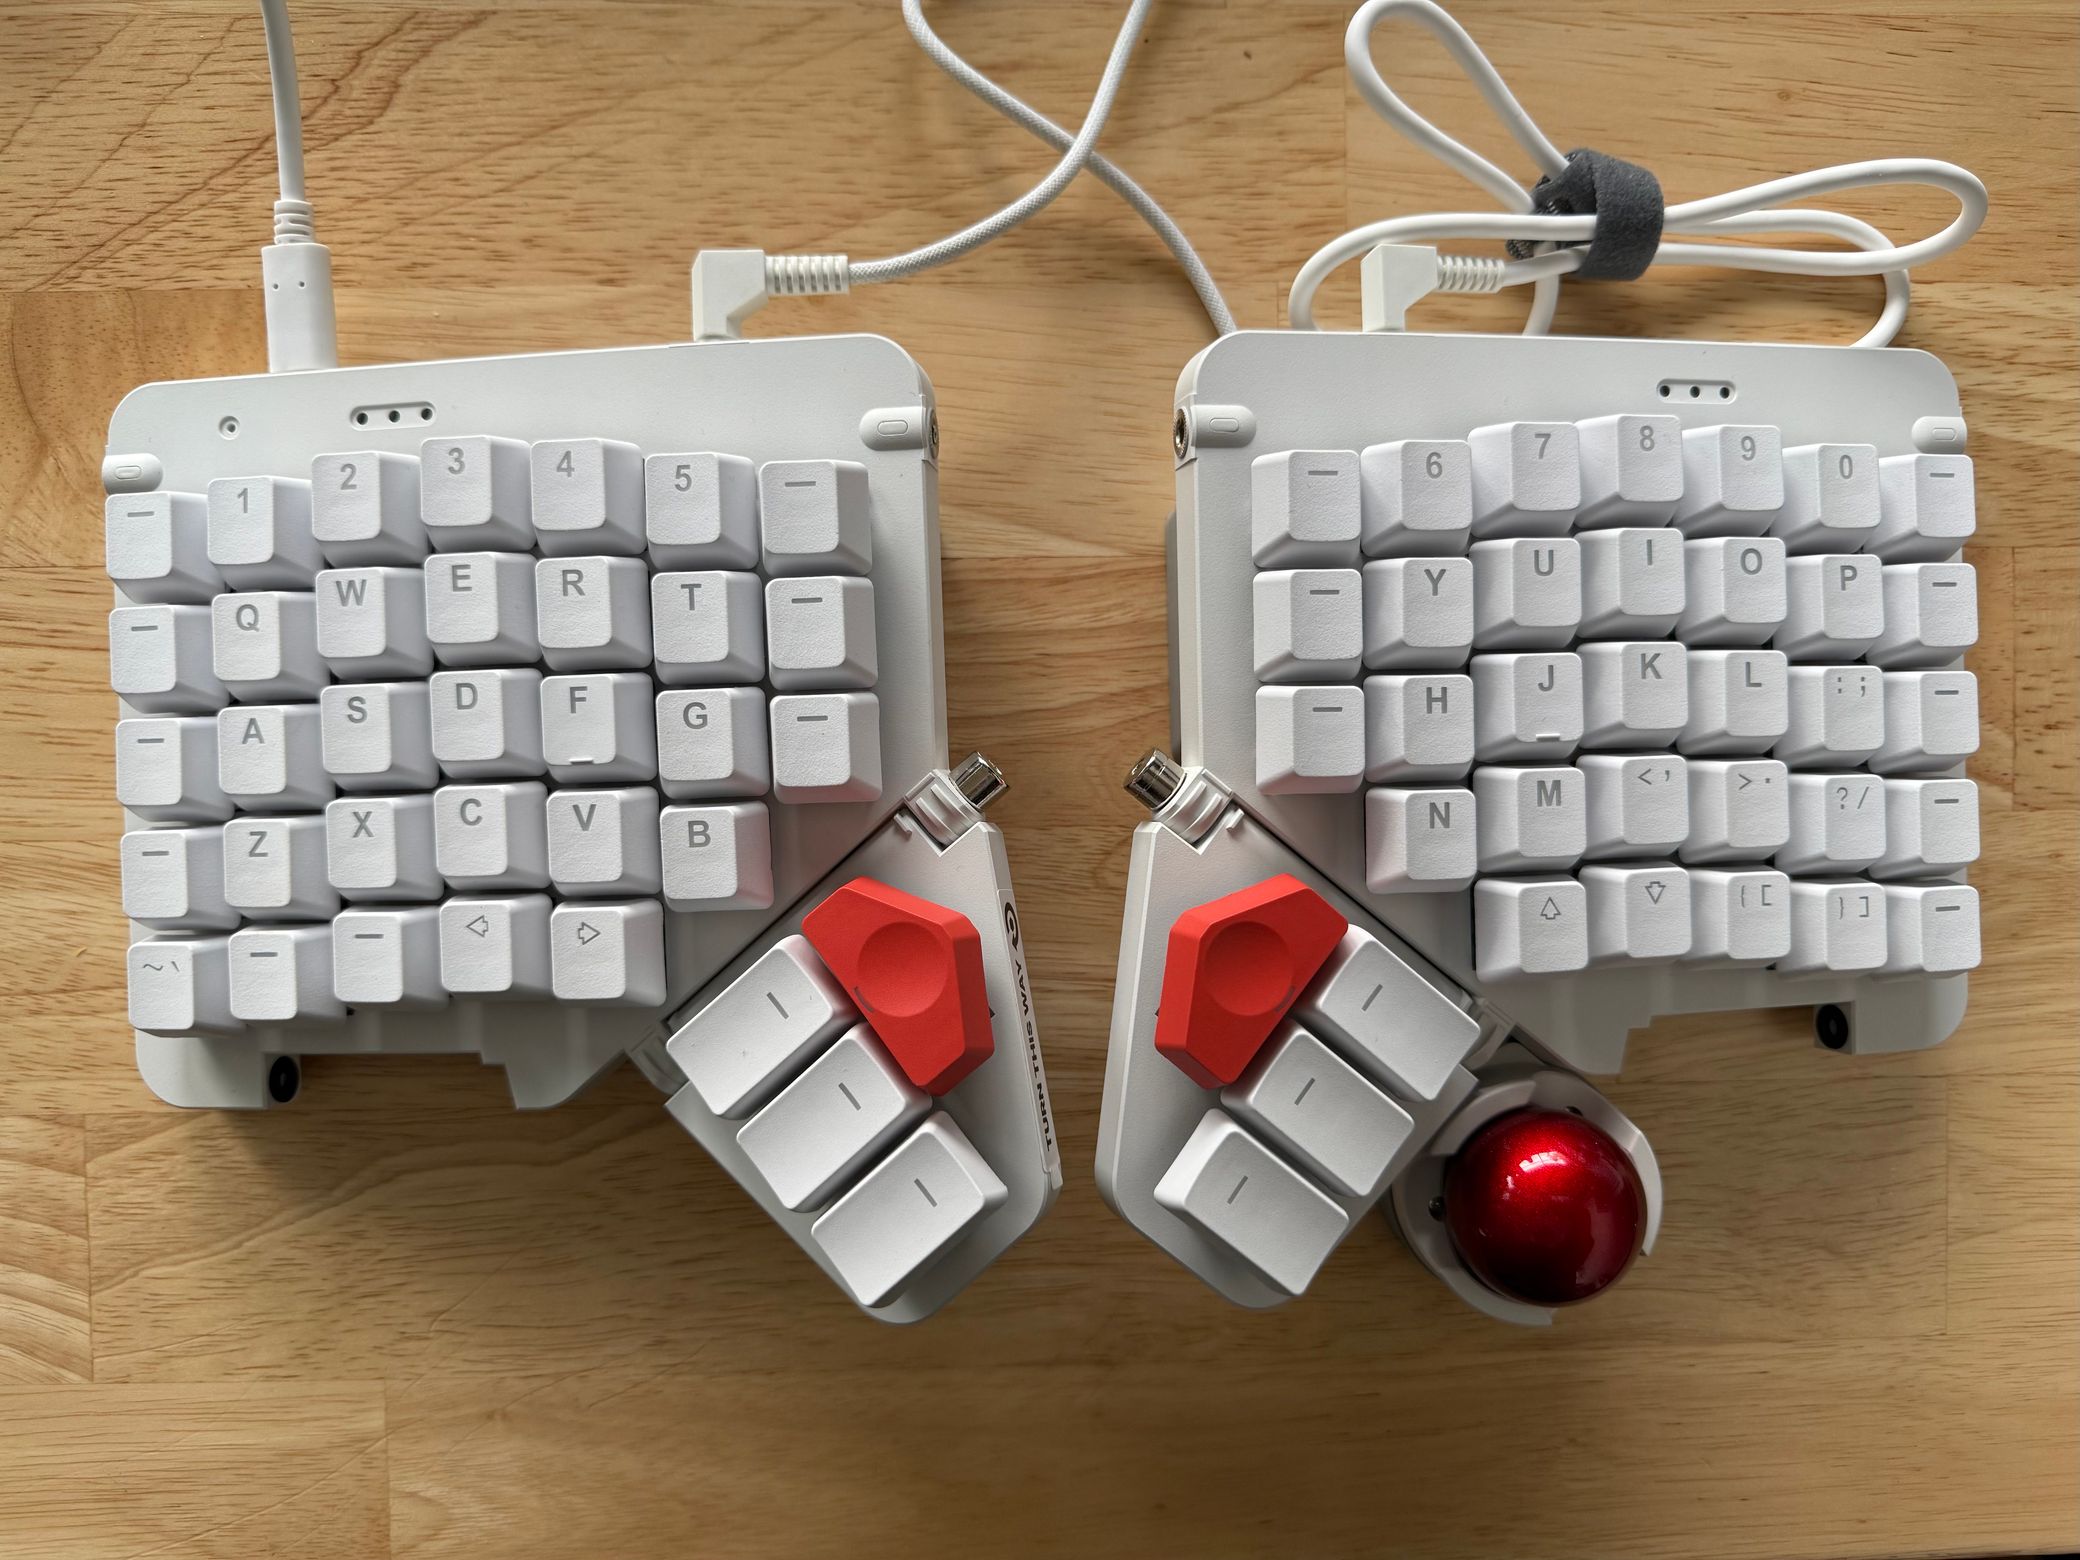
This option is for those of you who prefer using your thumb to move the trackball. One caveat here is the default short Navigator cable isn’t quite long enough to reach all the way from the bottom of the Moonlander to the TRRS port. You could try a little extension port if you can find one, but I also added in some extra space so you can repurpose the default Moonlander angled cable alongside the Navigator’s angled cable.
Bonus middle shell
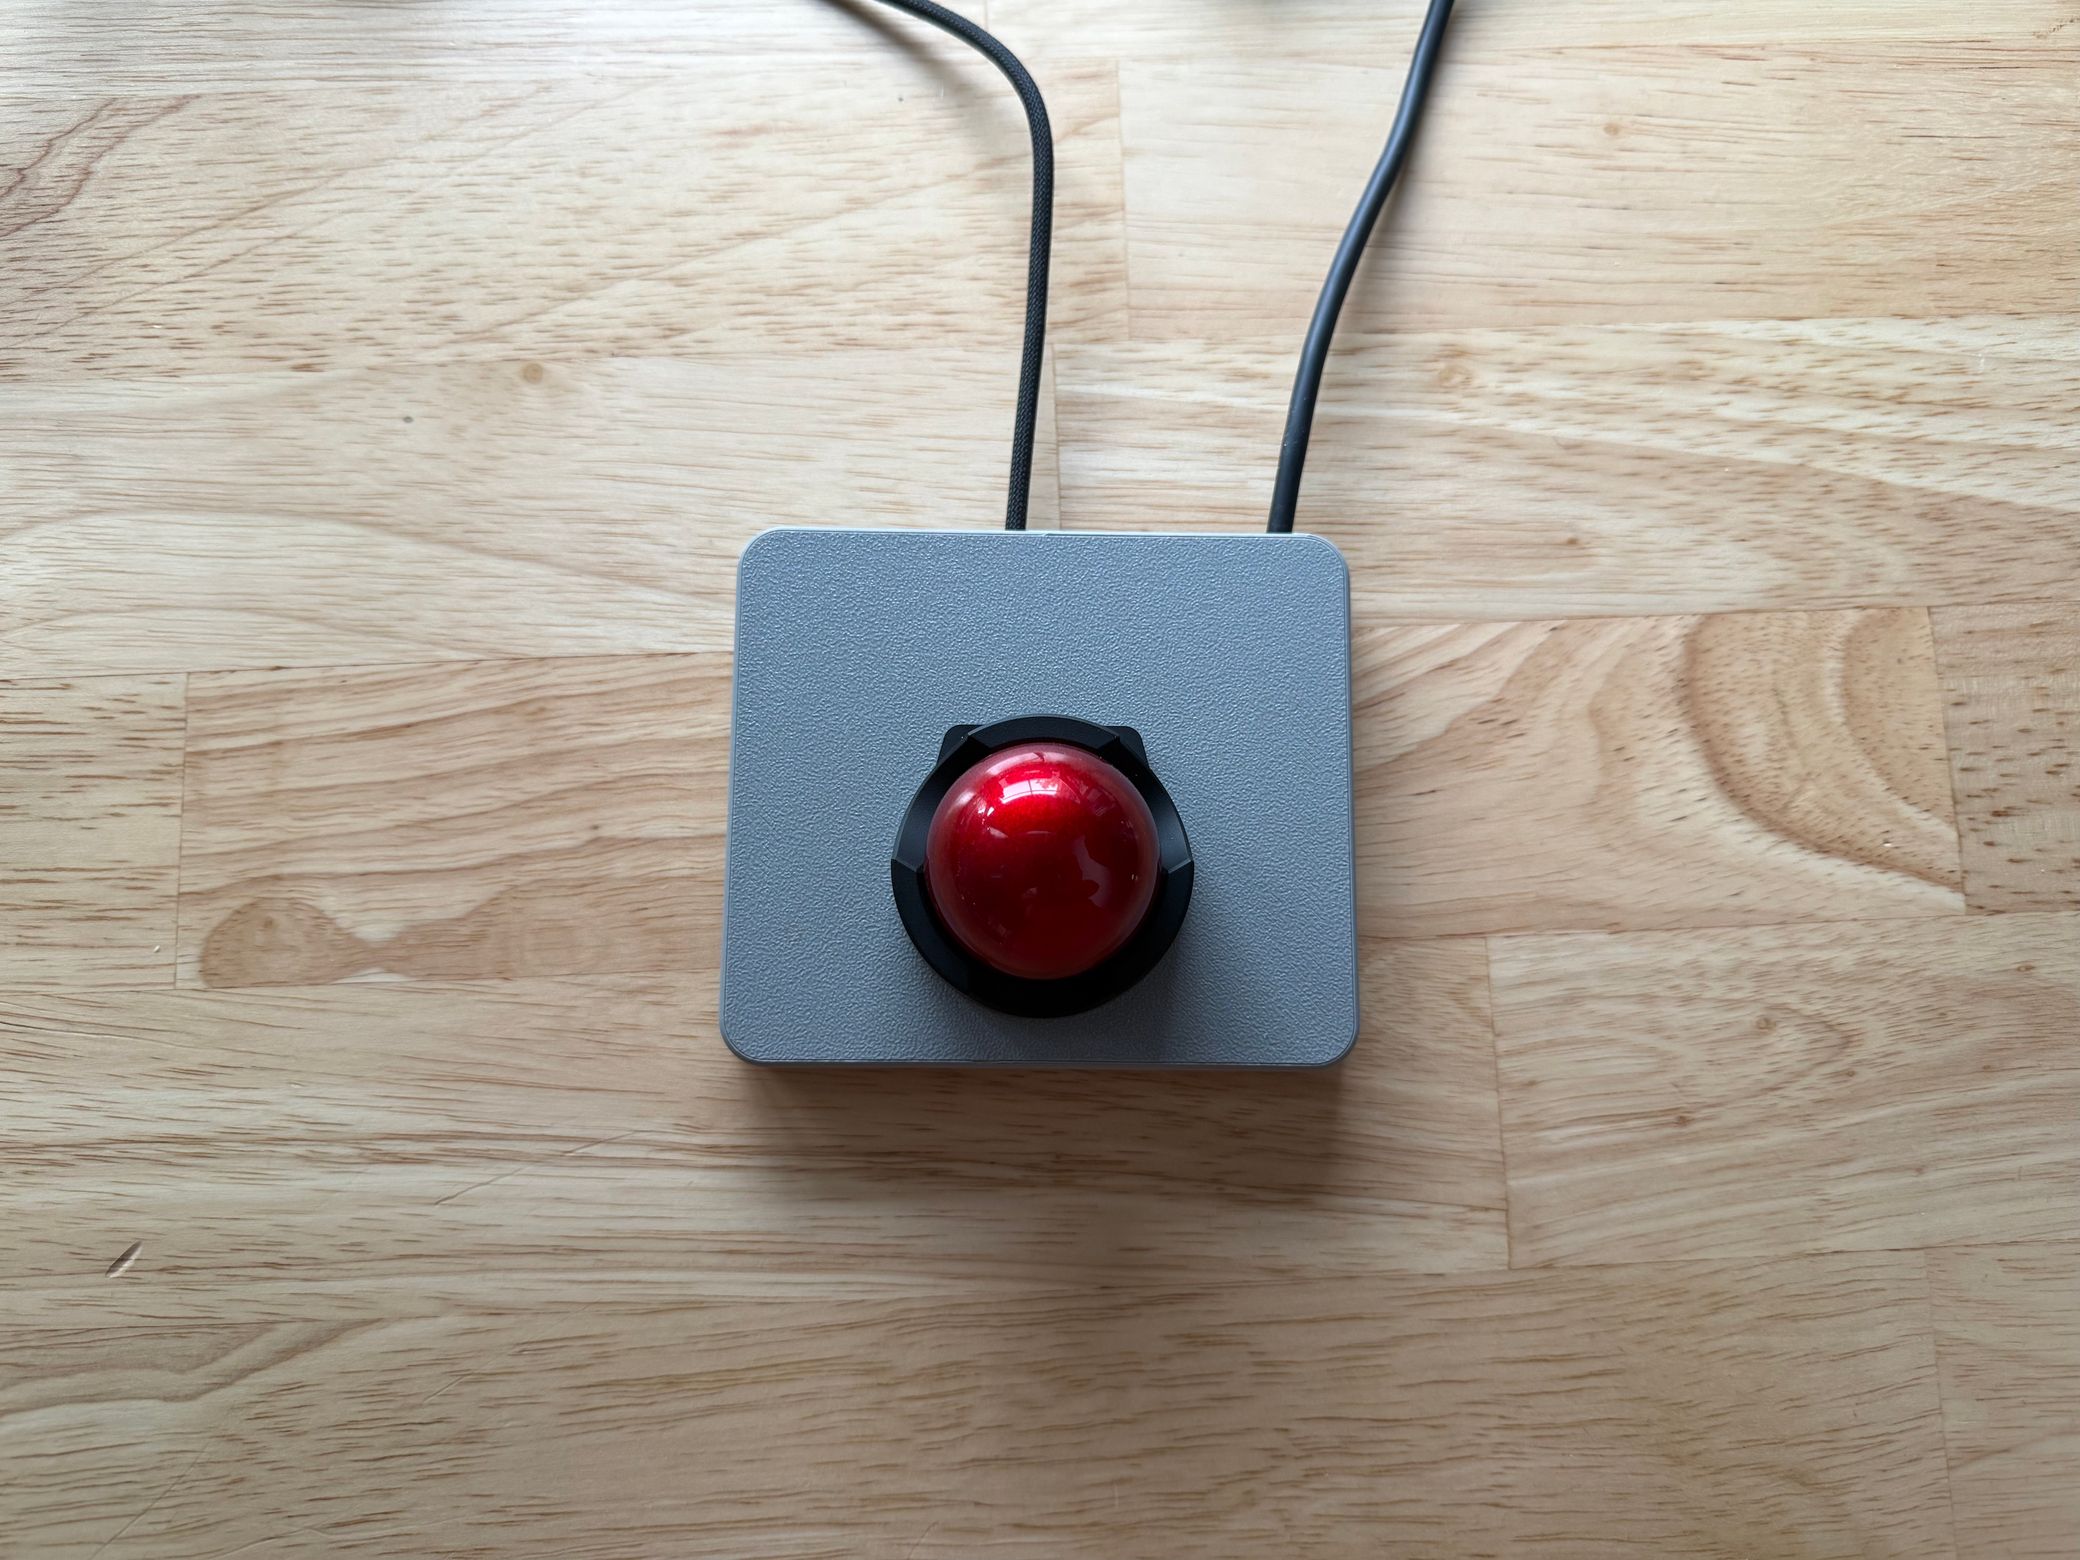
One last option to check out is the simple square shell. This is the fully-printable version of the square shell featured on the Navigator’s page. Like the above thumb shell, it lets you use angled cables, so you can repurpose the original long TRRS cable and have a ton of flexibility in where you place the trackball.

I’m running out of space on my desk for all these shells. Enjoy!